Upload and manage videos
When you select an index on the Indexes page, the index details page is displayed. From here, you can upload and manage videos.
User interface
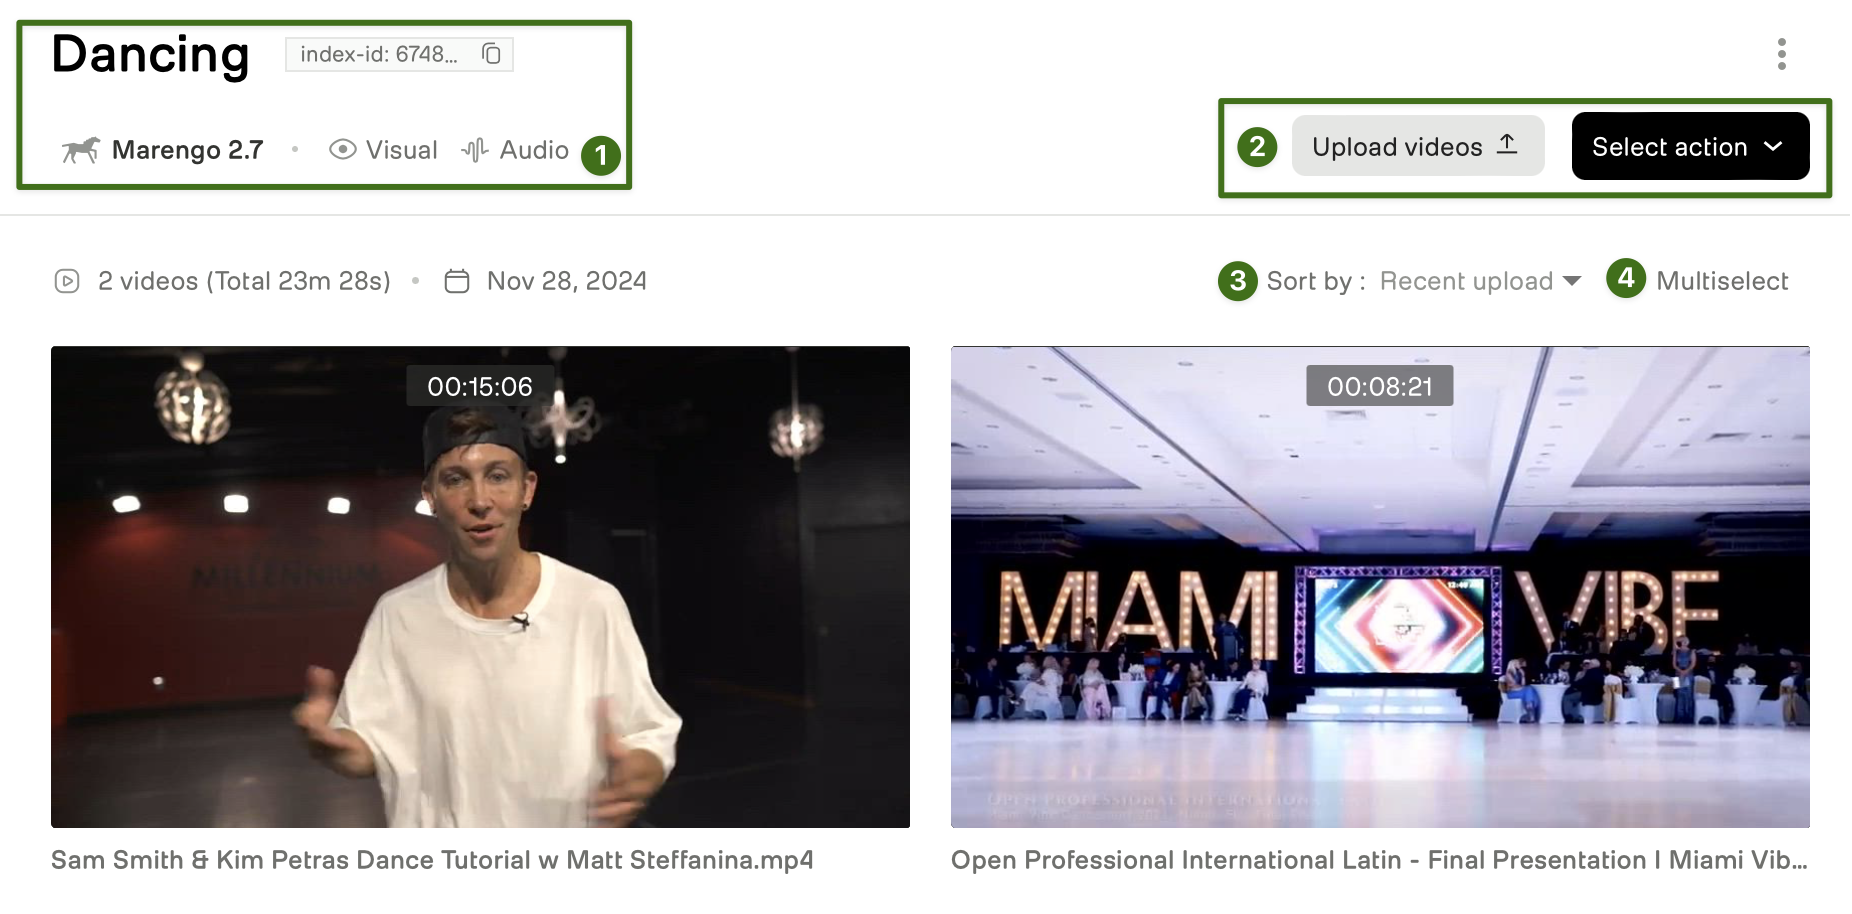
The following image shows the user interface and the key elements:

- Index information: Displays the following information about each index:
- Index name and its unique identifier
- The video understanding model and model options that are enabled for this index.
- Quick actions: Provides quick access to commonly used actions that you can perform on an index.
- Sort by: Use this dropdown to sort the list of videos based on the date they were uploaded, duration, name, or resolution.
- Multiselect: Use this button to select multiple videos and then delete them.
The following sections describe the most common actions you can perform on the index details page.
Upload a video
Notes:
- Before uploading a video, ensure it meets the requirements in the Prerequisites section of the Upload single videos page.
- The ability to upload videos from YouTube is no longer supported.
- You can upload files from direct URLs using the API. For details see the Upload single videos page.
There are two ways in which you can upload videos.
From the Overview page:
-
From the Select index drop-down, choose the index to which you want to upload your video.
-
Select the videos you wish to upload.
-
(Optional) Review the list of videos to be uploaded. To remove a video, select the
Xicon located at the right. -
Select the Upload button.
-
(Optional) Monitor the progress of the indexing process. After uploading the video, the platform must index it before you can perform any downstream tasks. Wait until you see the video with a thumbnail and duration.
From the Indexes page:
-
Choose the index to which you want to upload your video.
-
On the index details page, select the Upload Video button.
-
Select the videos you wish to upload.
-
(Optional) Review the list of videos to be uploaded. To remove a video, select the
Xicon located at the right. -
Select the Upload button.
-
(Optional) Monitor the progress of the indexing process. After uploading the video, the platform must index it before you can perform any downstream tasks. Wait until you see the video with a thumbnail and duration.
Delete videos
Note:
This action cannot be undone.
There are two ways in which you can delete videos.
Delete a single video:
- From the Indexes page, select the index that contains the video you want to delete.
- On the index details page, select the video that you want to delete.
- In the modal, select the trash icon located at the bottom right corner of the modal.
Delete multiple videos:
- From the Indexes page, select the index that contains the video you want to delete.
- From the index details page, click the Multiselect button.
- Choose the videos that you want to delete.
- Select the Delete button.
Cloud-to-cloud integrations
You can also upload multiple videos in a single API call. This feature is currently supported for the us-west-2 region of AWS S3. For details, see the Cloud-to-cloud integrations page.
Updated 23 days ago