Cloud-to-cloud transfers
Cloud-to-cloud transfers allow you to upload multiple videos at once by grouping multiple video indexing operations in a single API call. Initially, this feature is supported for the us-west-2 region of AWS S3. If your data is located in other regions or with other cloud providers, please reach out to us at sales[at]@twelvelabs.io.
The steps for performing a cloud-to-cloud-transfer are as follows:
- Set up an integration. When you set up an integration, you grant Twelve Labs access to read the files in your S3 bucket.
- Download the list of files in your S3 bucket. After an integration is set up , you must open the Integrations page to download the list of videos in your S3 bucket as a JSON file. Optionally, you can edit the file in a plain text editor.
- Transfer and index videos. Invoke the POST method of the
/tasks/transfersendpoint to transfer and index your videos.
The topics below provide instructions for managing integrations and making cloud-to-cloud transfers.
1. Set up an integration
An integration grants Twelve Labs access to read the files in your S3 bucket. Before you can use the cloud-to-cloud transfer feature, you must set up an integration by following the steps in this guide.
Prerequisites
- You’re familiar with the concepts that are described on the Platform overview page.
- You’ve already created an index. For details about creating an index, see the Create indexes page.
- Before starting this procedure, make sure you have the following information available:
- Your AWS account ID. For instructions, see the Finding Your AWS Account ID section of the AWS documentation
- The name of your bucket
- Your bucket must be in the
us-west-2region.
Procedure
- Go to the Dashboard page.
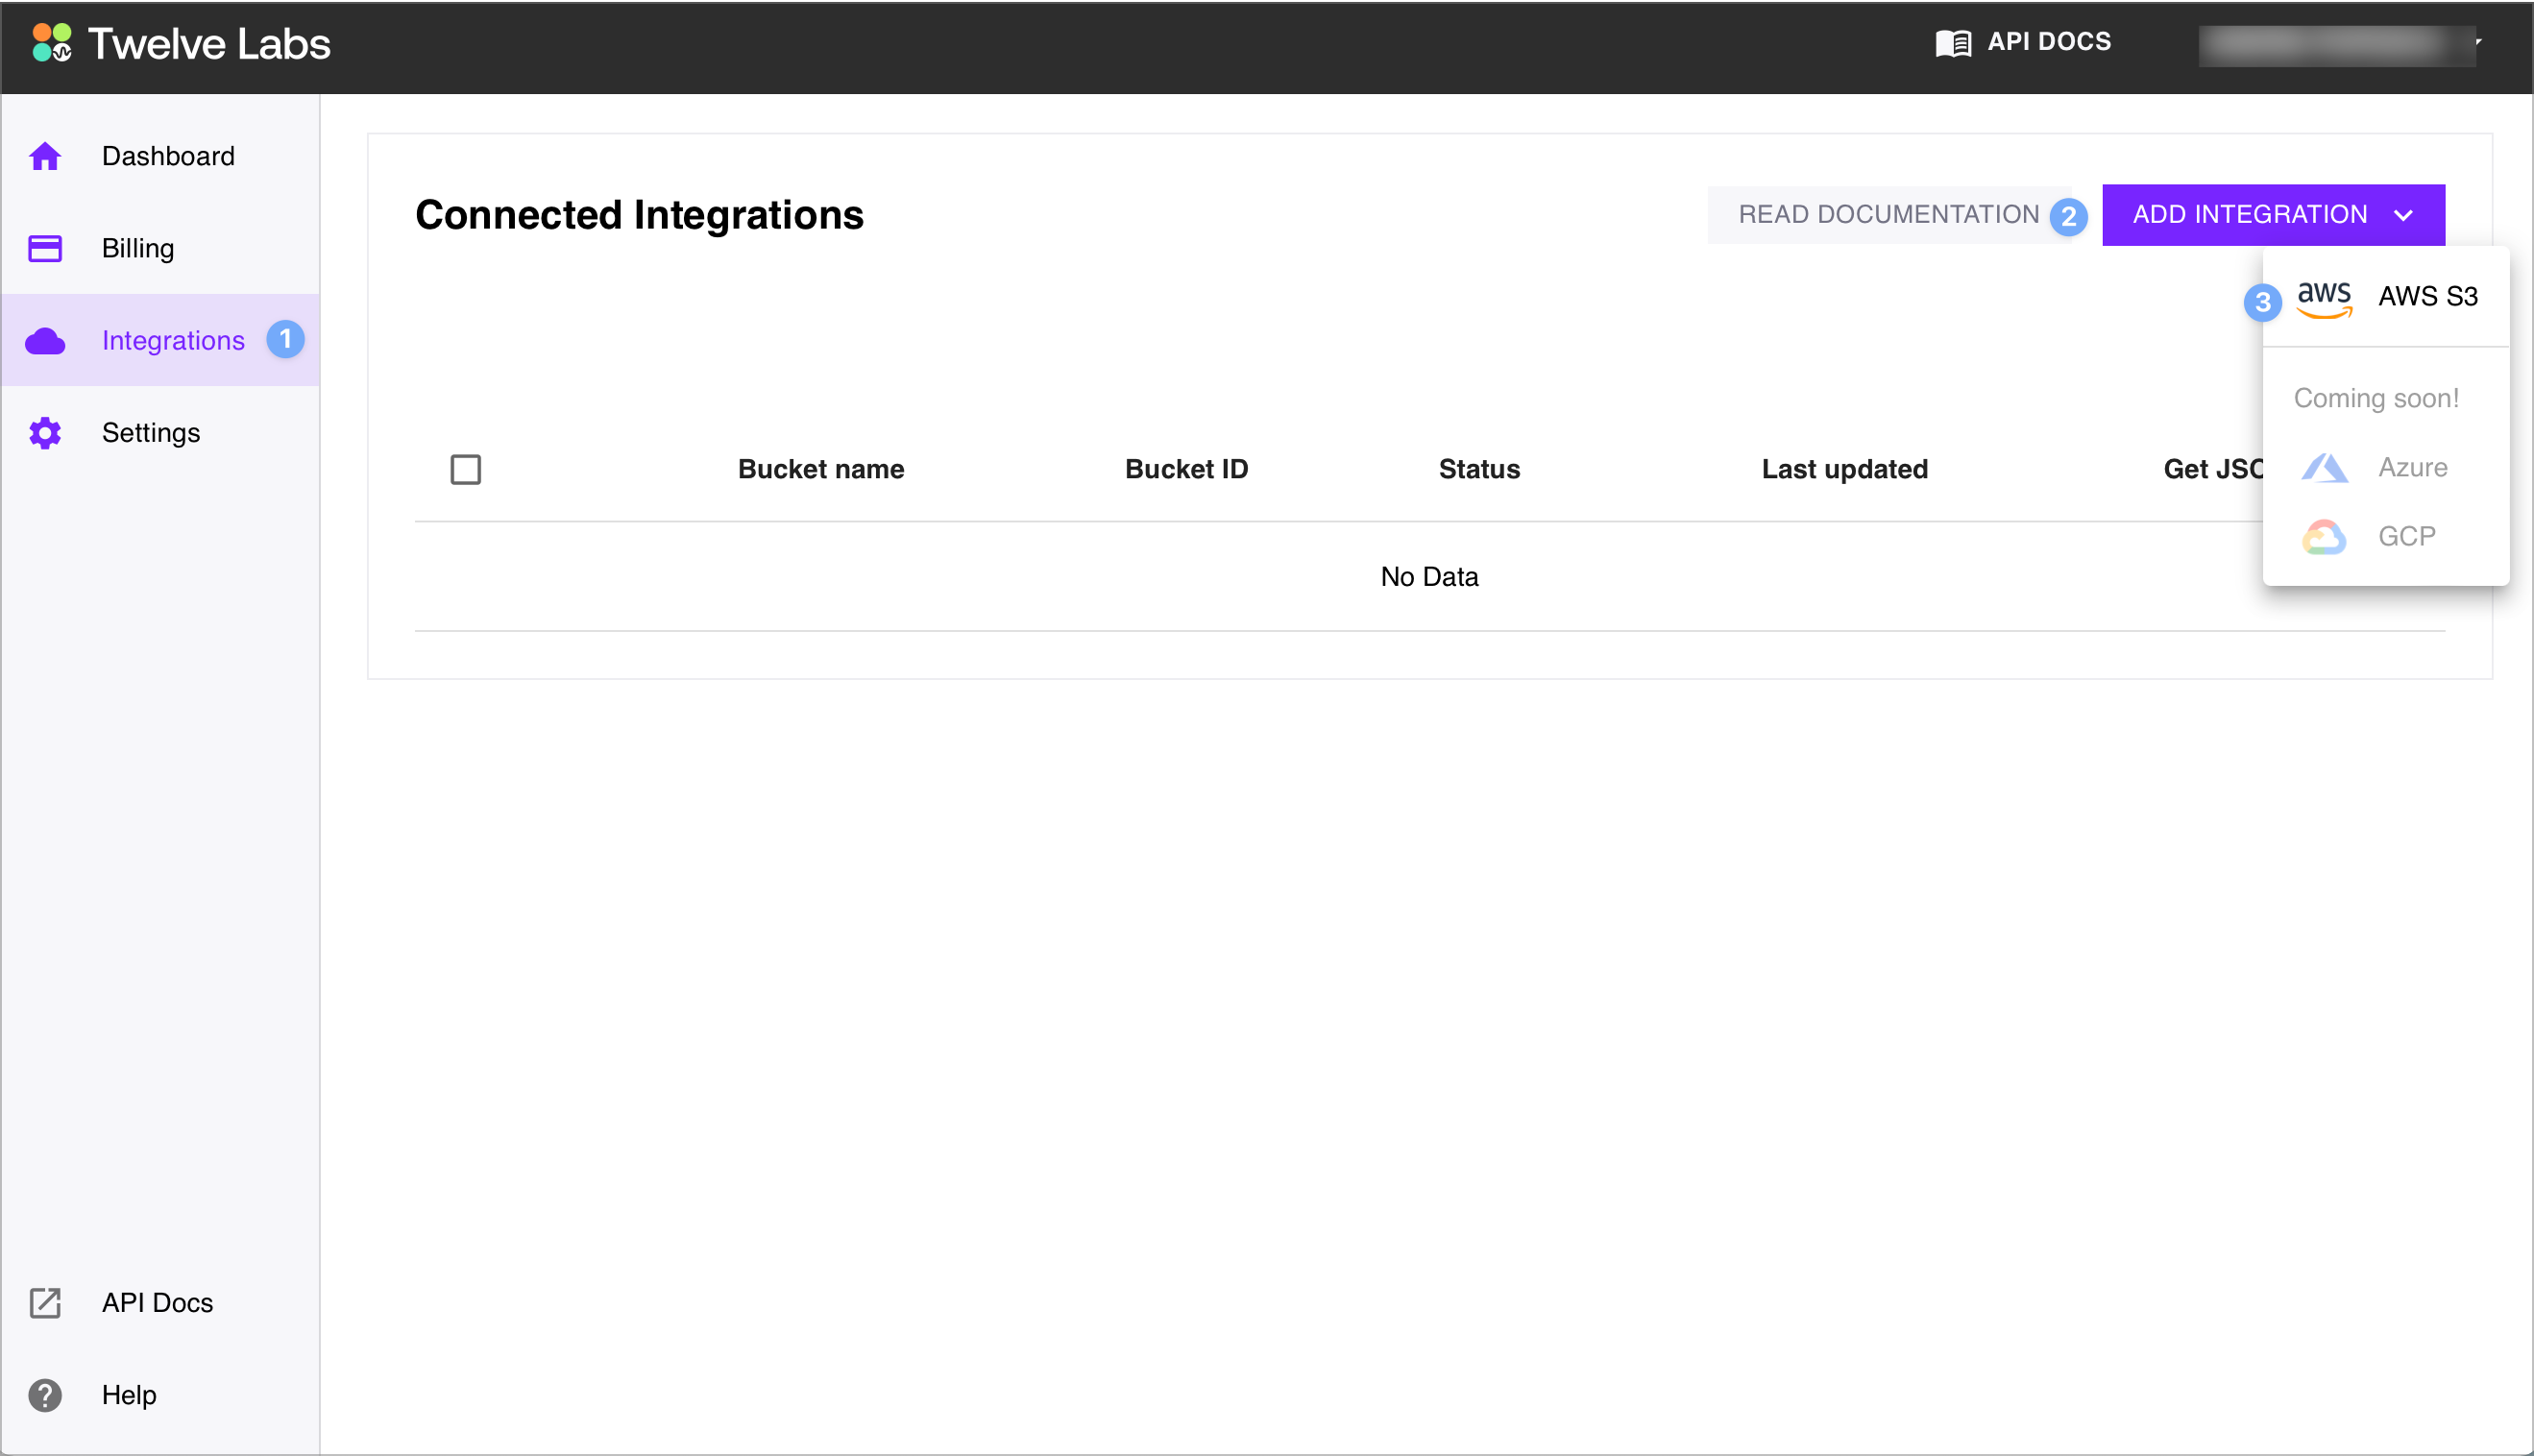
- From the sidebar, choose Integrations. Then, select Add Integration > AWS S3:
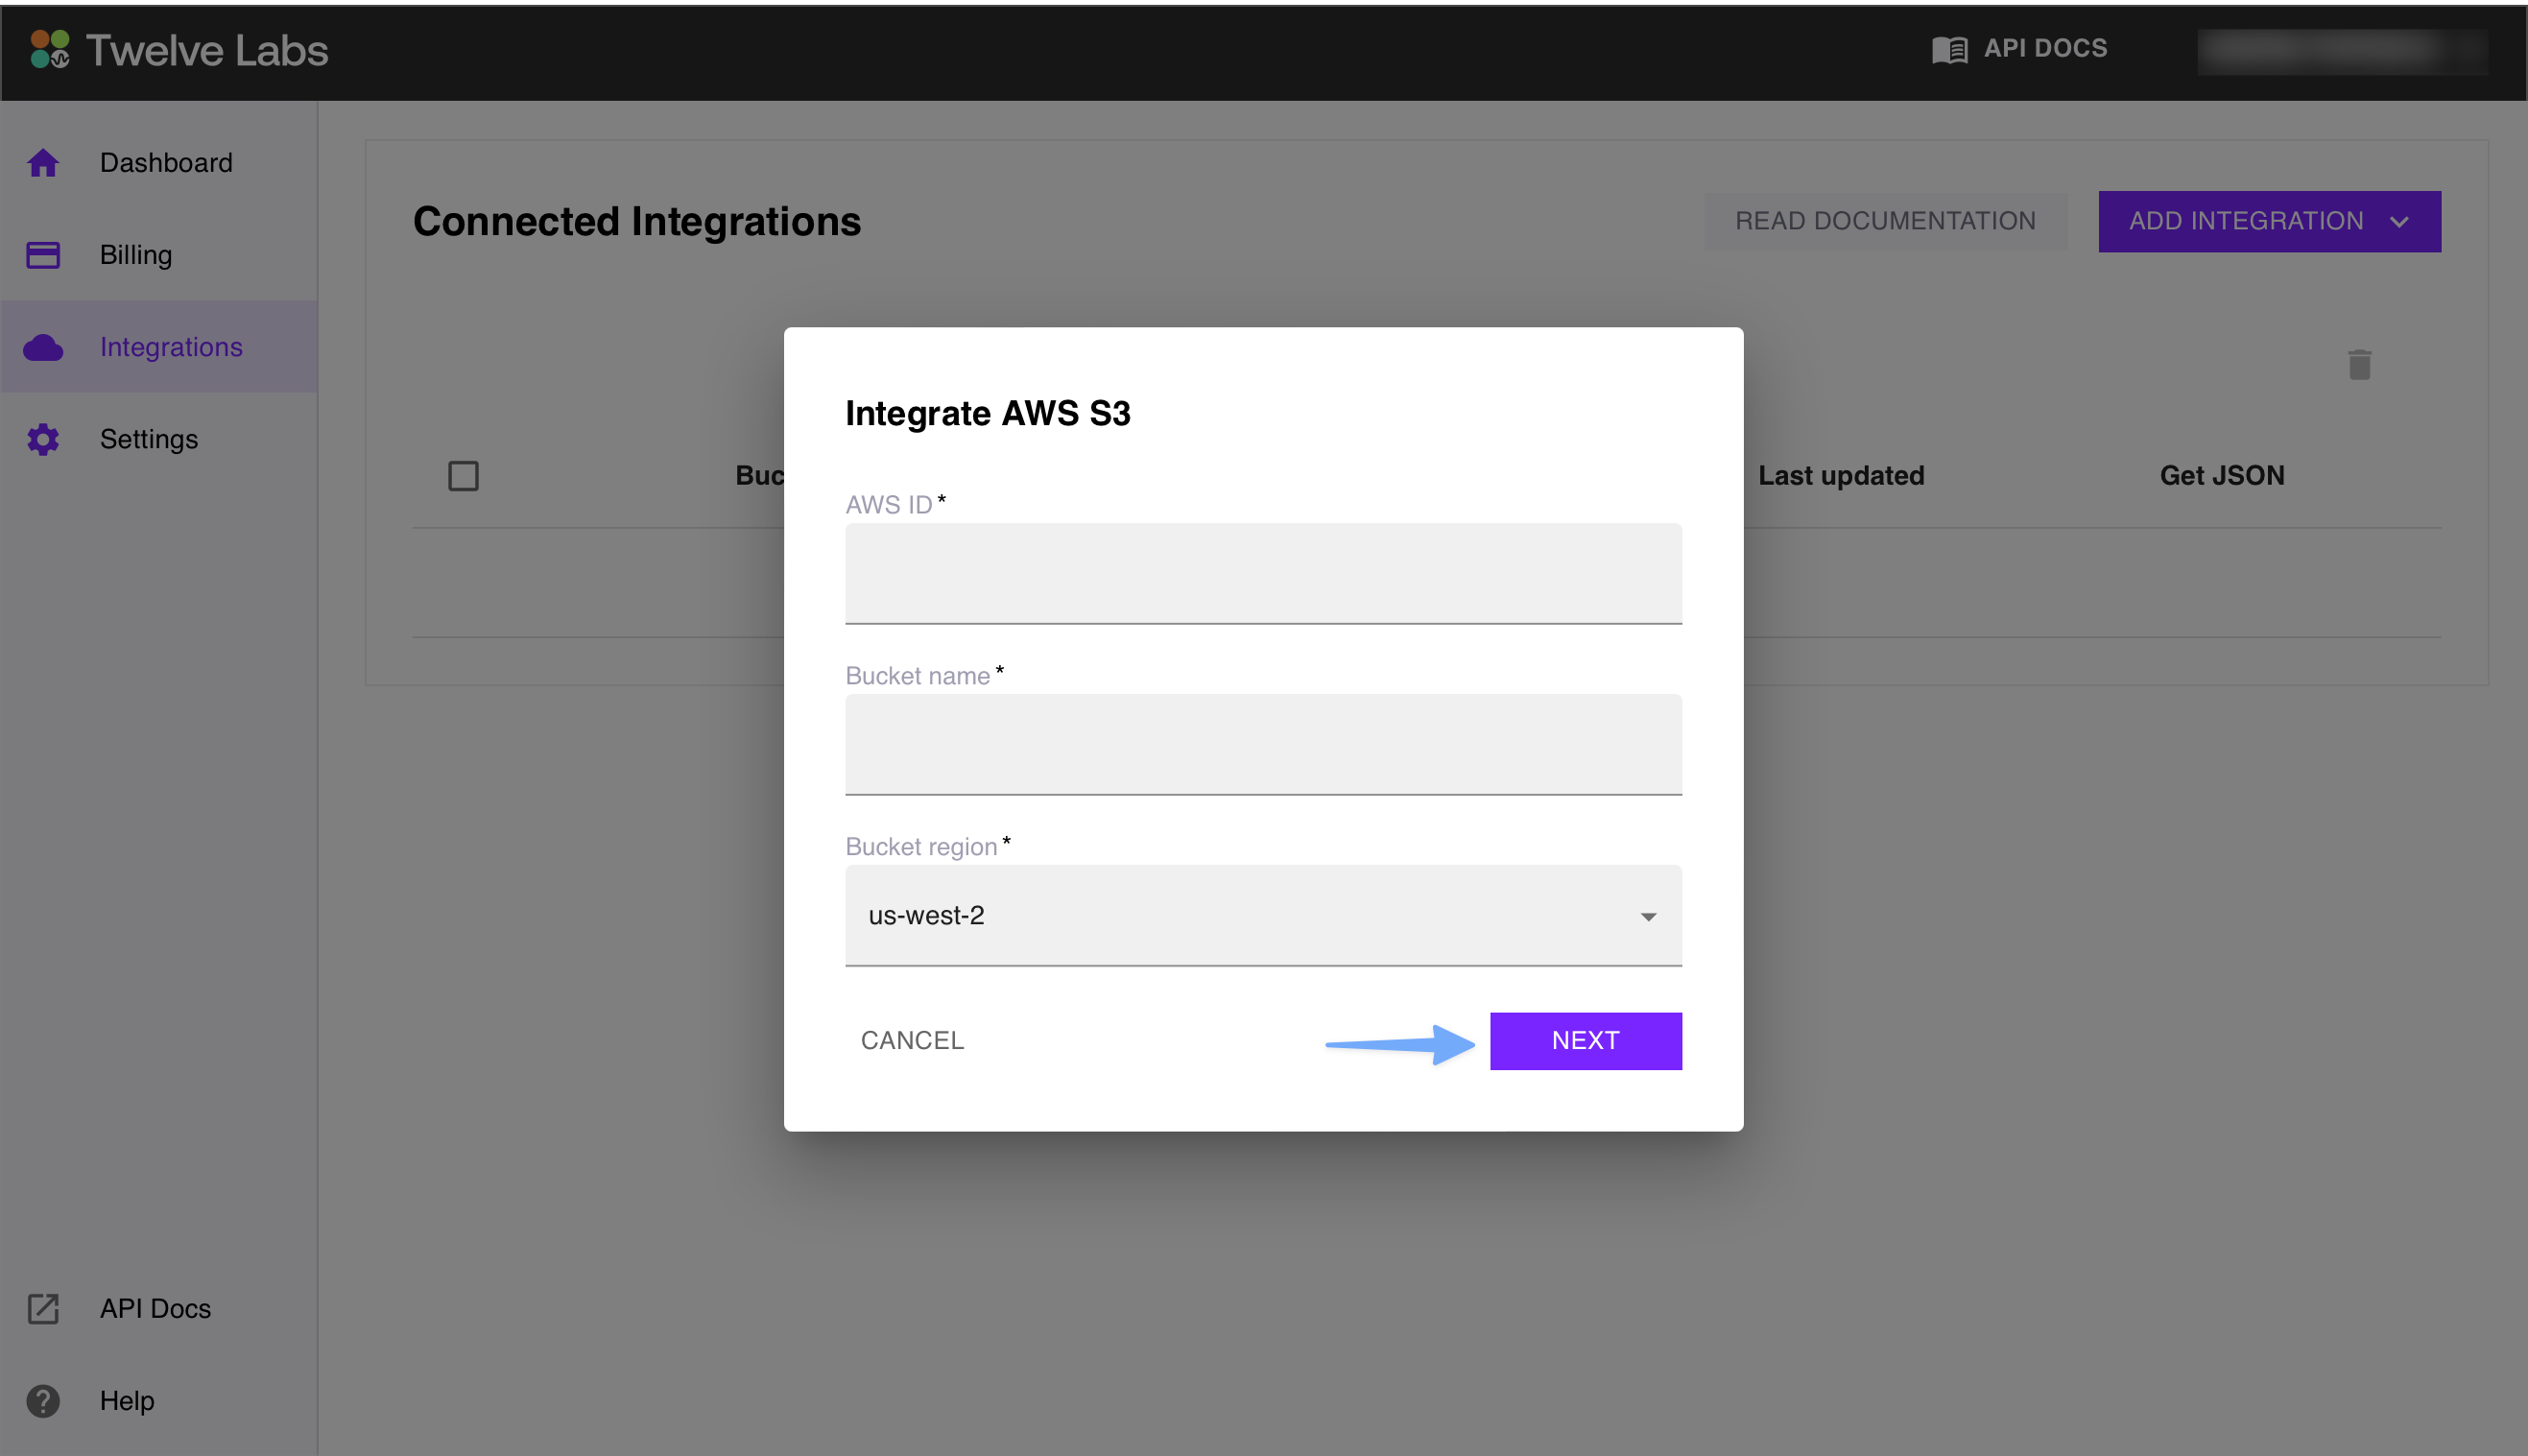
- In the Integrate AWS S3 modal, enter your AWS ID and bucket name. Then, select the Next button:
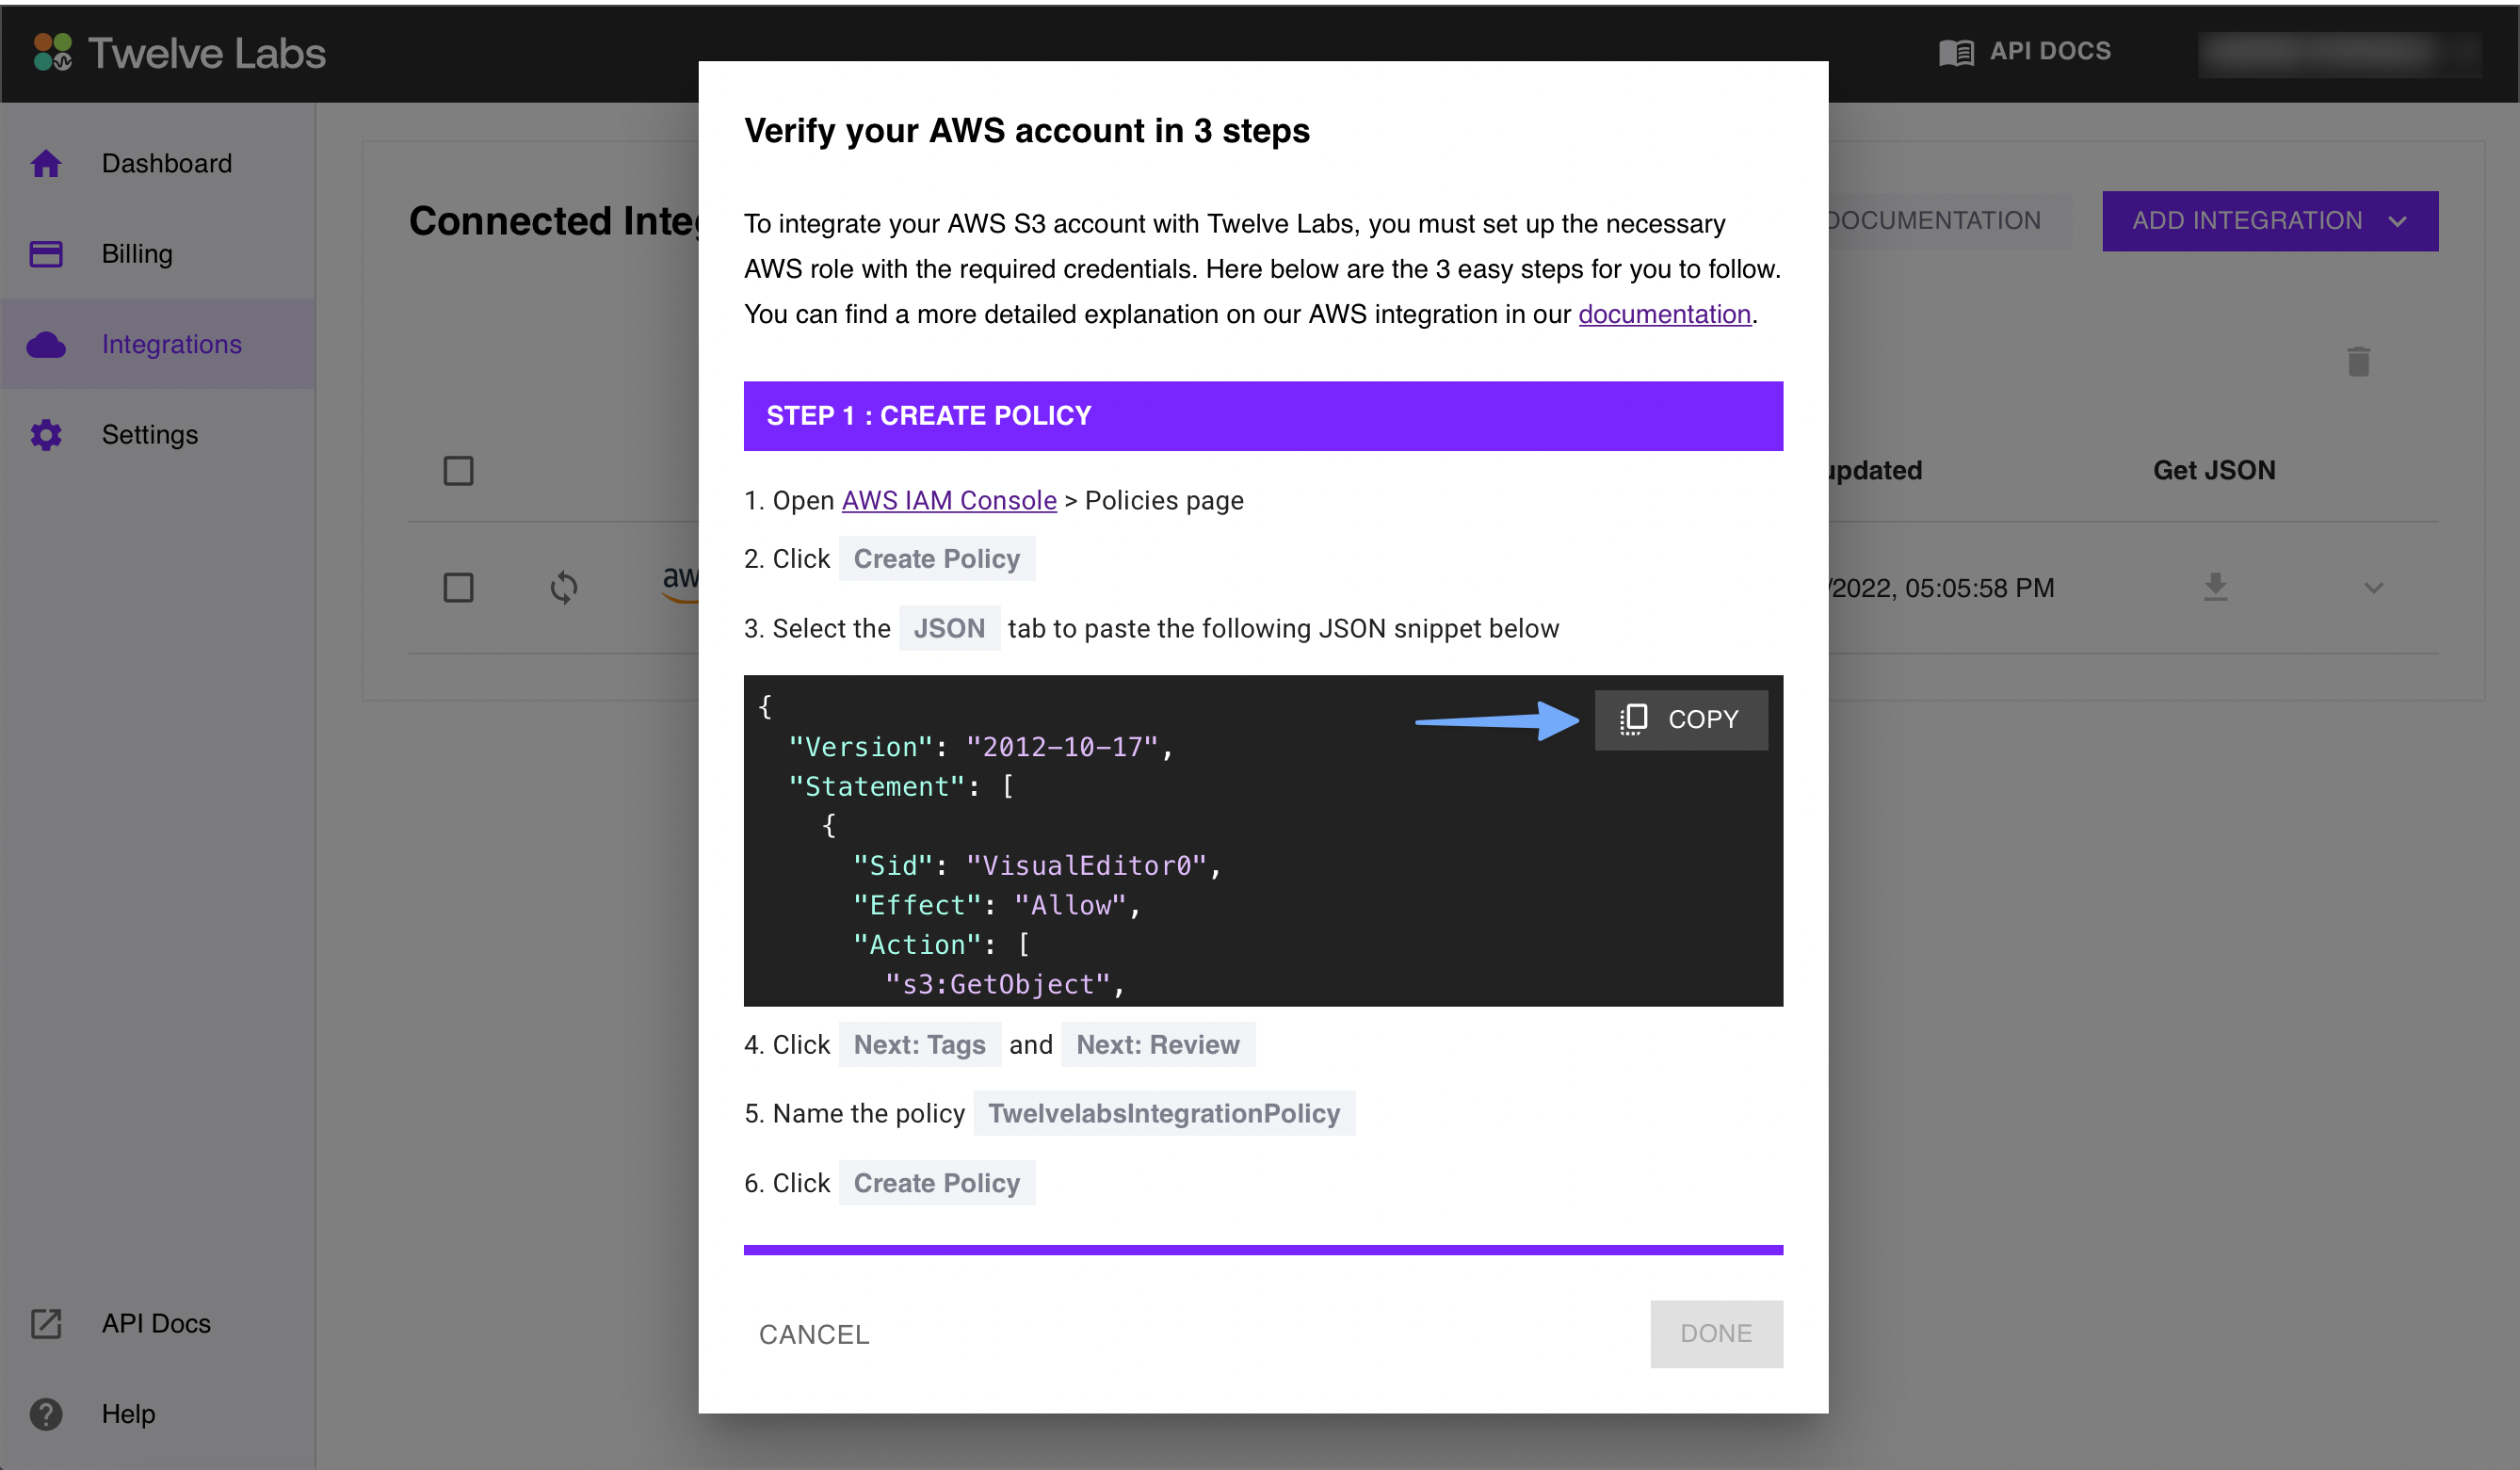
Create an AWS policy
-
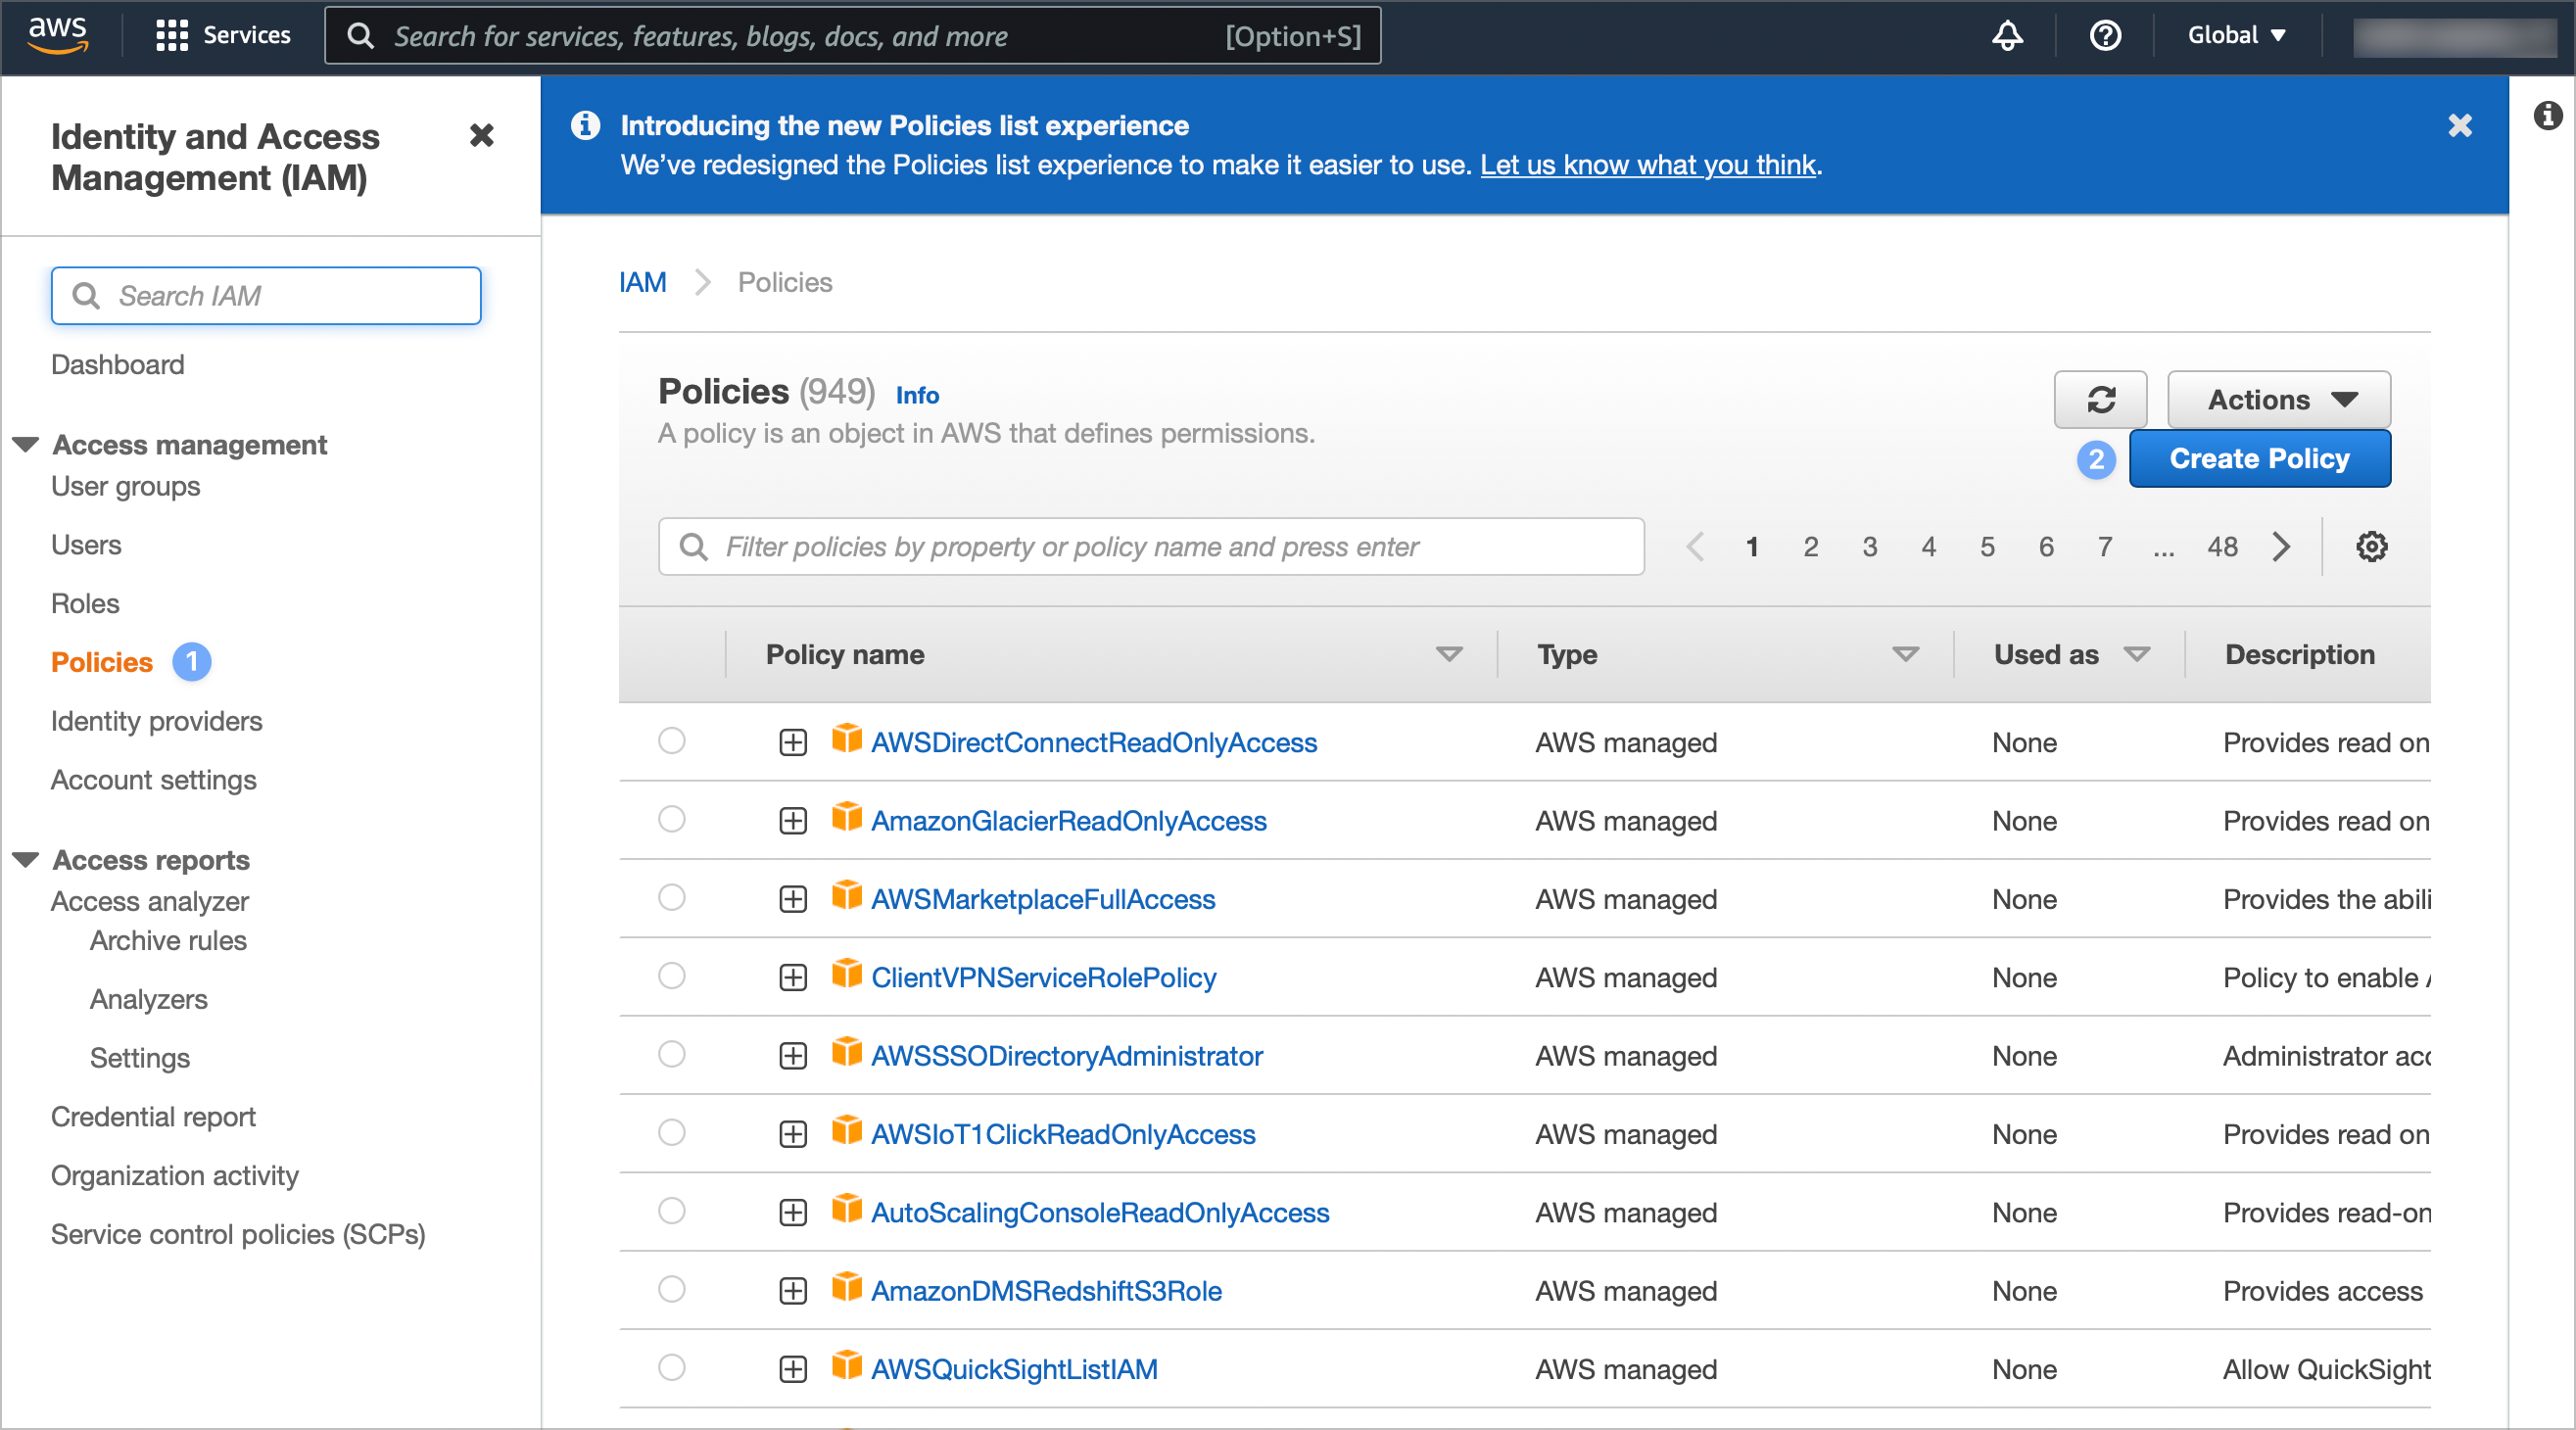
Open the IAM Dashboard page.
-
From the sidebar, choose Policies. Then, select the Create Policy button:
-
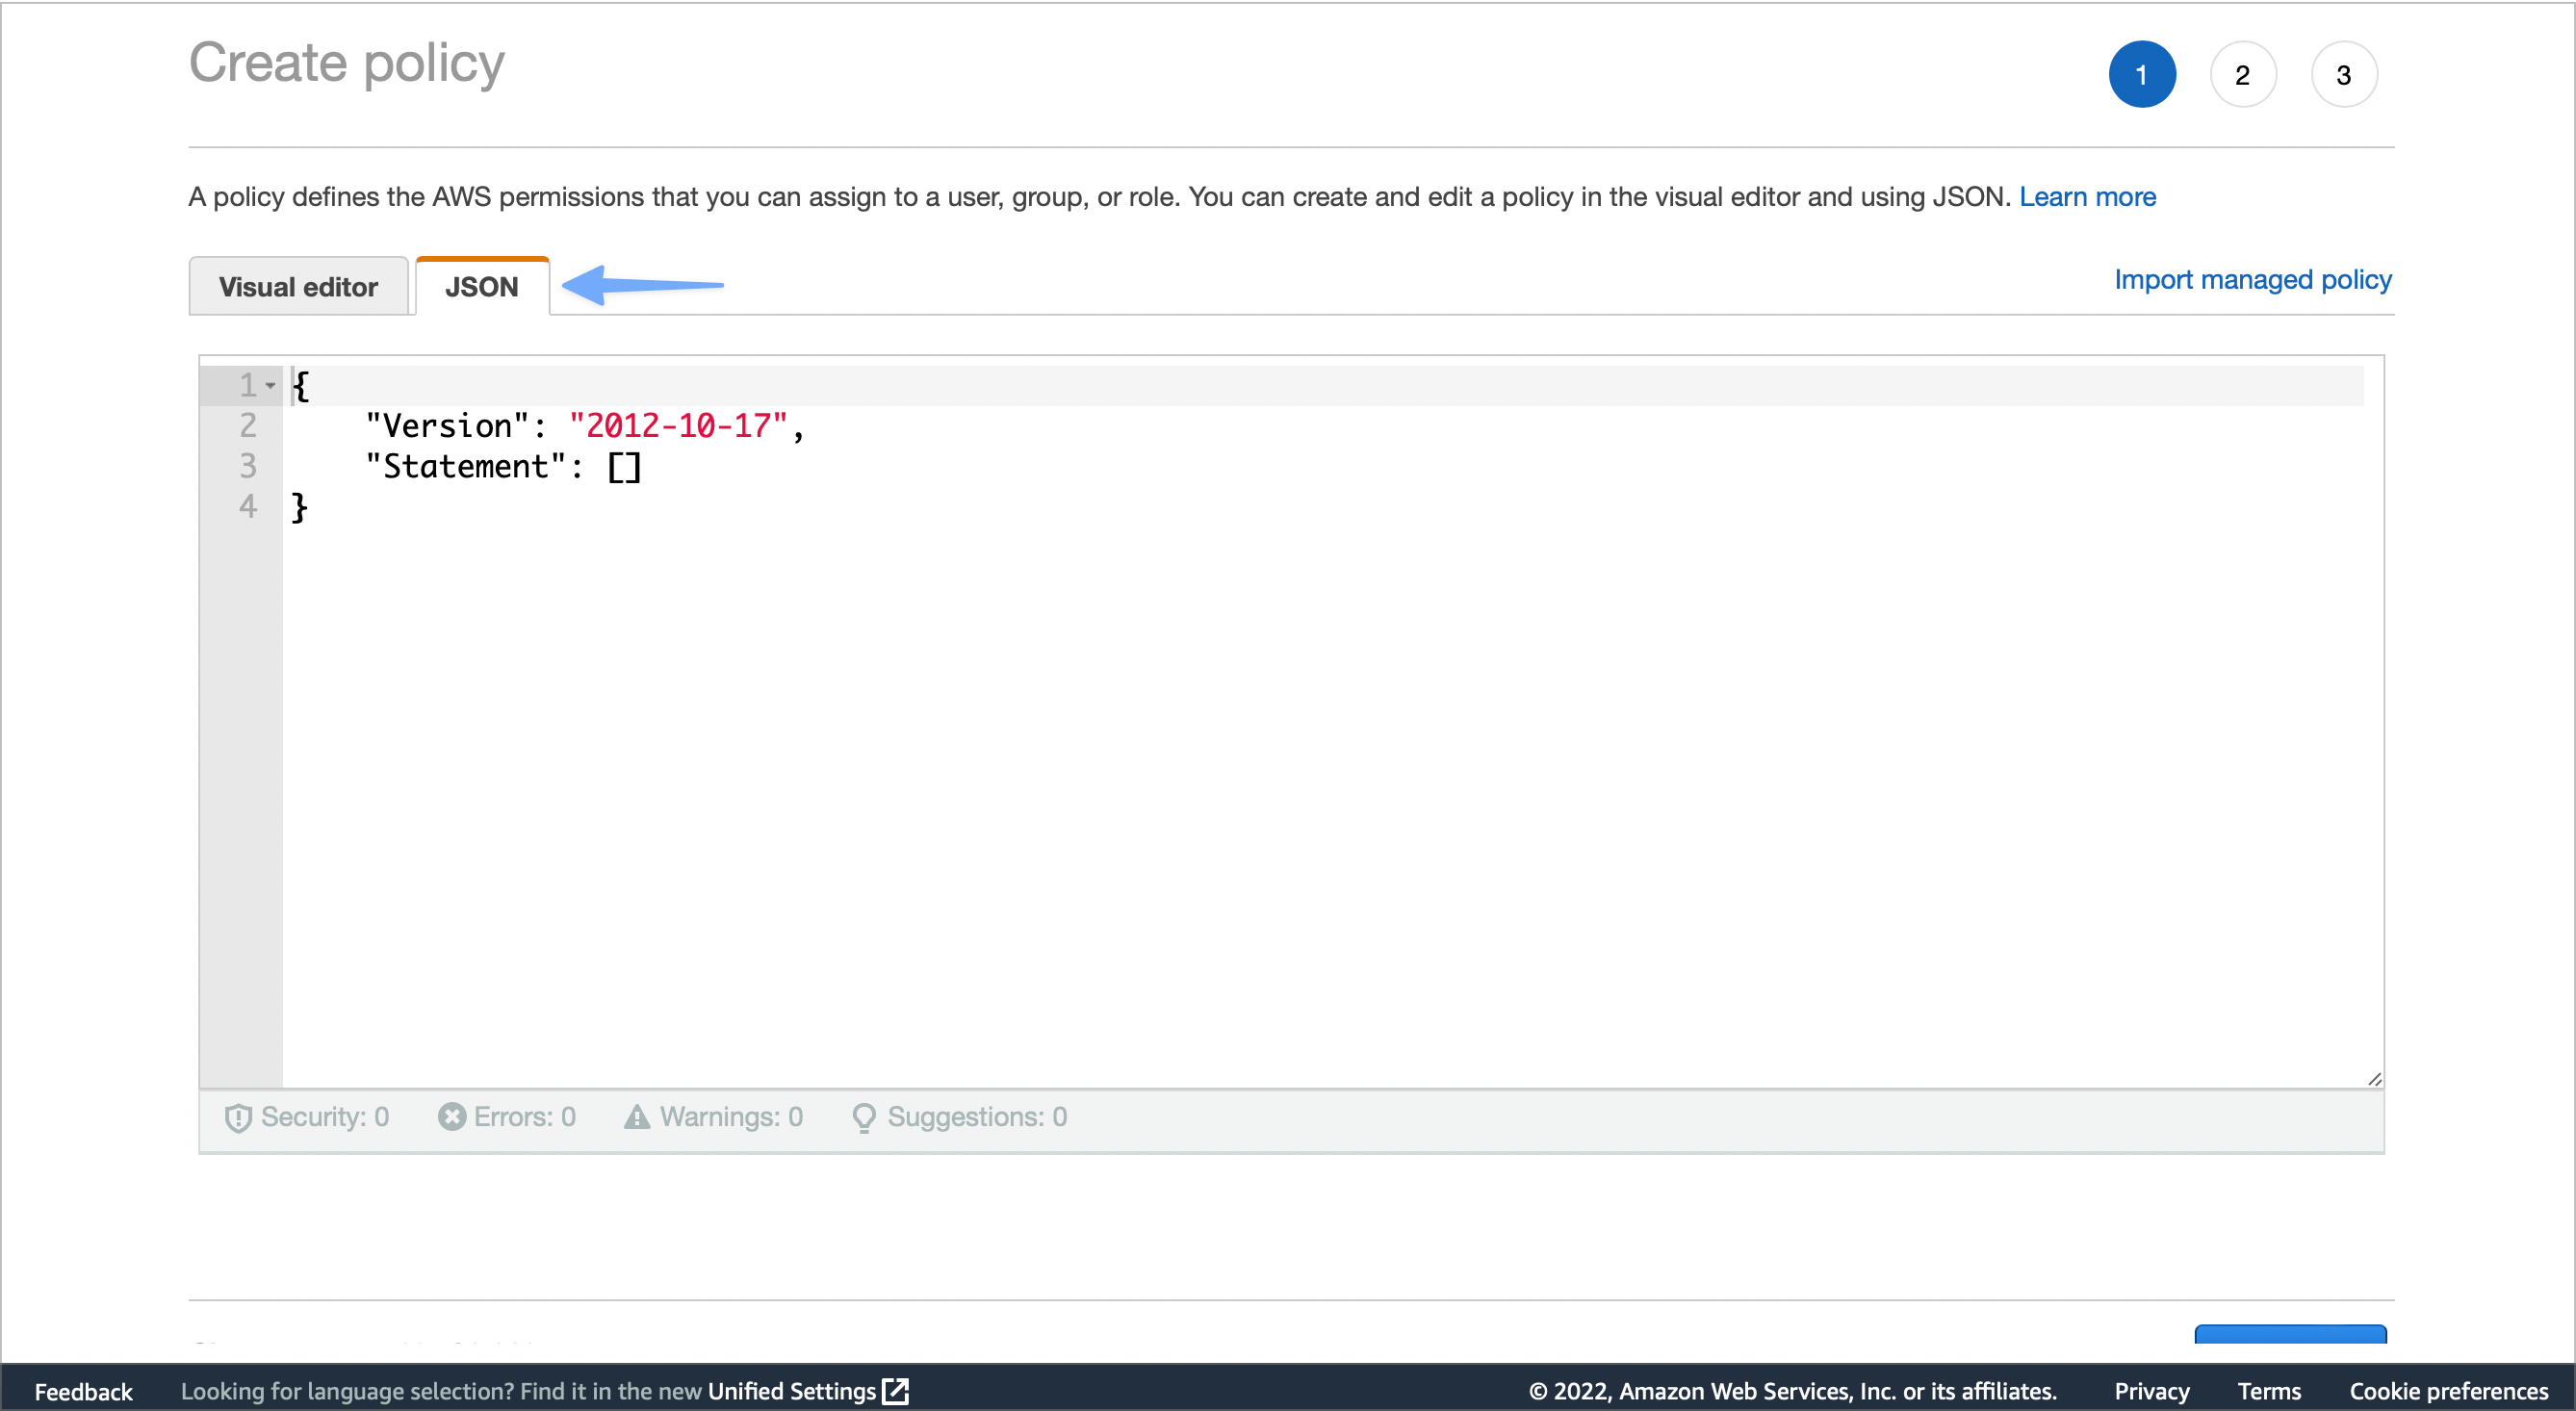
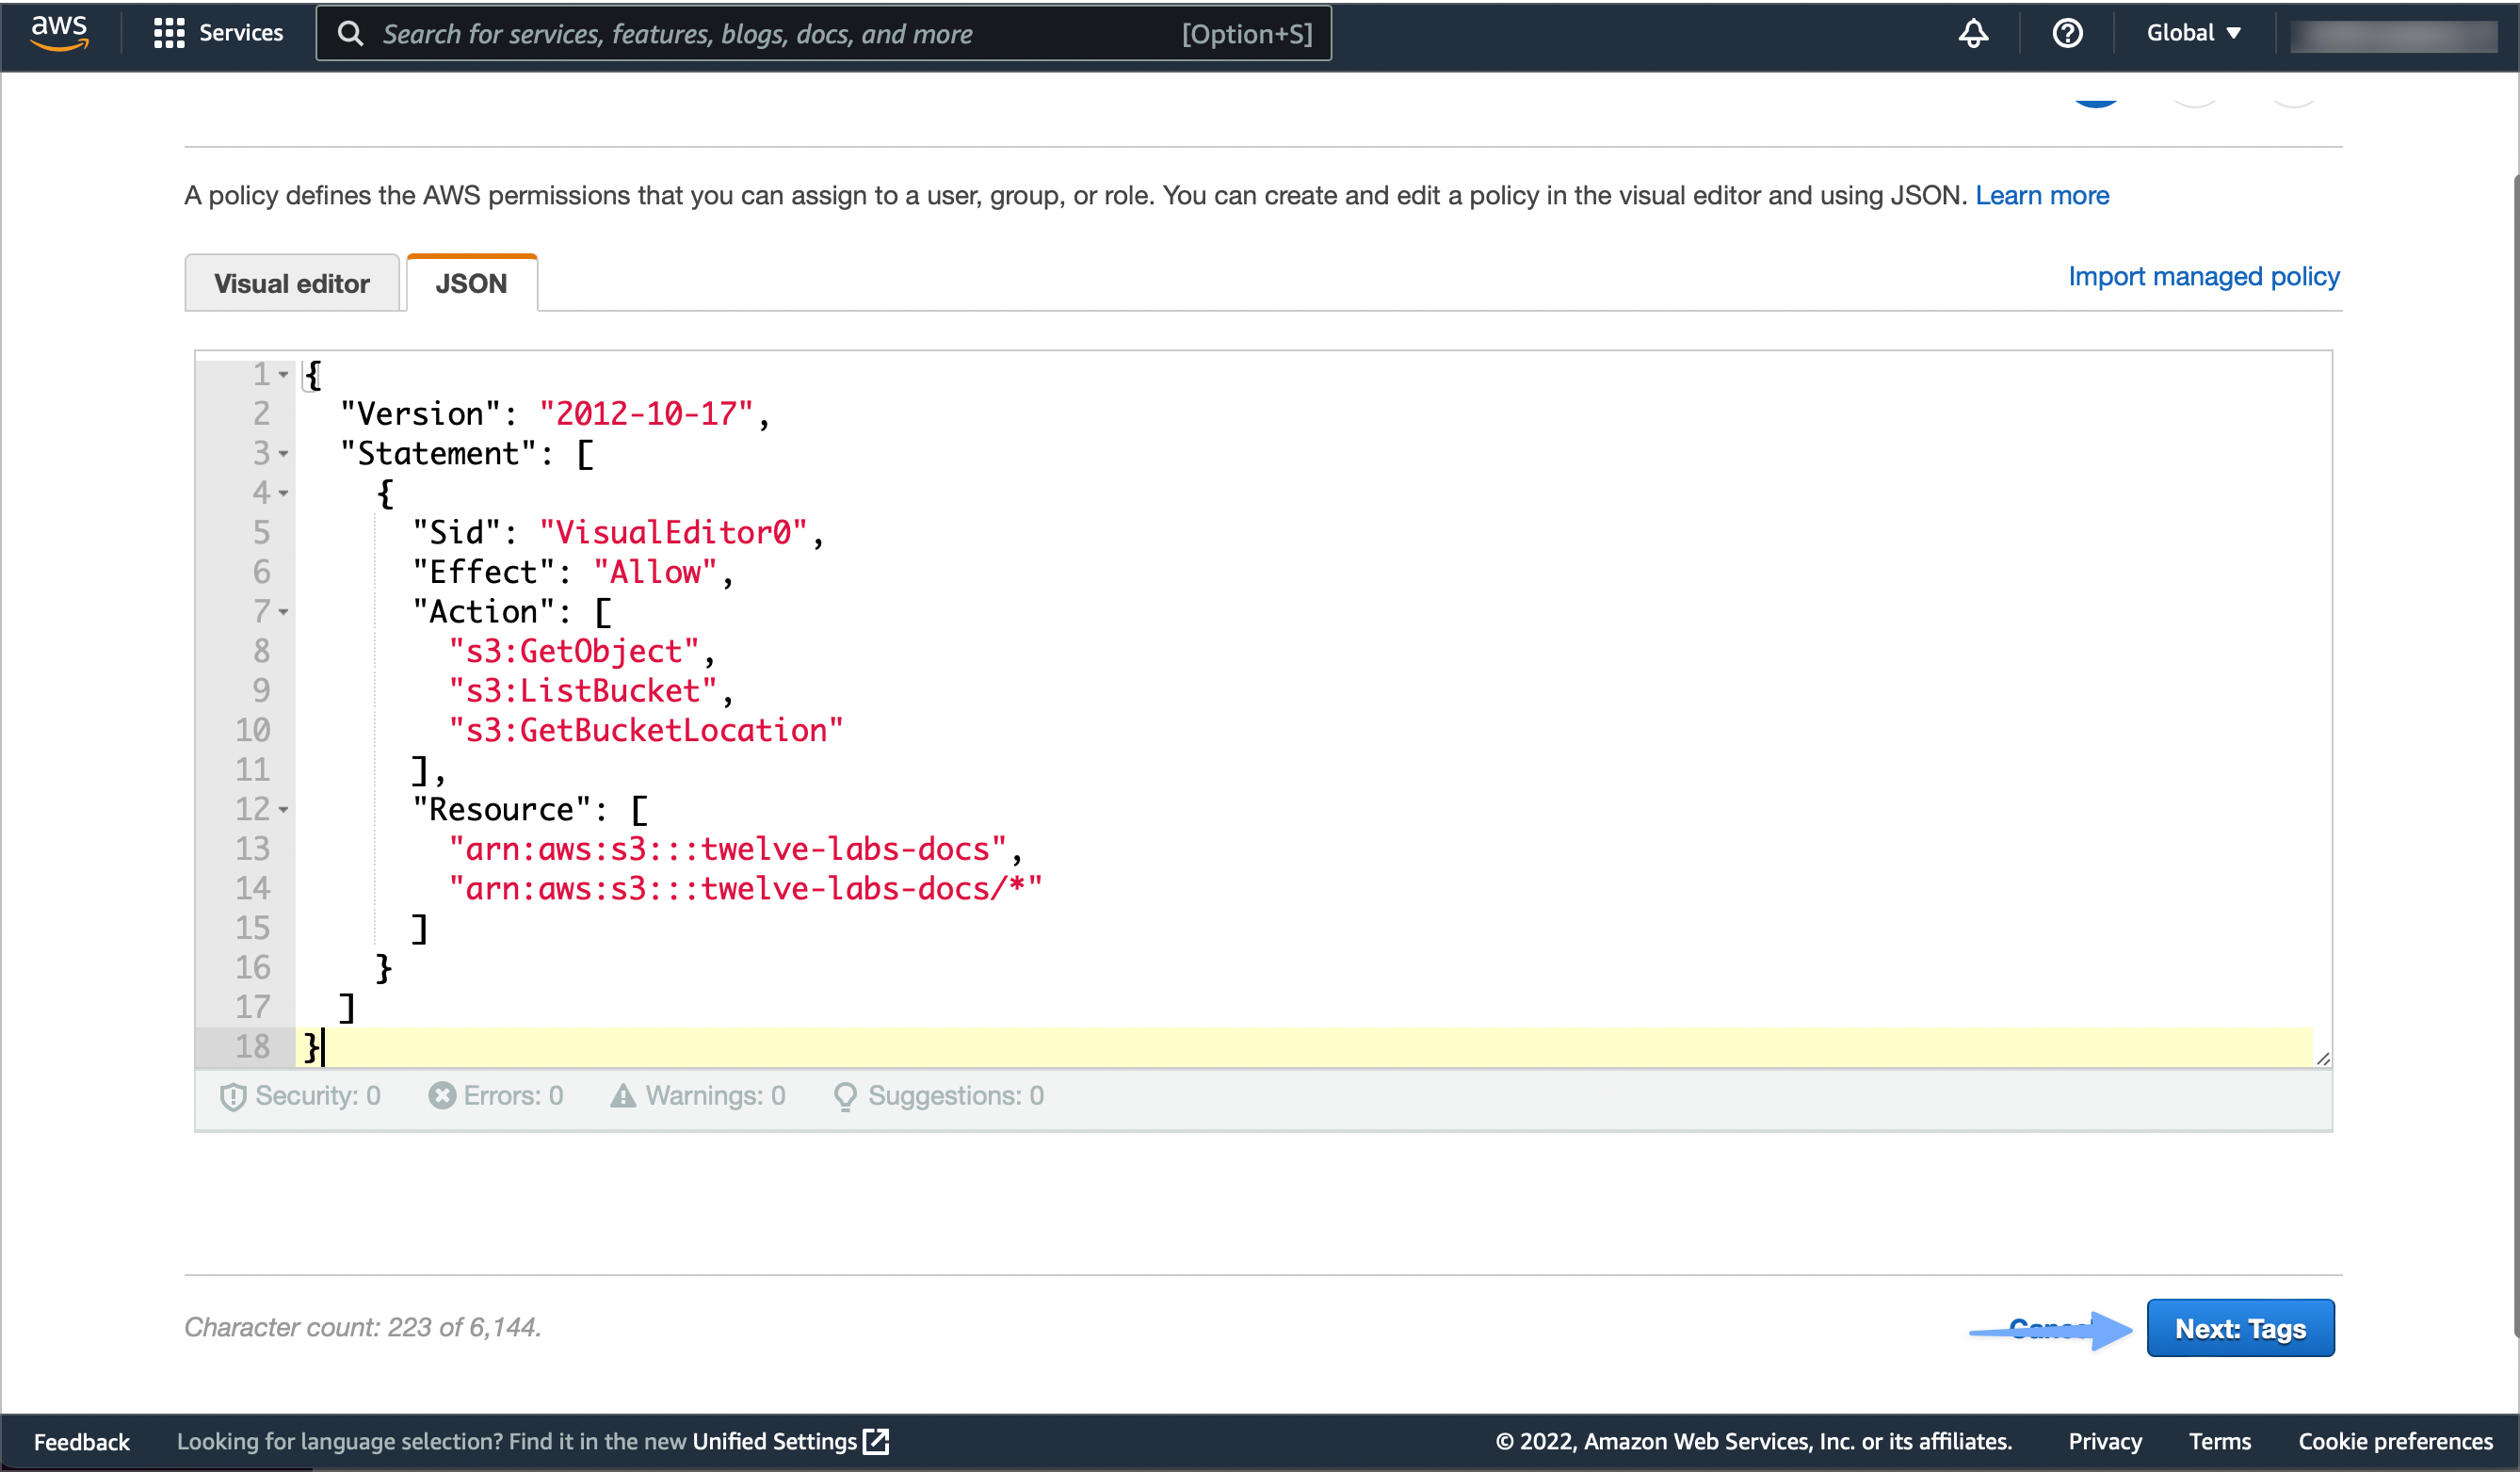
Select the JSON tab:
-
Move to the Twelve Labs Dashboard page, and copy the JSON snippet under Step 1 : Create Policy:
-
Move to the IAM Dashboard page, and replace the content of the JSON tab with the snippet you've copied in the previous step. Then, select the Next: Tags button:
-
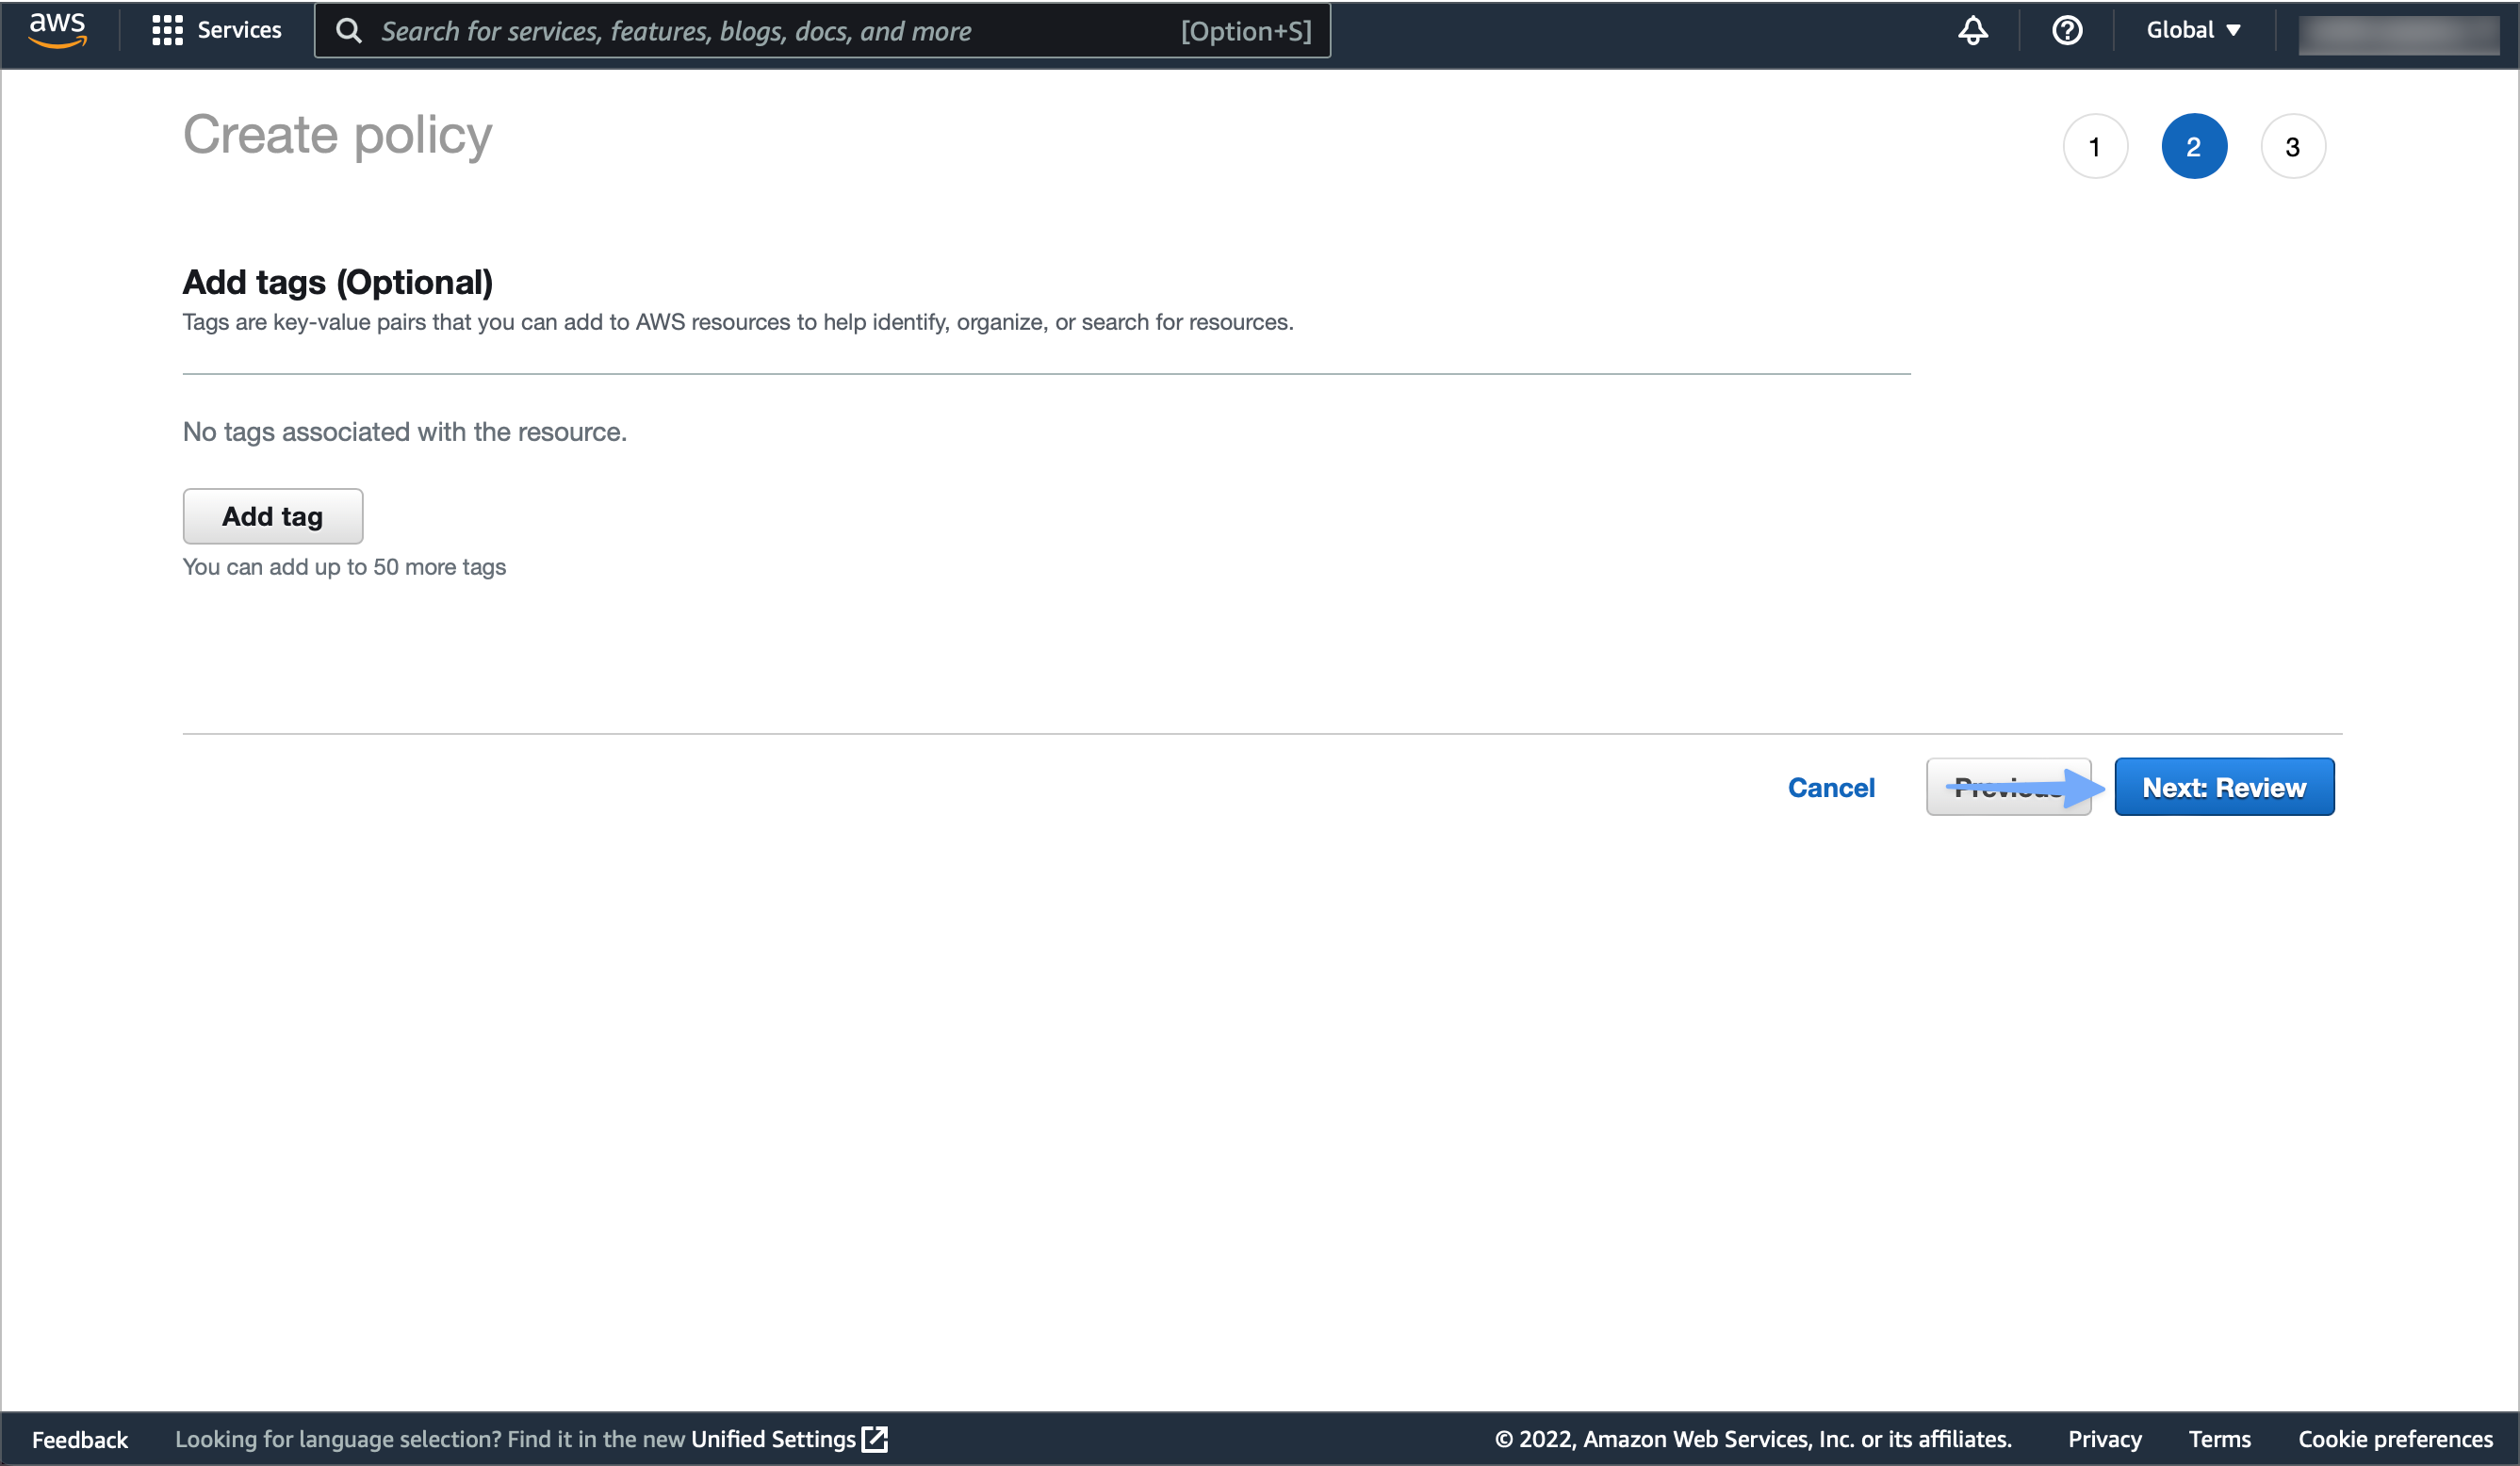
(Optional) On the Add Tags page, add any tags you want to associate with the policy. Then, select the Next: Review button:
-
On the Review Policy page, set the name of the policy to "TwelvelabsIntegrationPolicy" and enter a brief description. Then, select the Create Policy button:

Note
Do not change the name of the policy. If you rename the policy, the integration will not work.
-
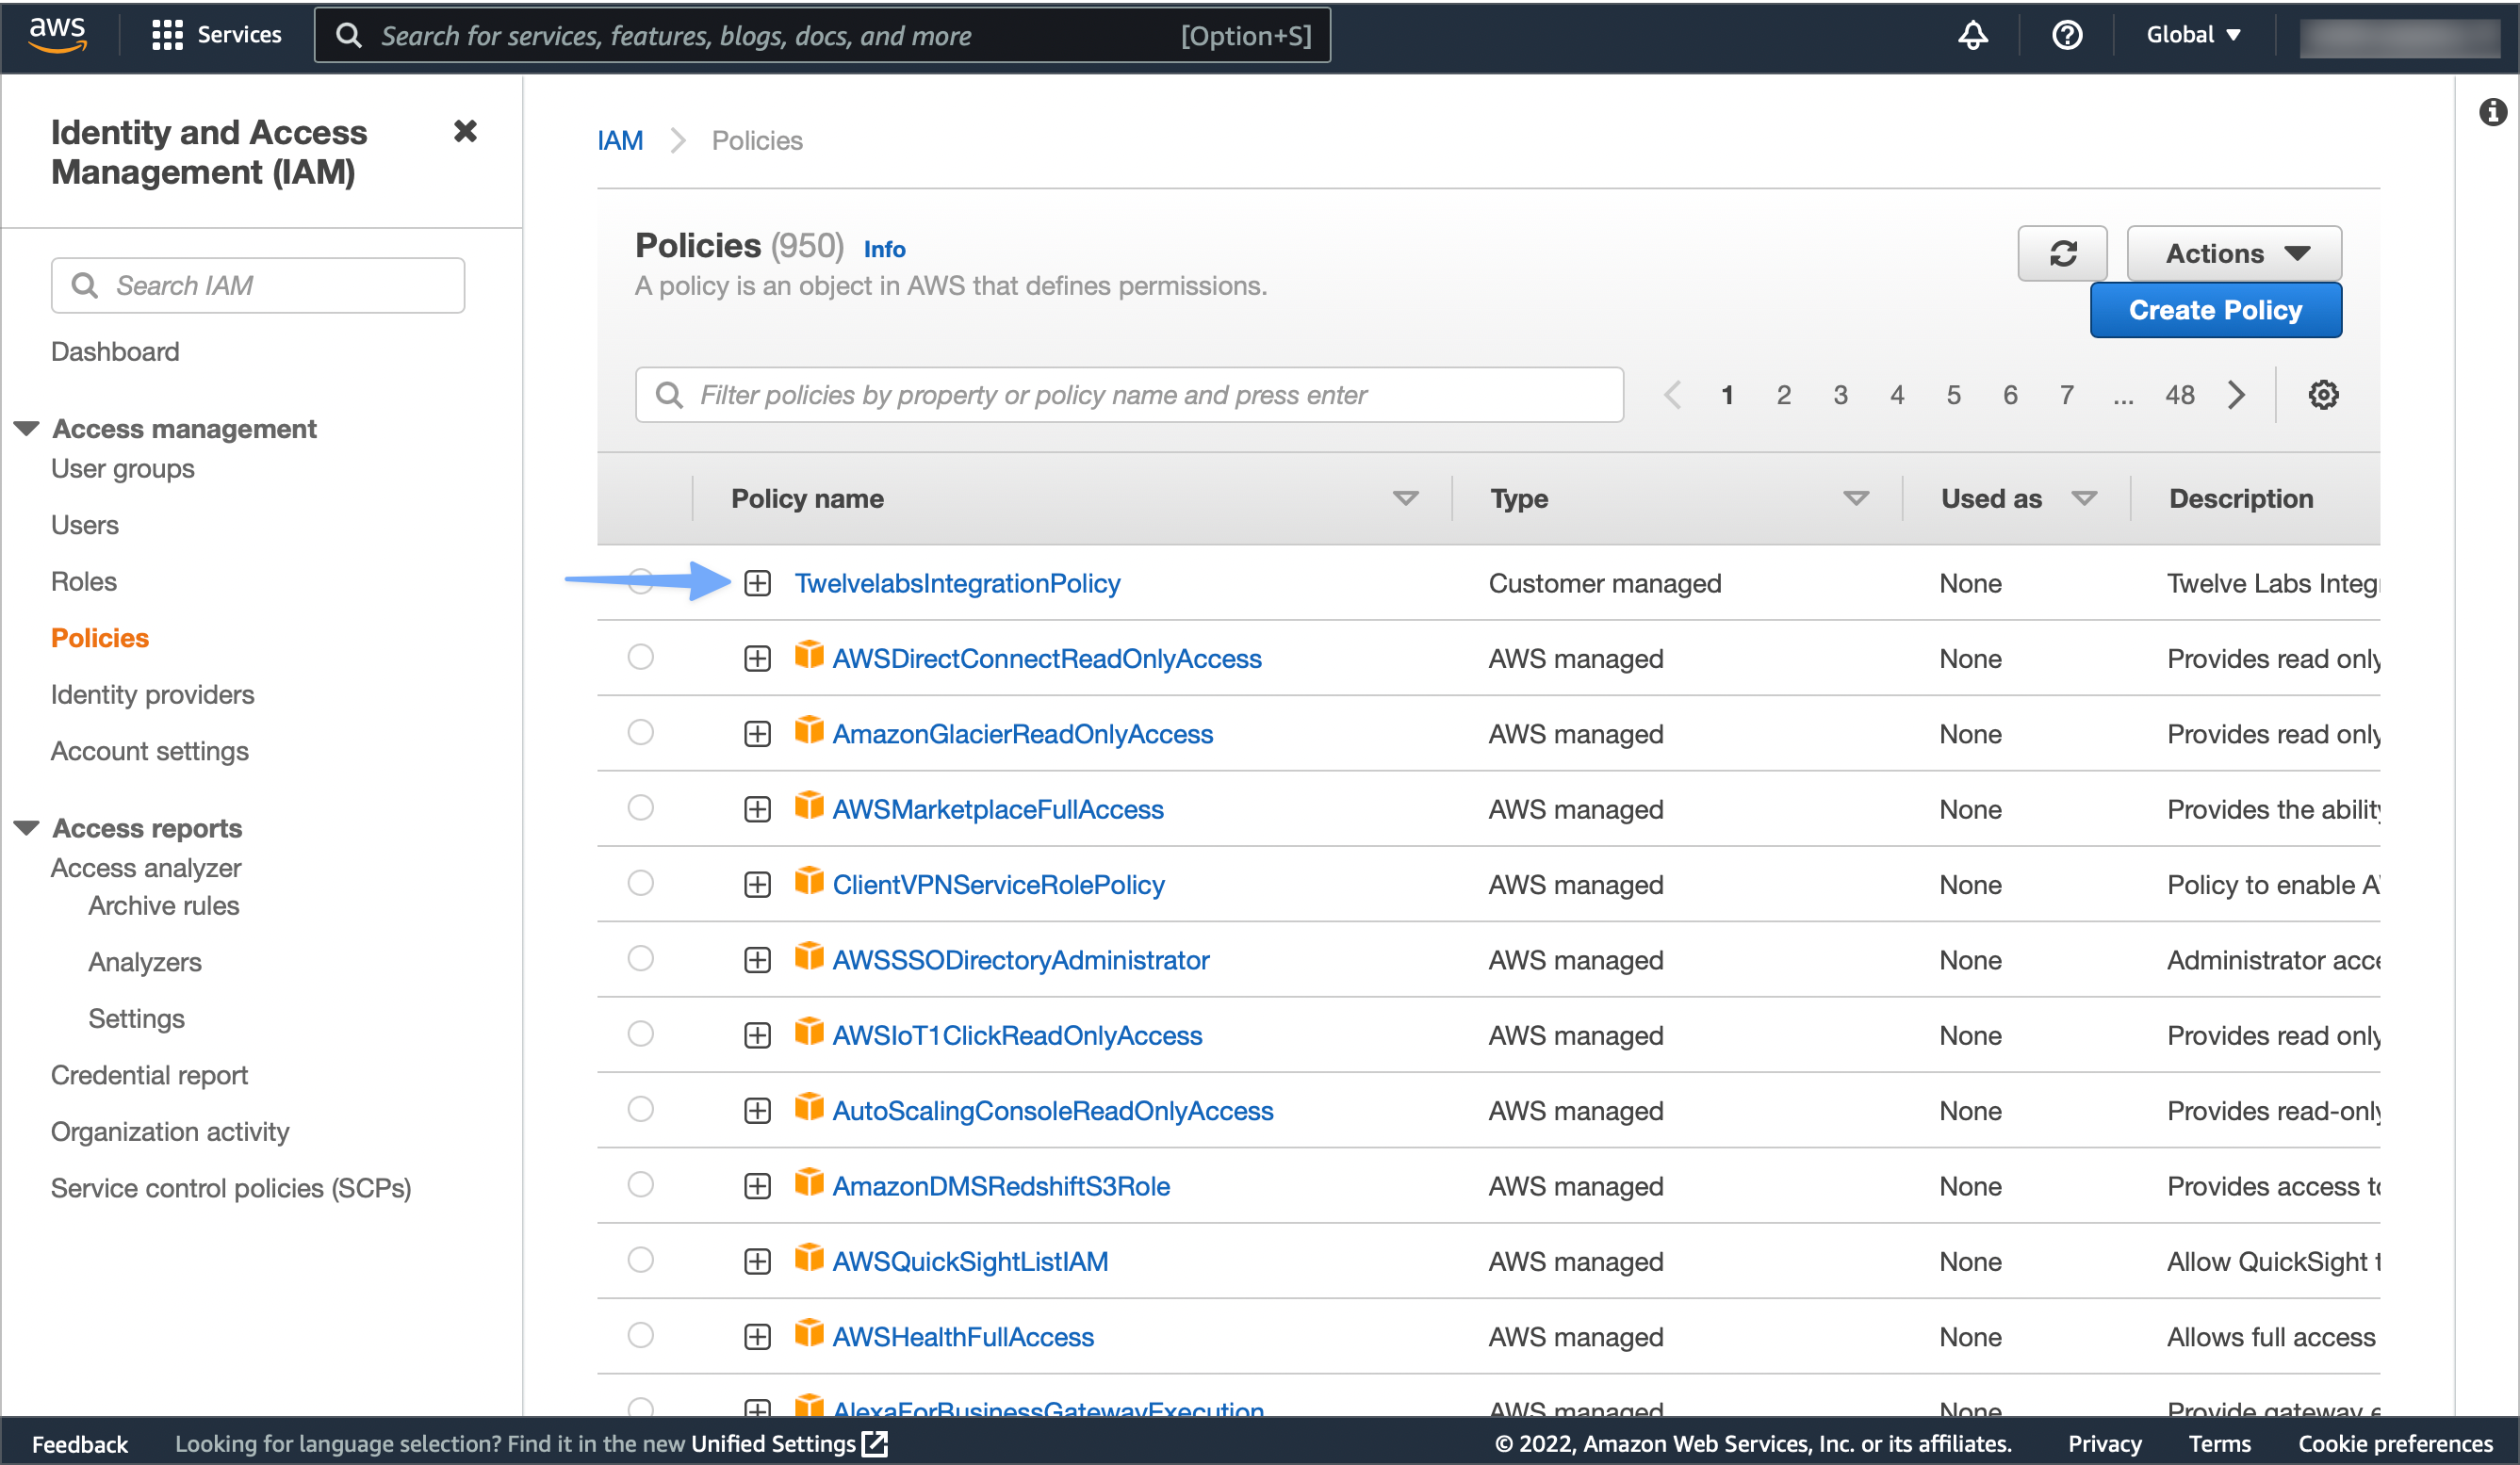
On the Policies page, make sure that the system displays your new policy:
If the system does not display your policy, review the steps in this section, making sure all the information you entered is correct.
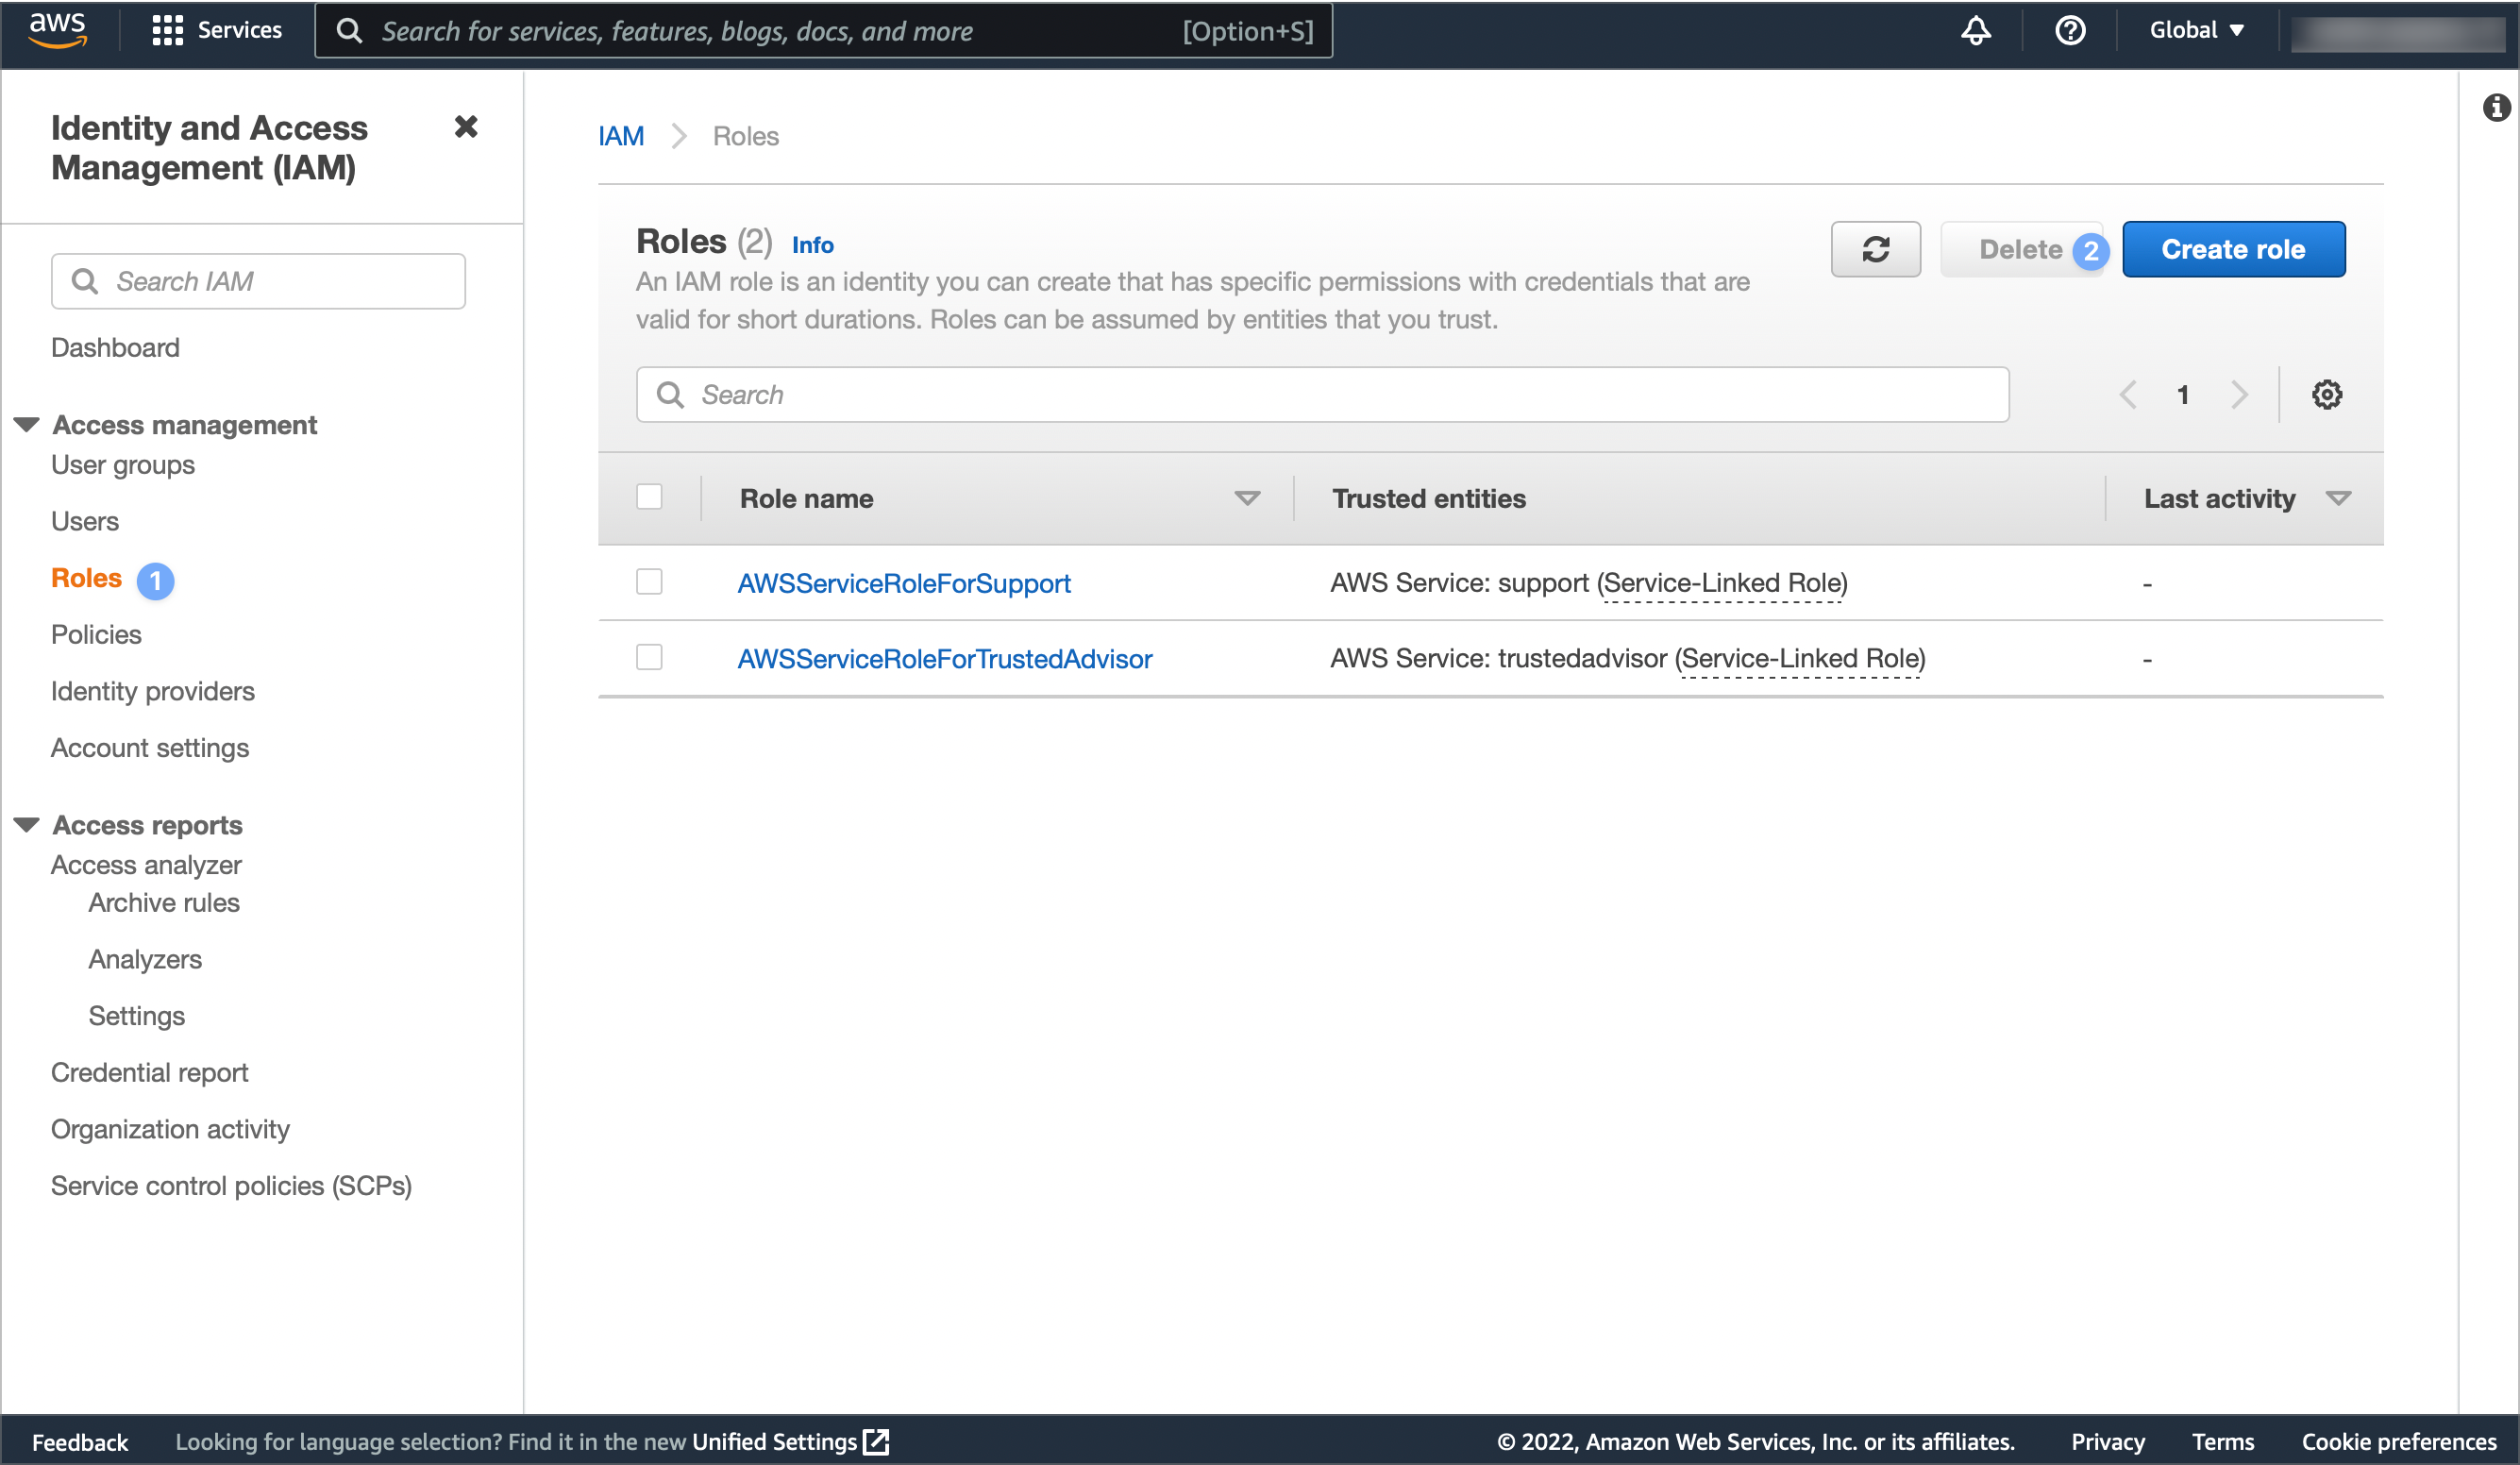
Create an AWS role
-
From the sidebar, choose Roles. Then, select the Create Role button:
-
Under Trusted Entity Type, select Custom Trust Policy:
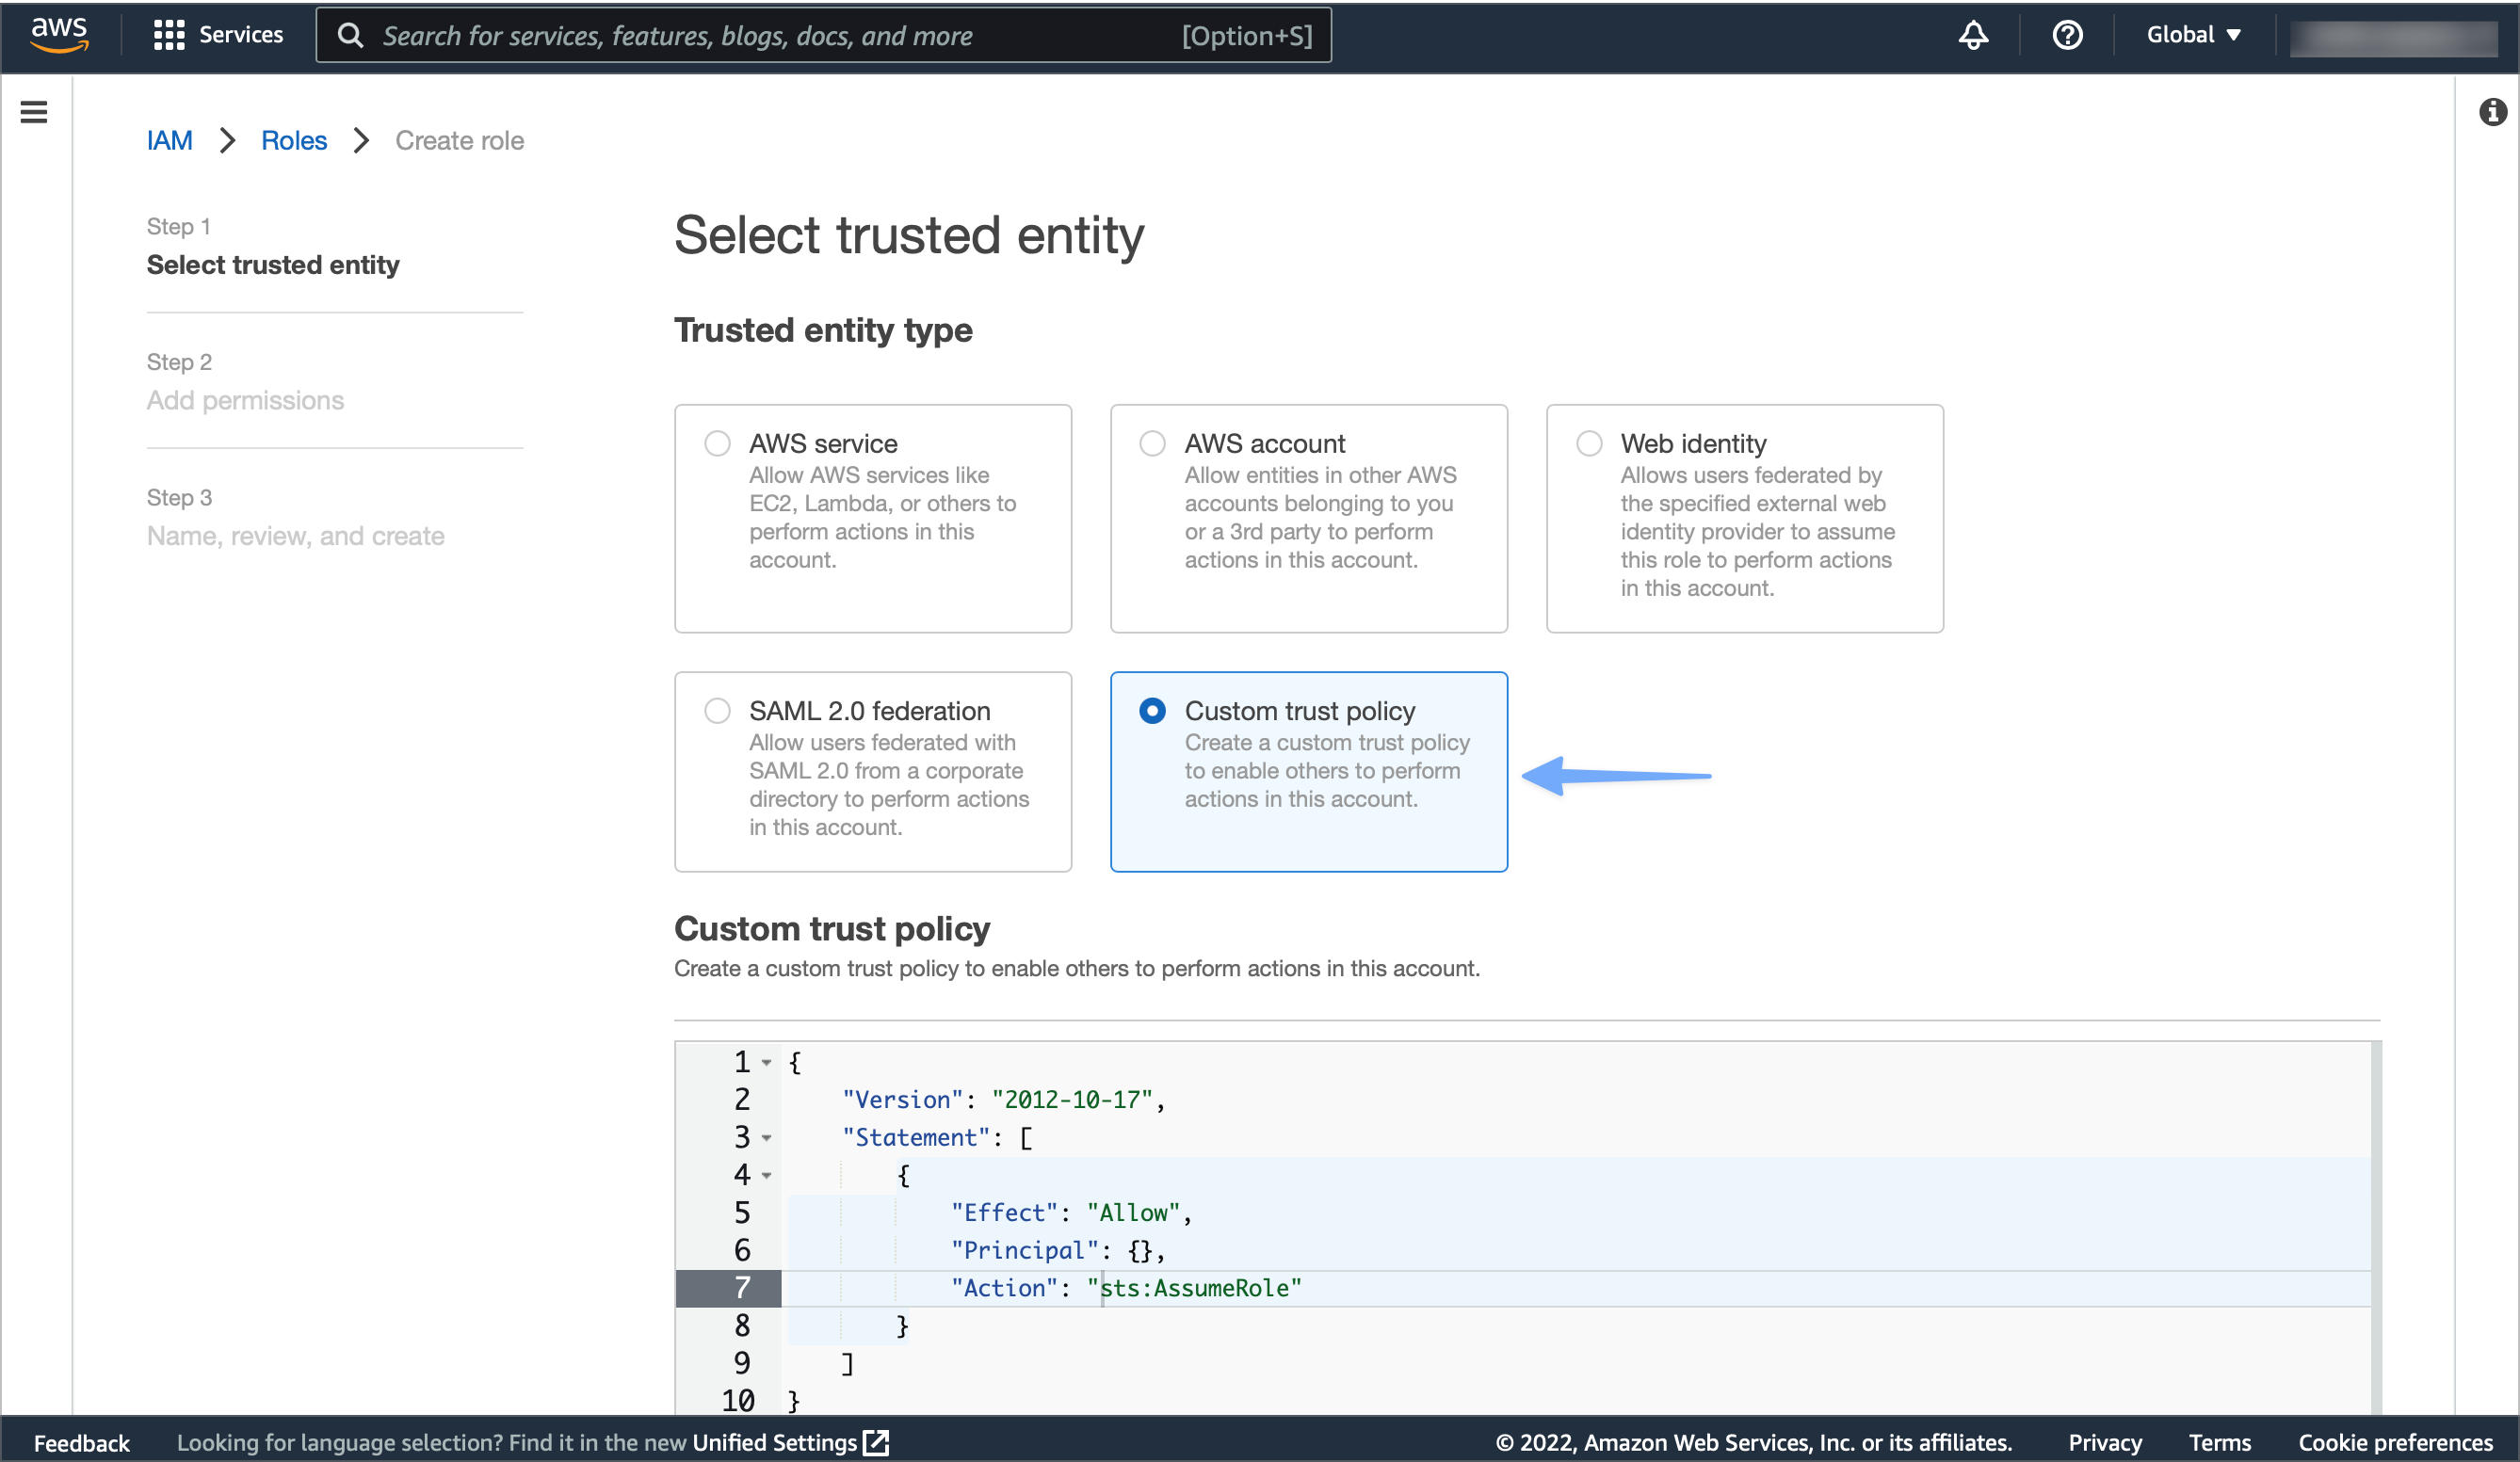
-
Move to the Twelve Labs Dashboard page, and copy the JSON snippet under Step 2 : Create Role:

-
Move to the IAM Dashboard page, and replace the content of the Custom trust policy box with the snippet you've copied in the previous step. Then, select the Next button:
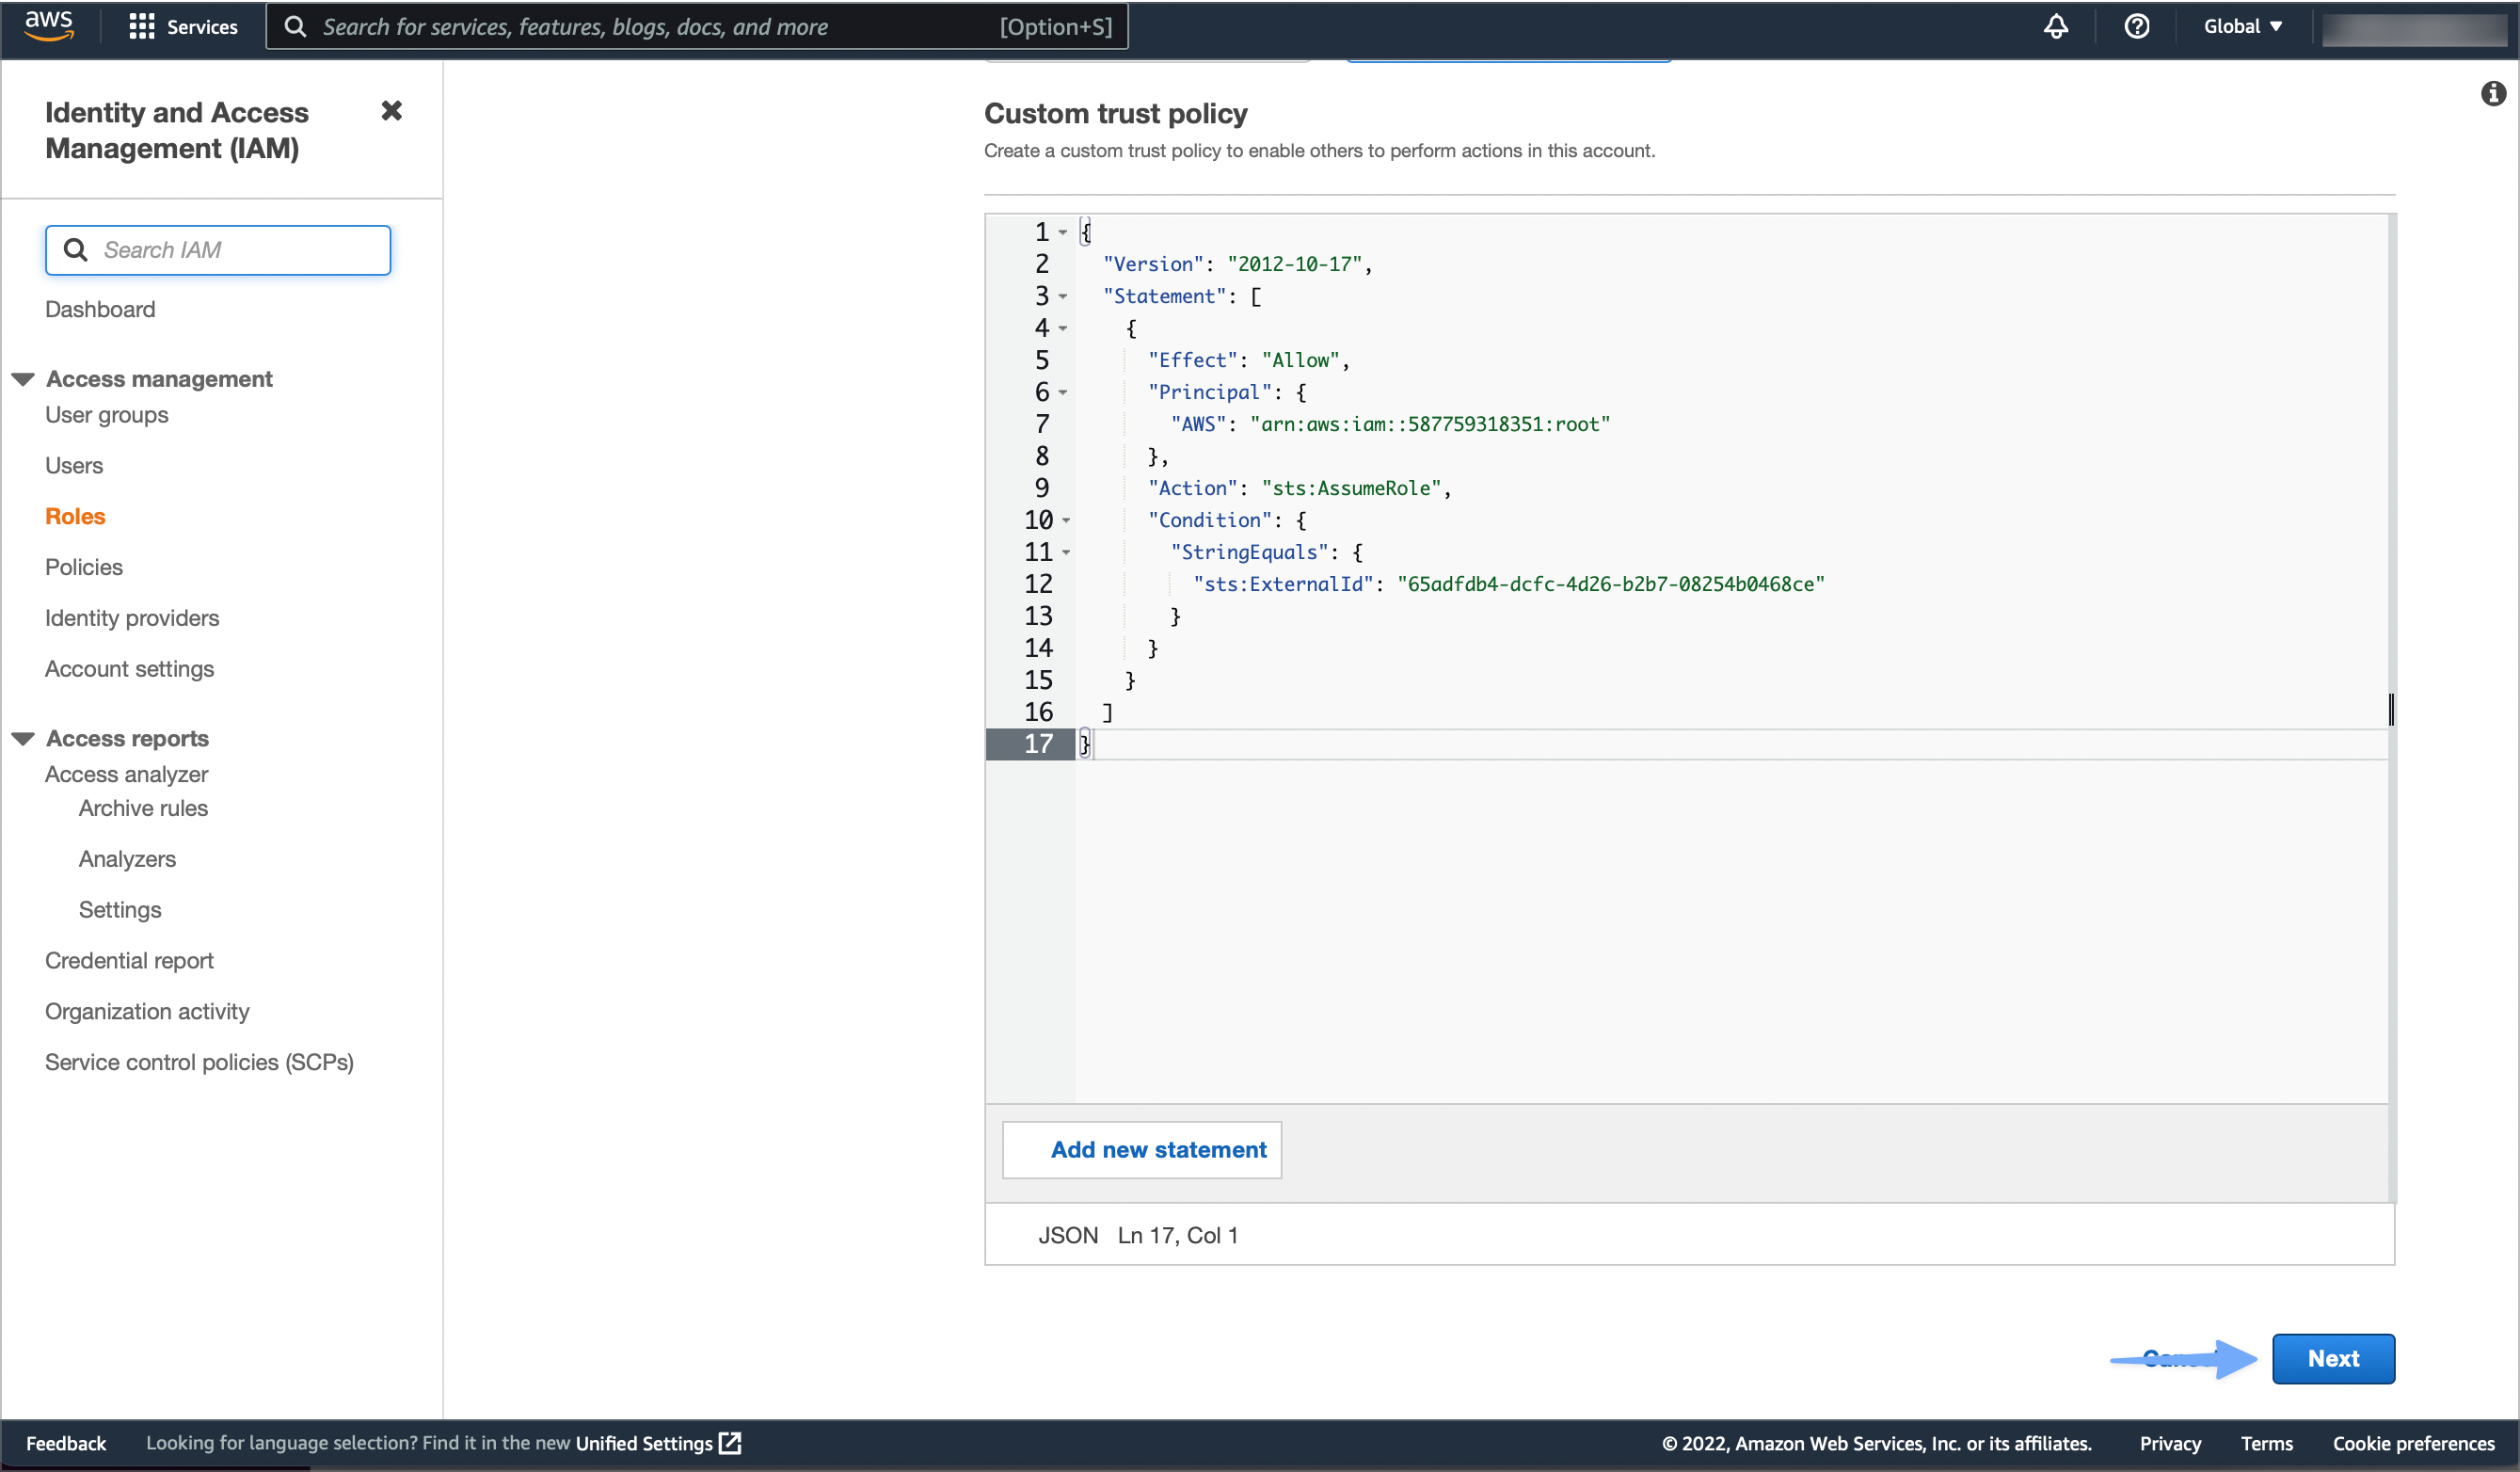
-
On the Add Permissions page, select the policy you've created in the previous section. Then, select the Next button at the bottom-right corner of the page:

-
On the Name, Review, and Create page, set the name of the role to
TwelvelabsIntegrationRoleand enter a brief description. Then, select the Create Role button:
Note
Do not change the name of the role. If you rename the role, the integration will not work.
-
On the Roles page, make sure that the system displays your new role:
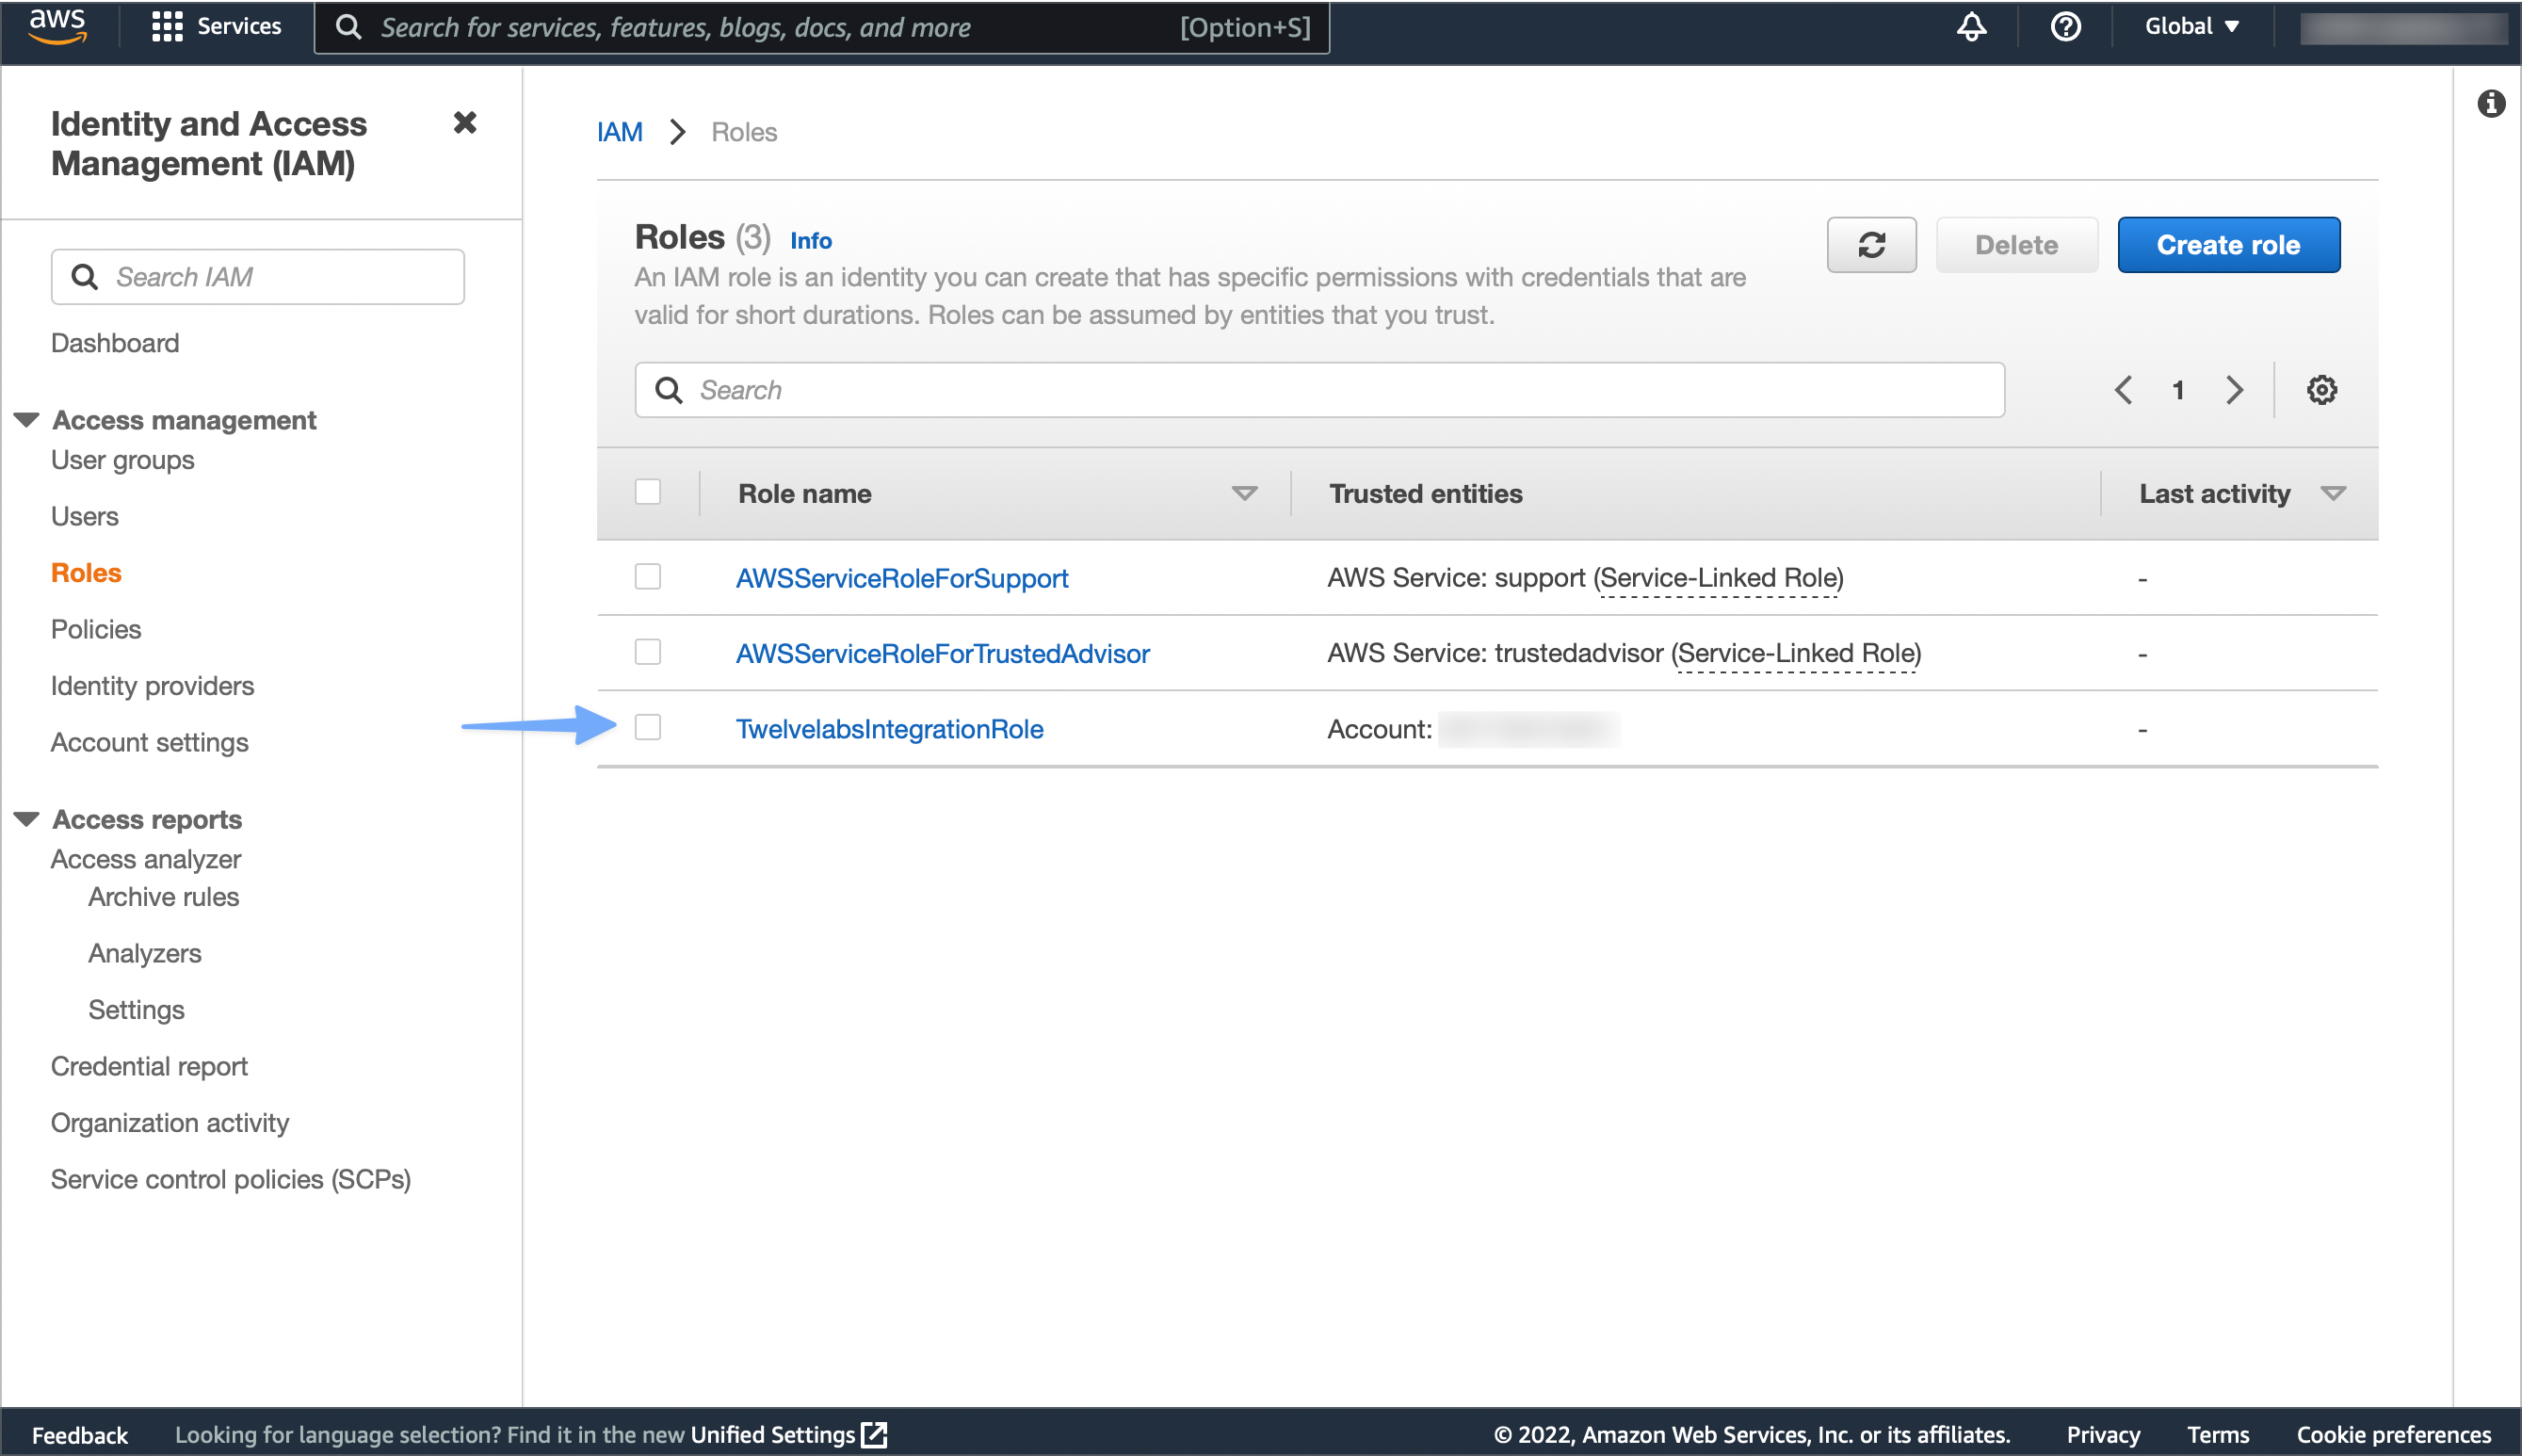
If the system does not display your role, review the steps in this section, making sure all the information you entered is correct.
Verify your integration configuration
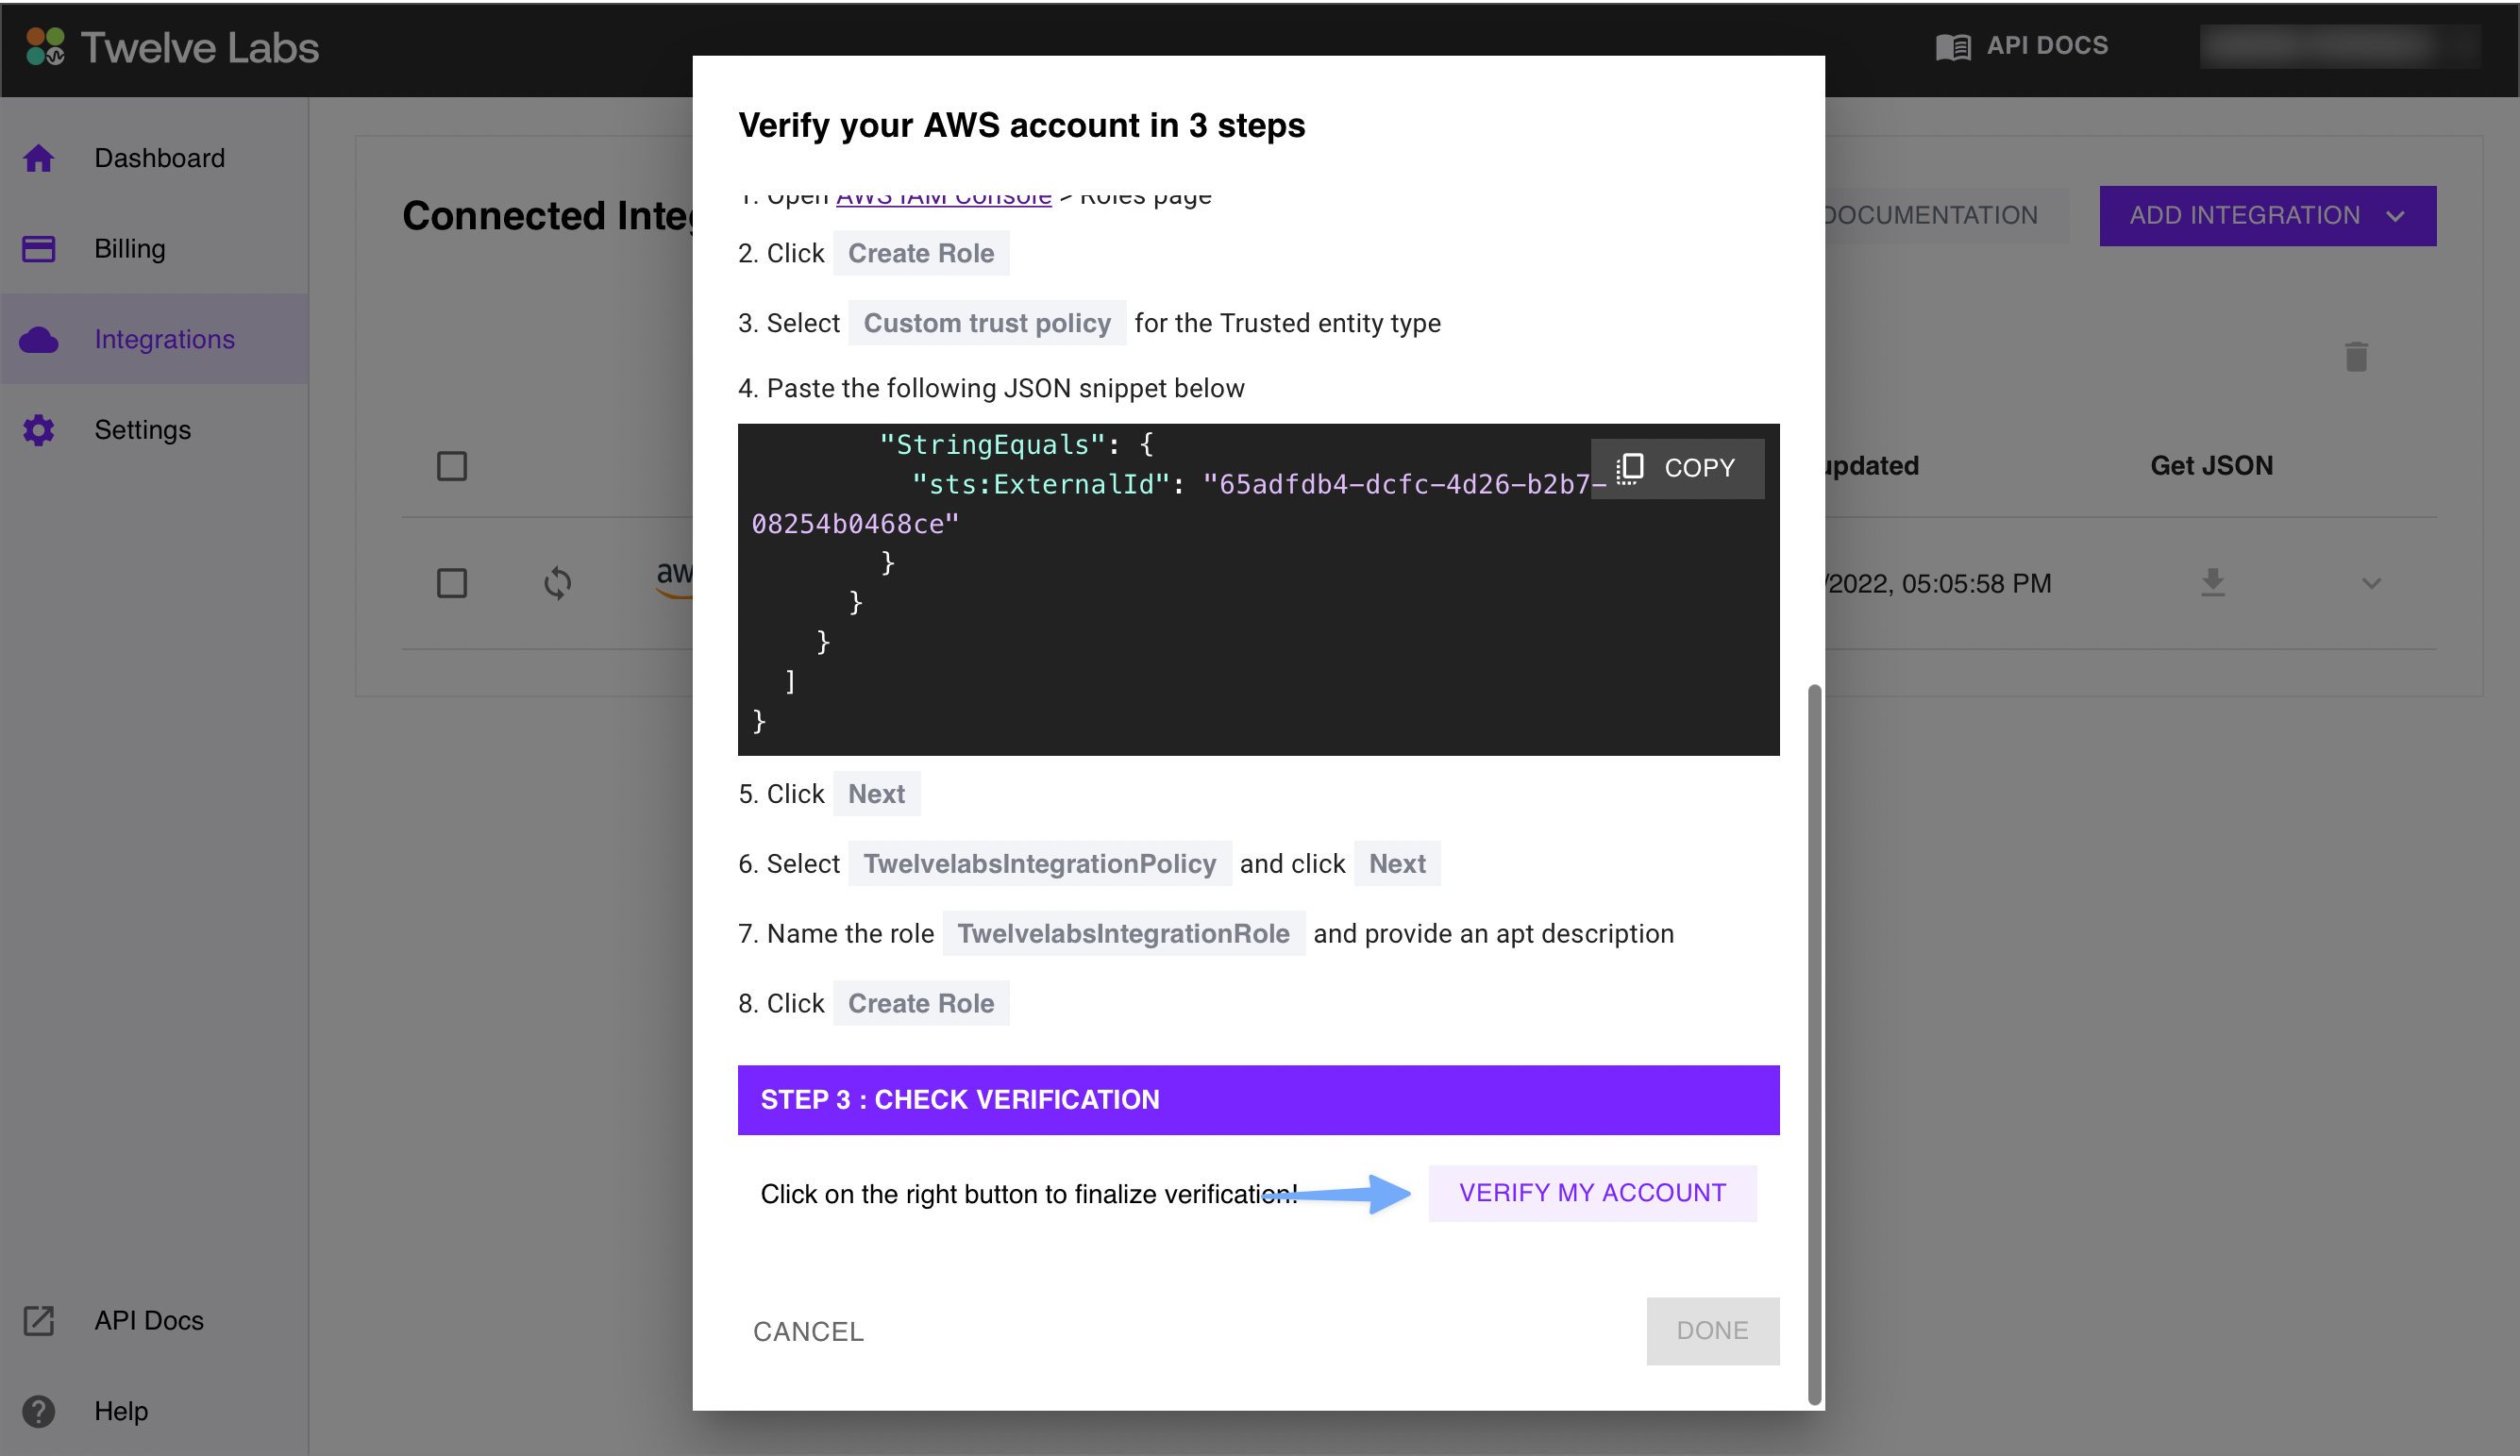
-
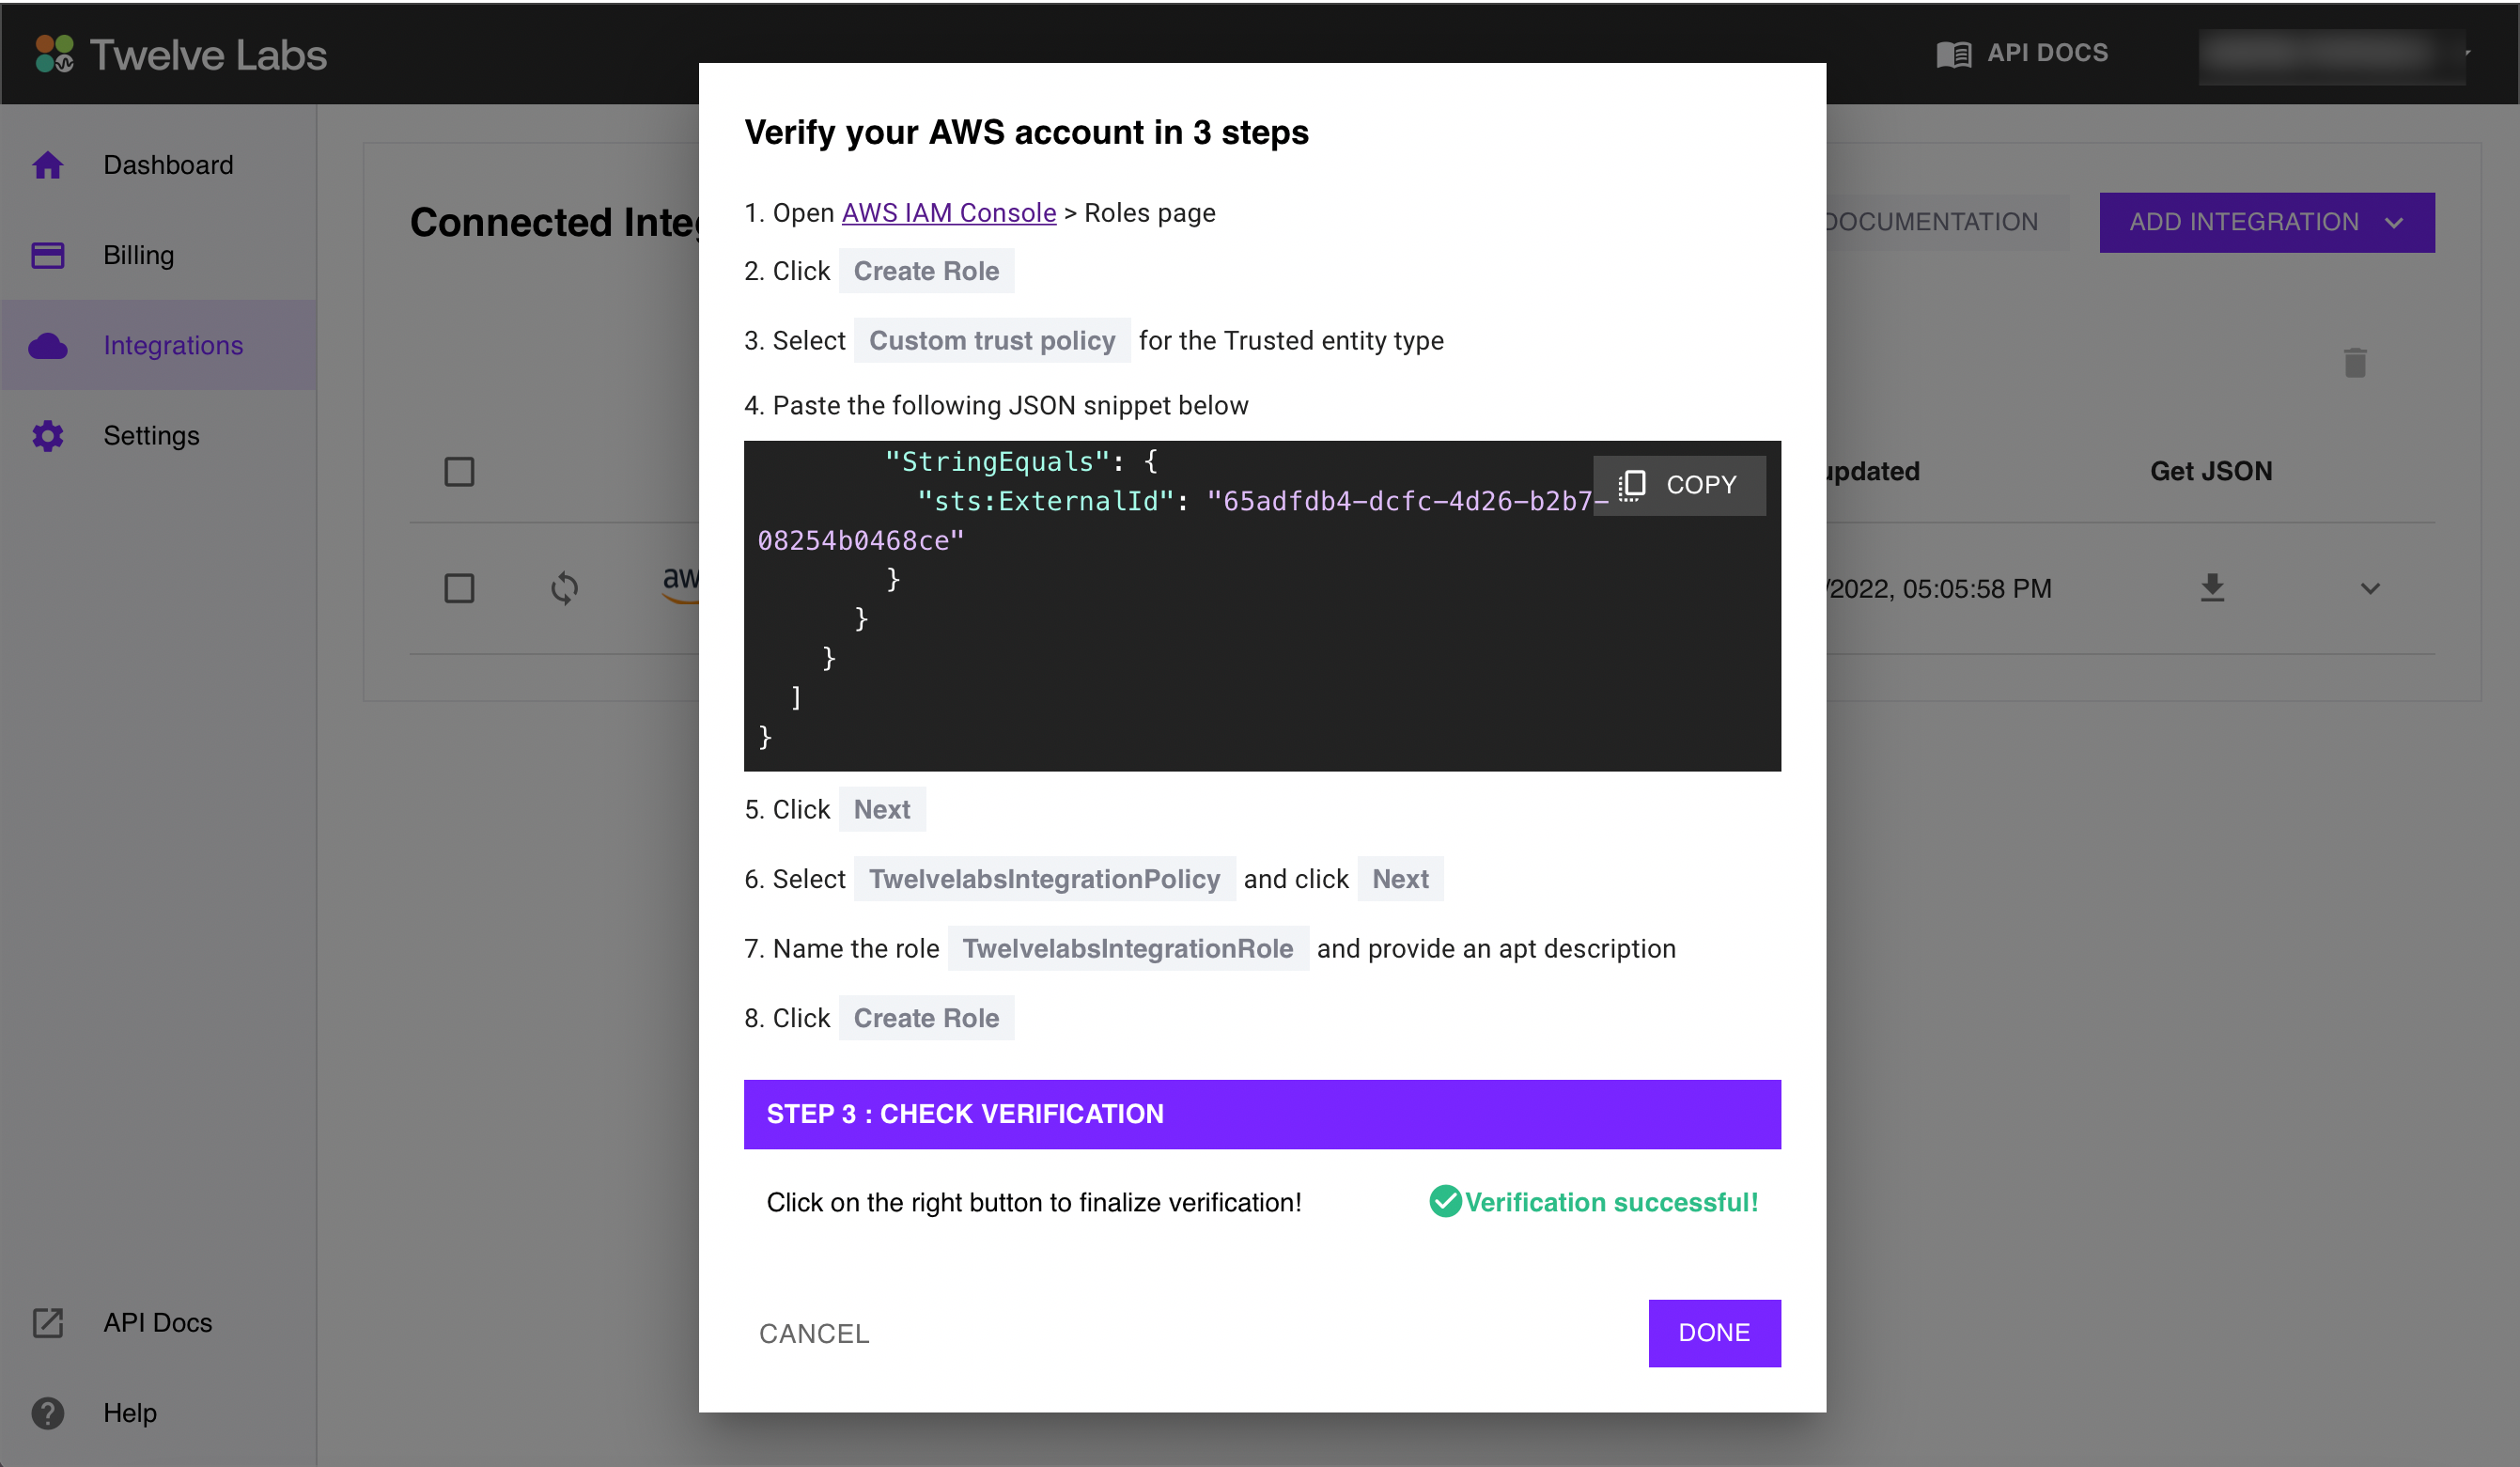
Move to the Twelve Labs dashboard. Under Step 3 : Check Verification, select the Verify My Account button:
If everything went well, you should see a message saying "Verification successful!":
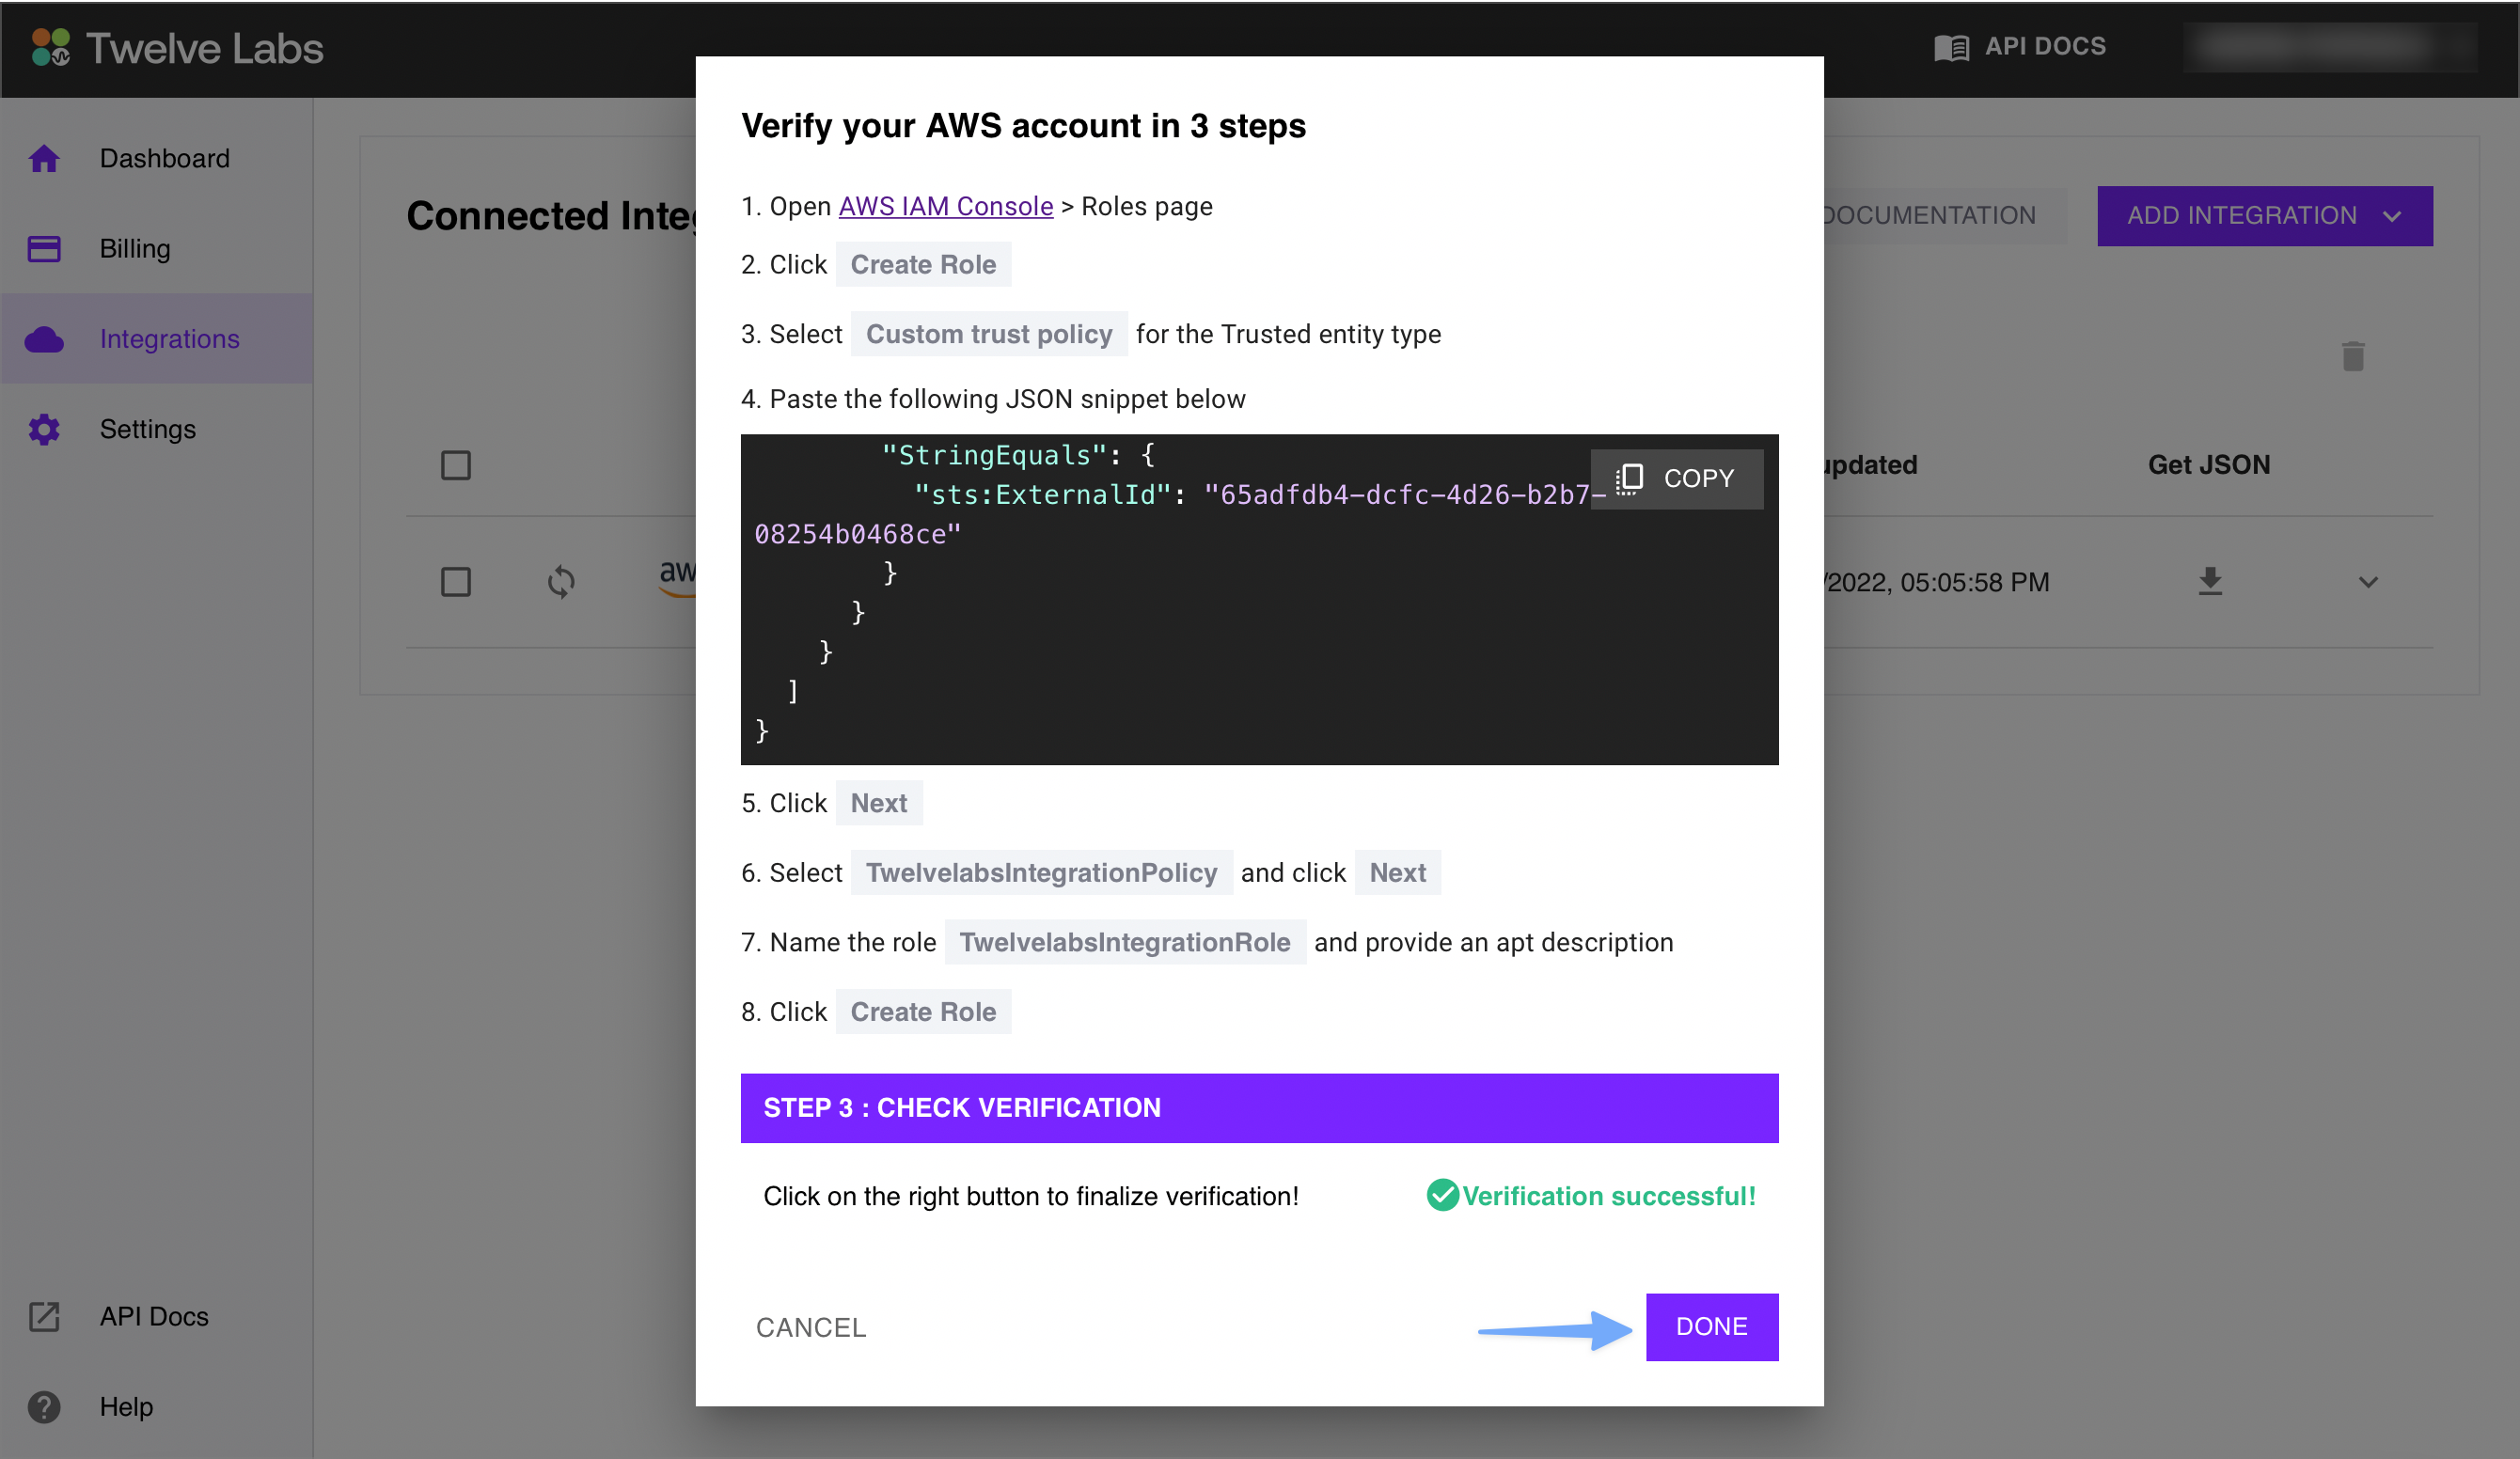
-
Select the Done button:
-
On the Connected Integrations page, make sure that the status of your new integration shows as Active:
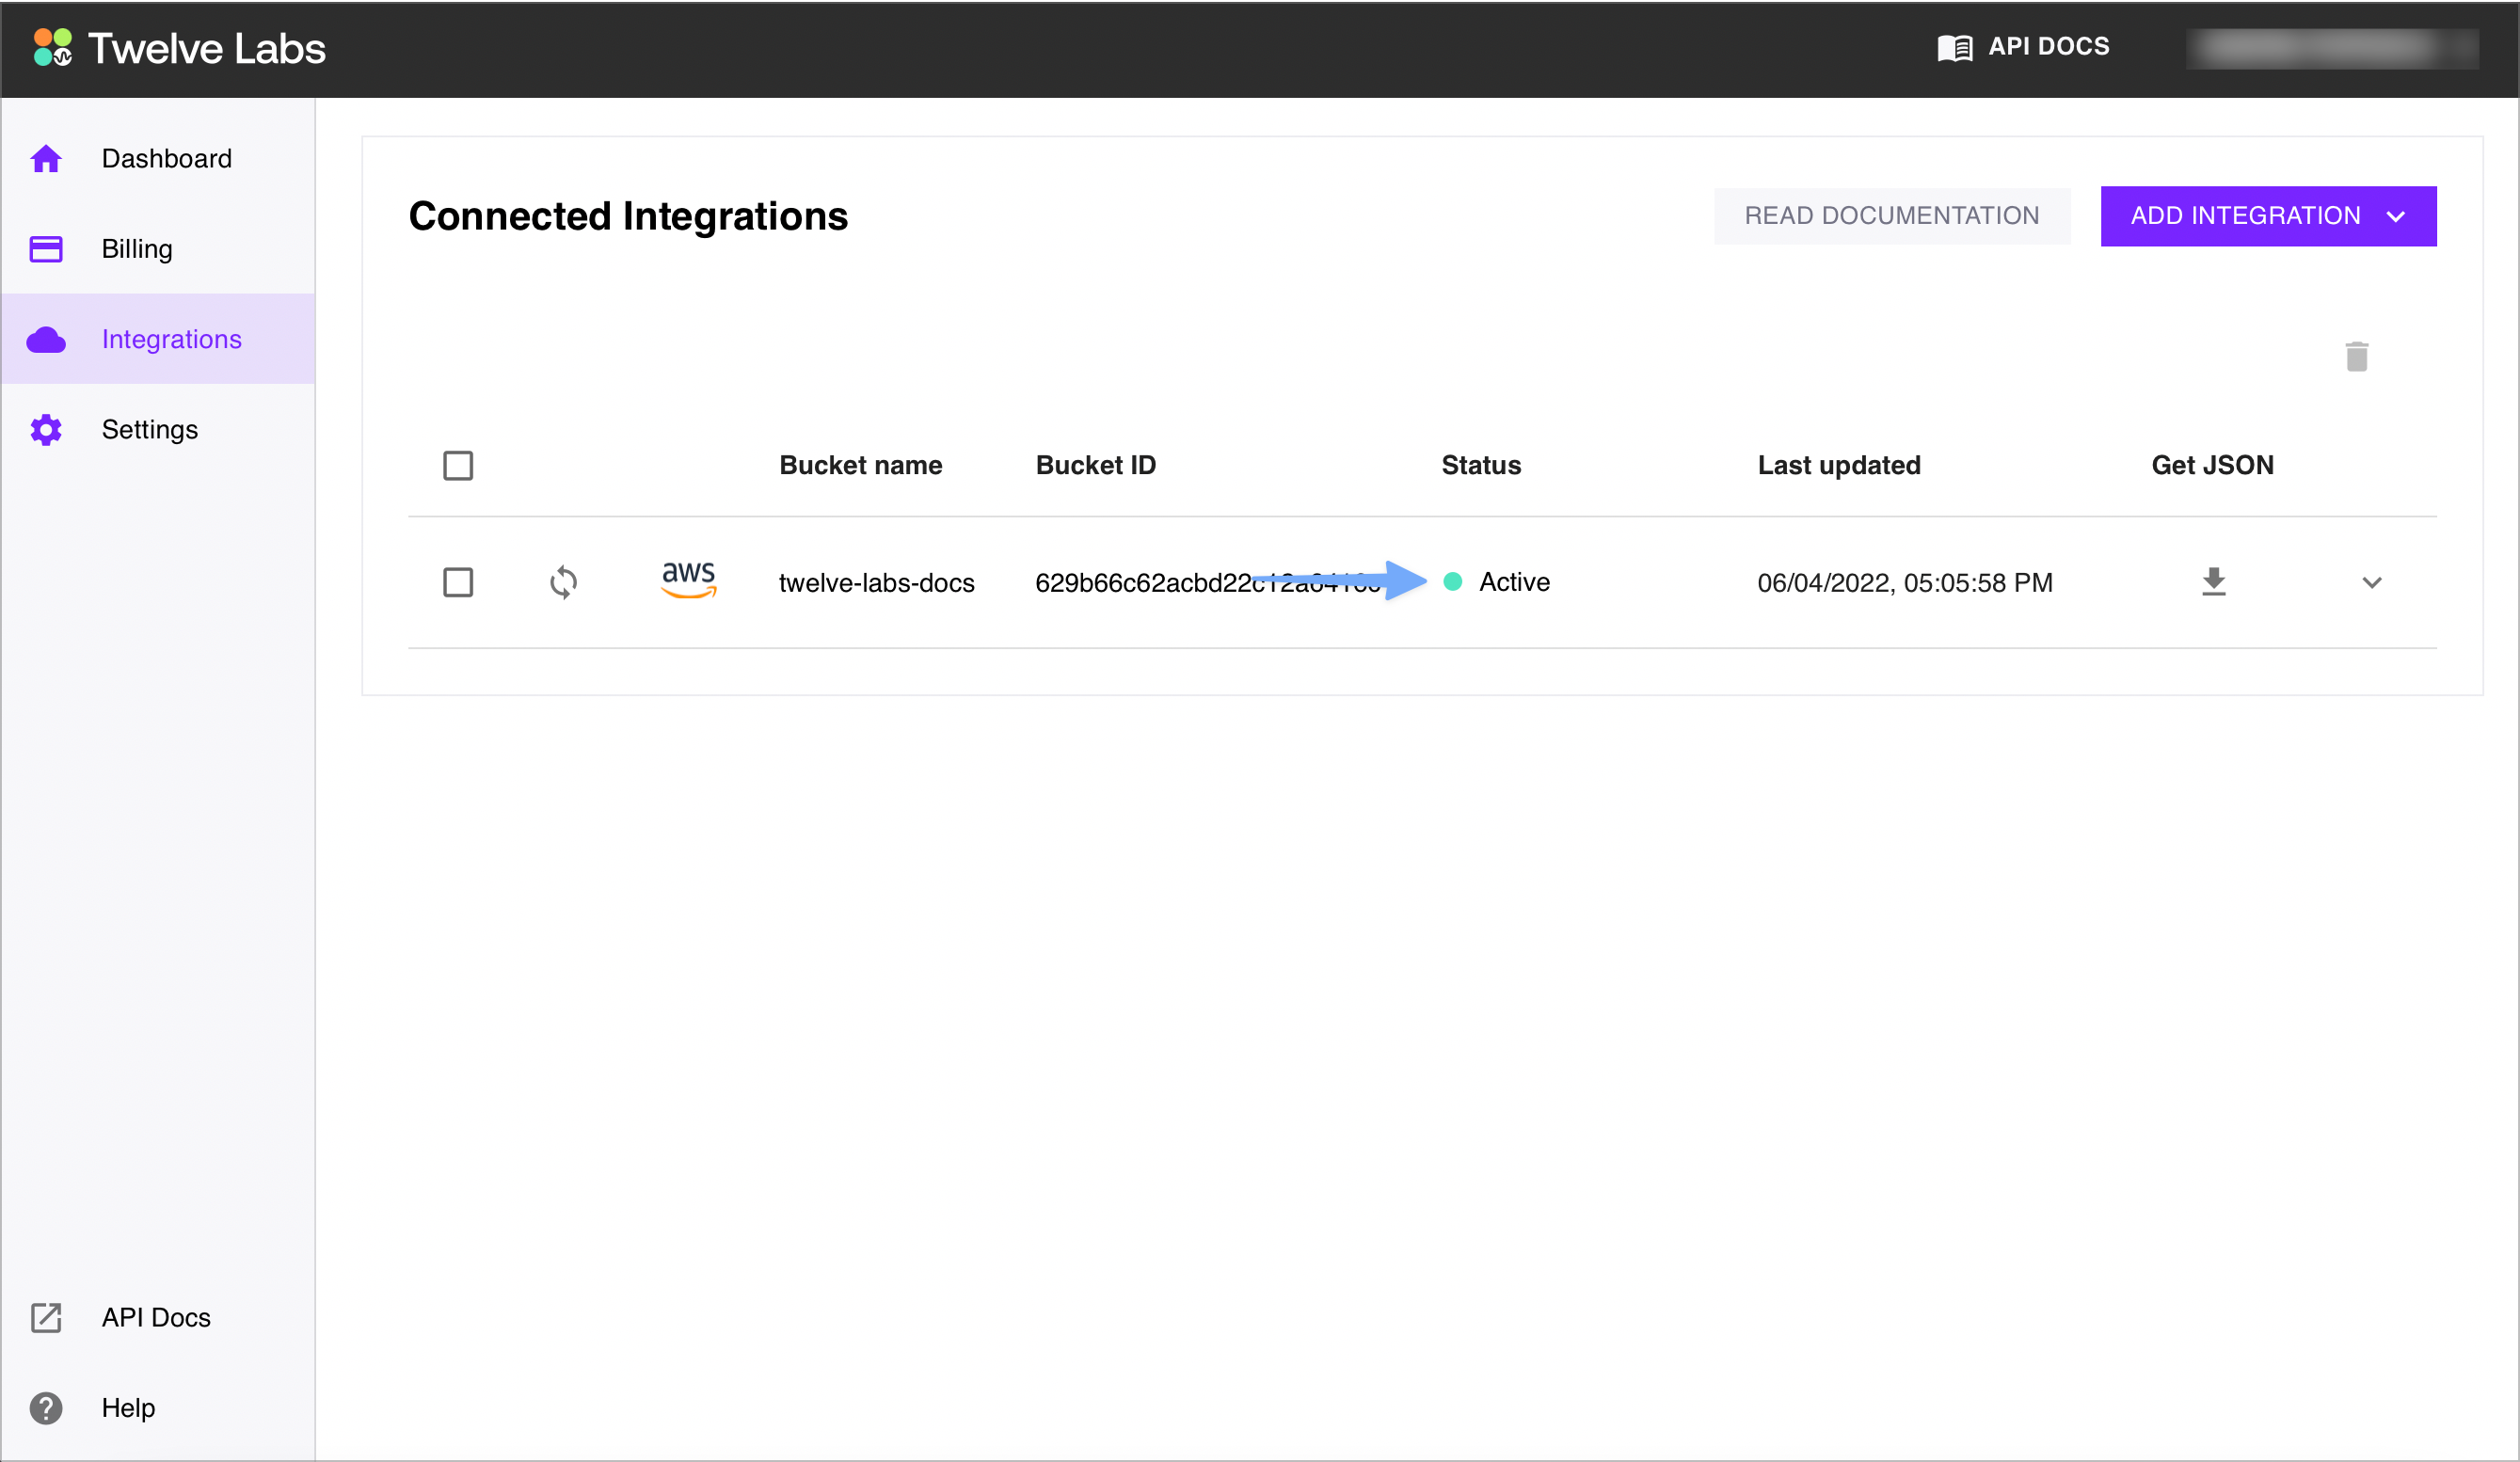
When the status of your integration shows as Active, it means that the API service can access the videos in your S3 bucket. If the status does not show as Active, review the steps in this section, making sure all the information you entered is correct.
2. Download and edit the list of videos
The Integrations page allows you to download the list of files in your AWS S3 bucket as a JSON. The structure of the JSON file is described on the Tasks/Transfers page. Once you've downloaded the JSON file, you can edit the fields in a plain text editor. For example, you can add transcription files or remove the files you don't want to upload and index.
Prerequisites
- Before you can download the list of files in your AWS S3 bucket, you must set up an integration.
.
Procedure
-
Go to the Dashboard page, and select Integrations:
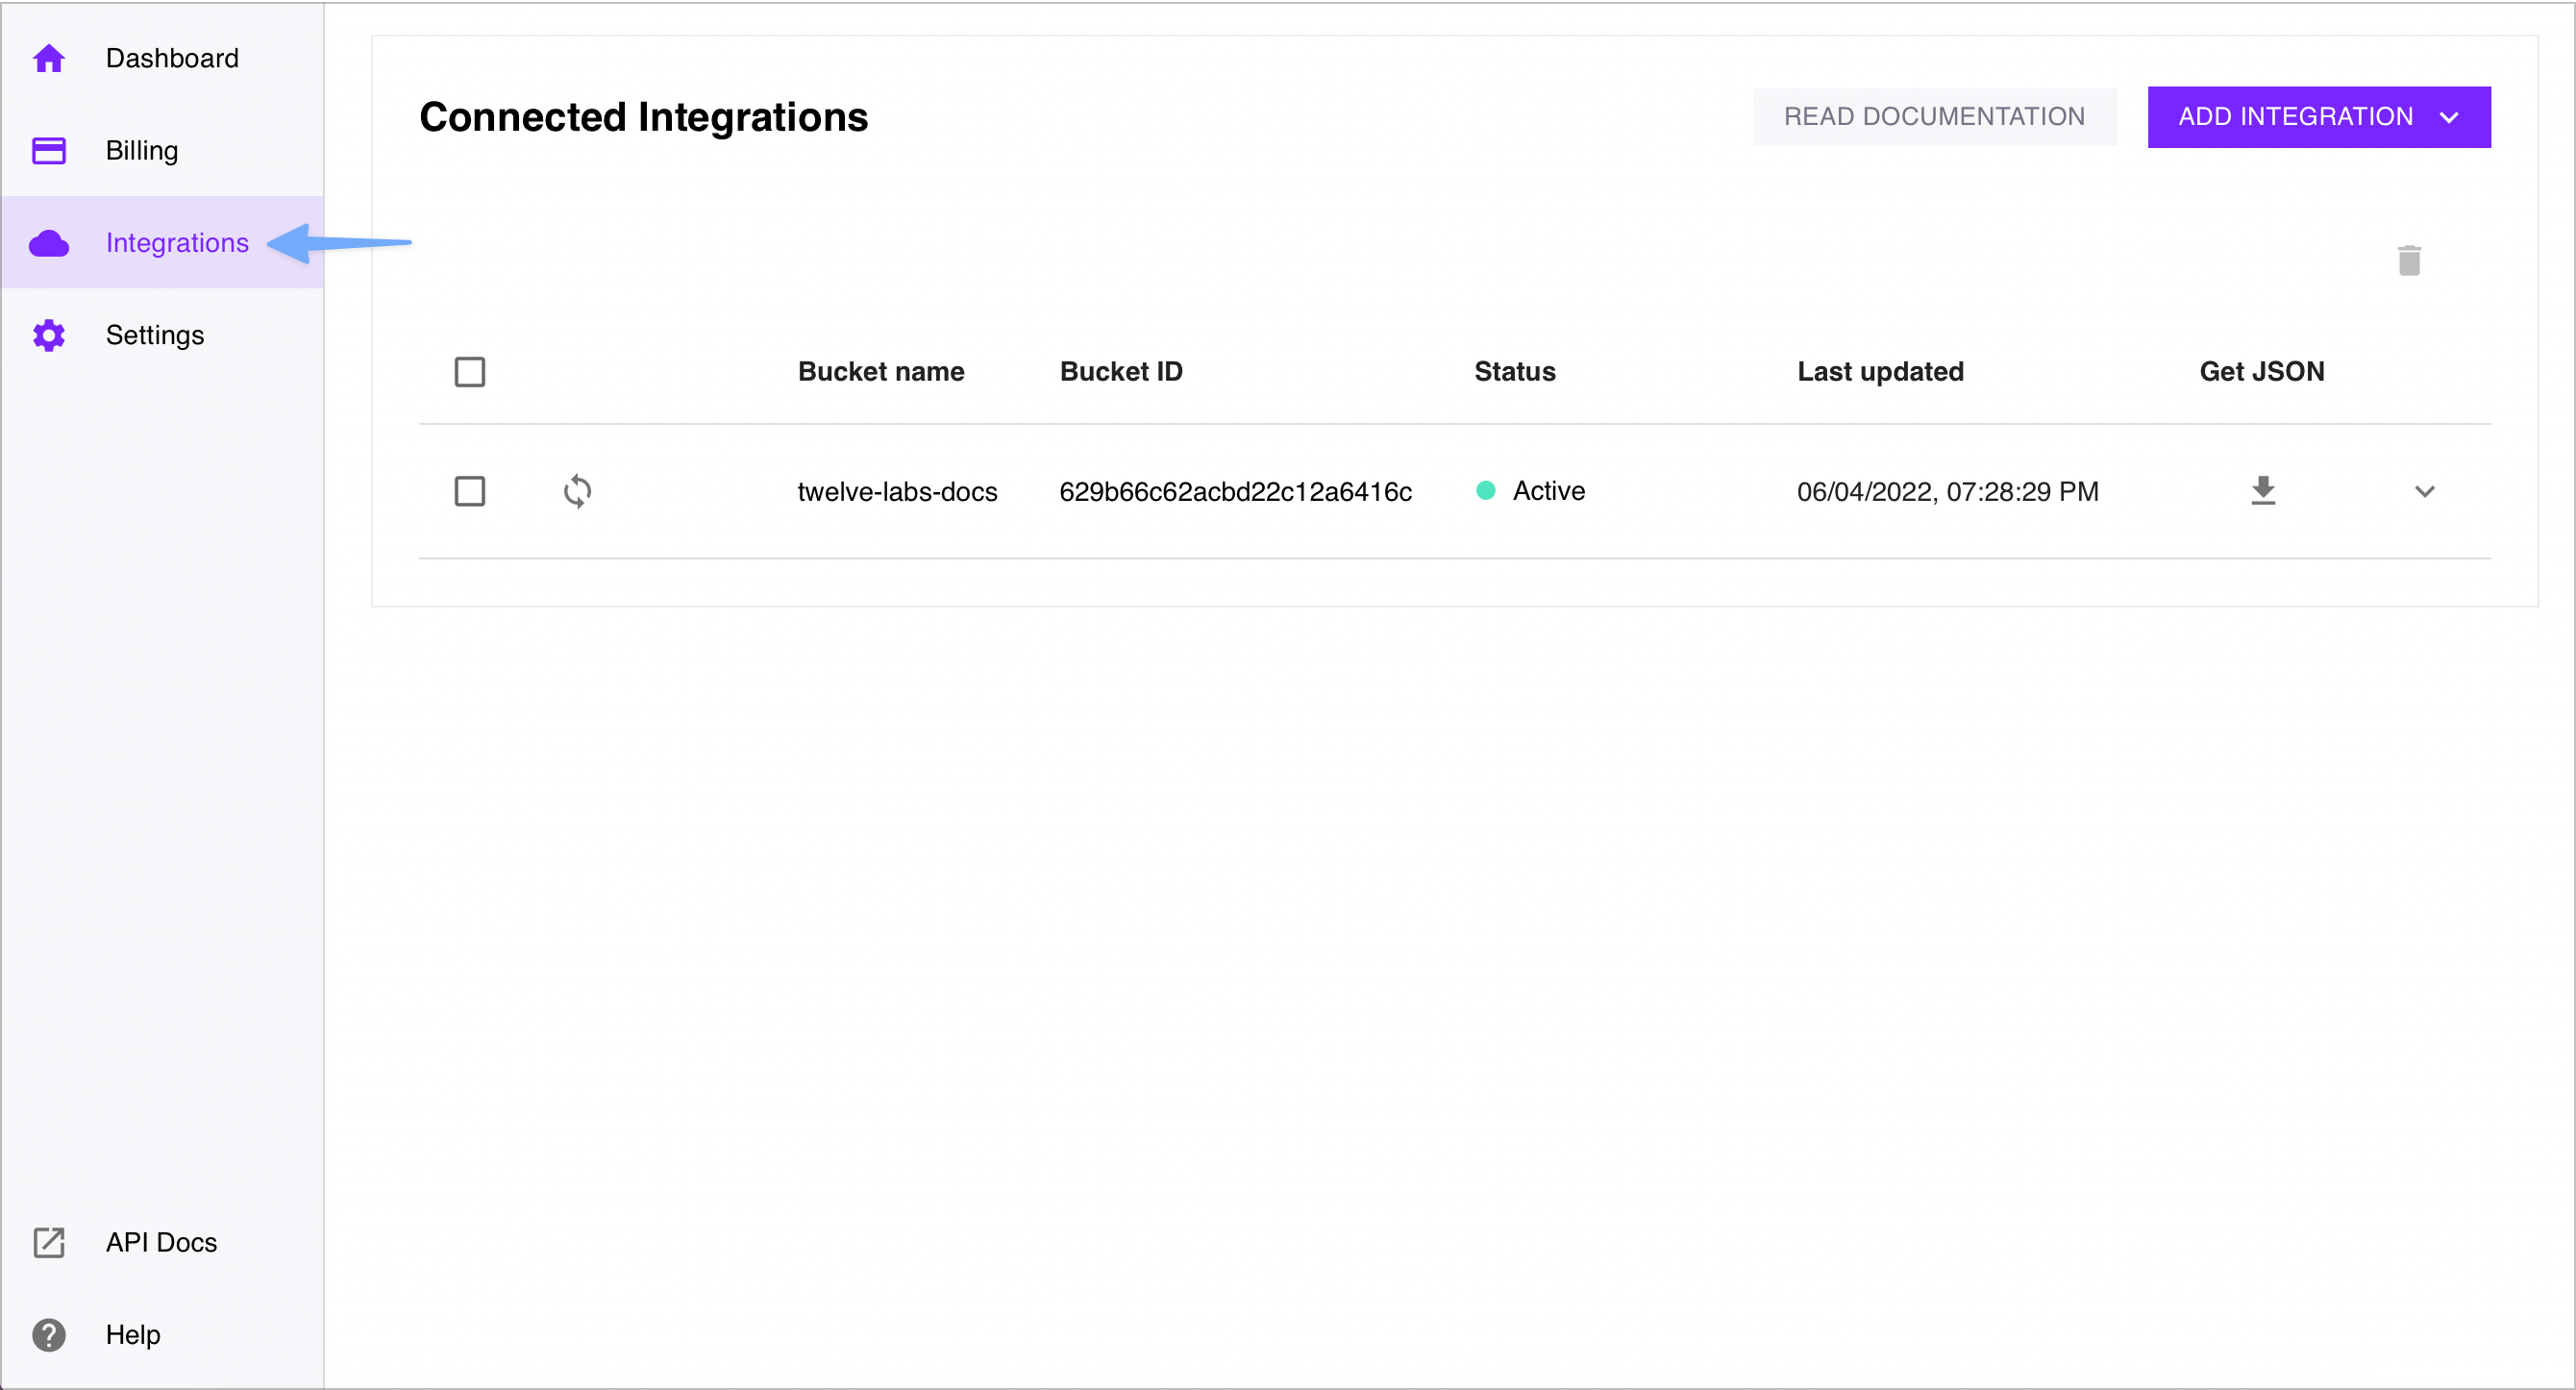
-
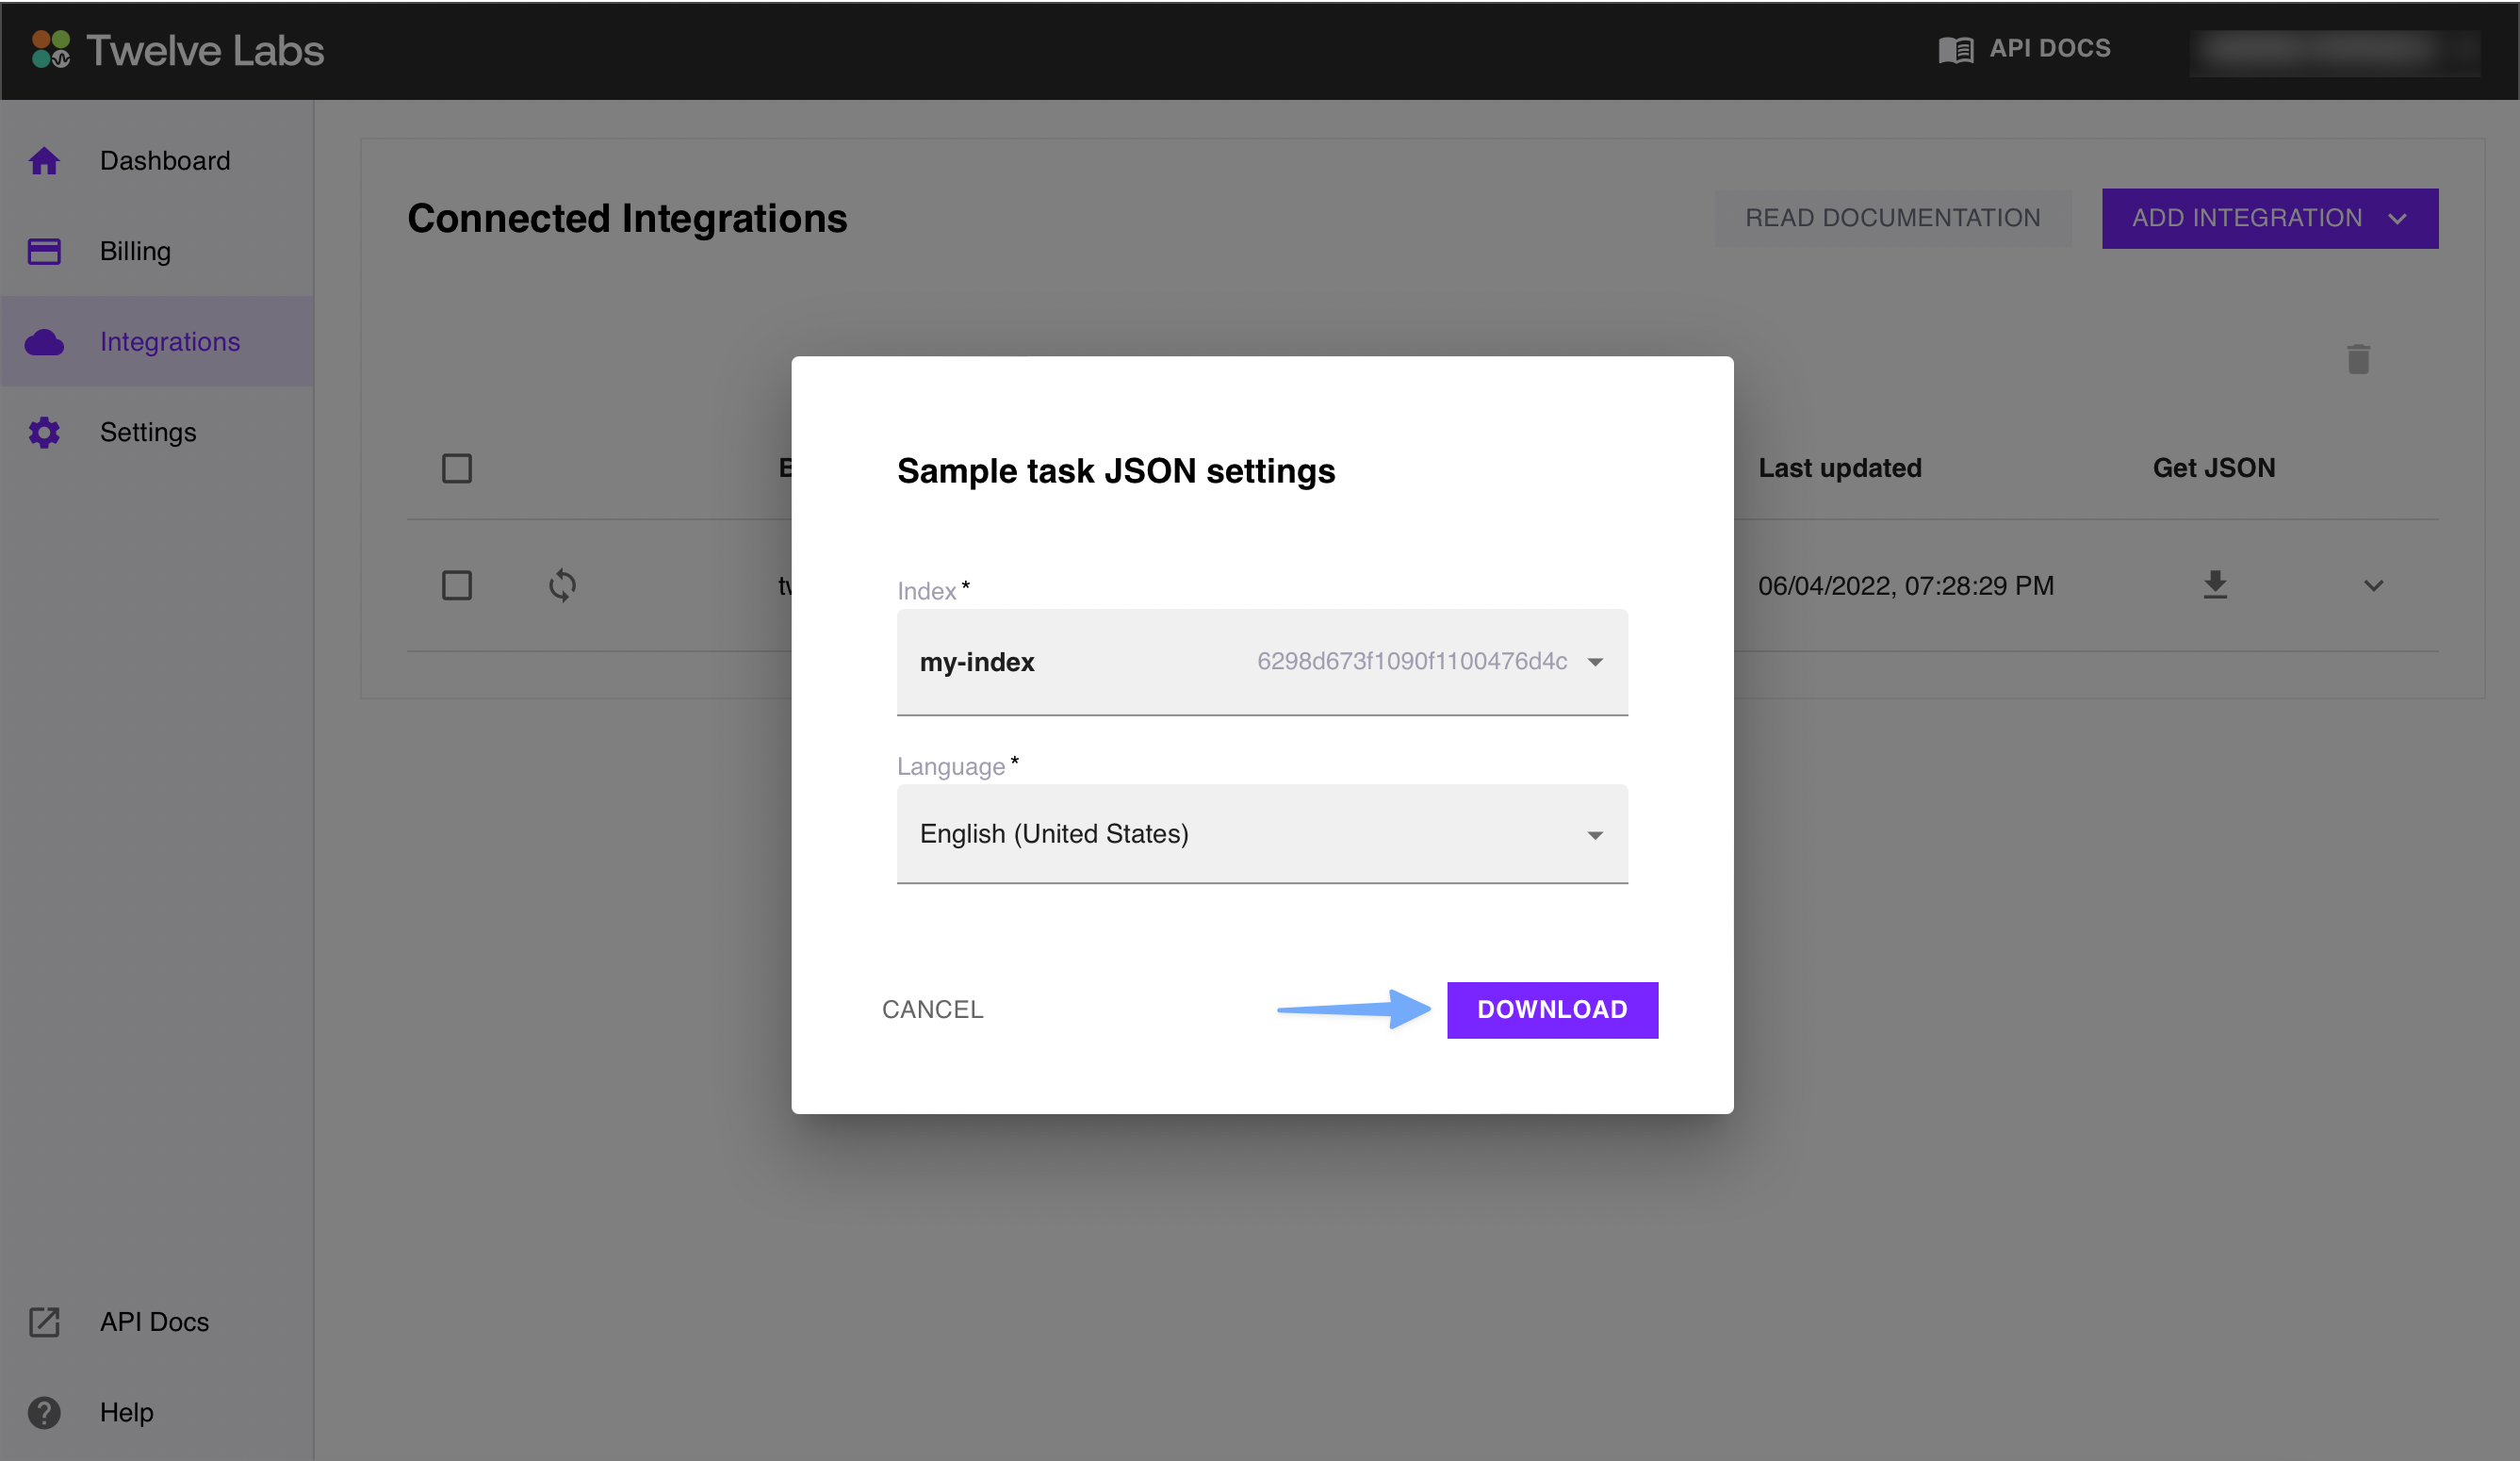
Choose an integration, making sure that the status shows as Active. Then, to download the list of files, select the Get JSON button:
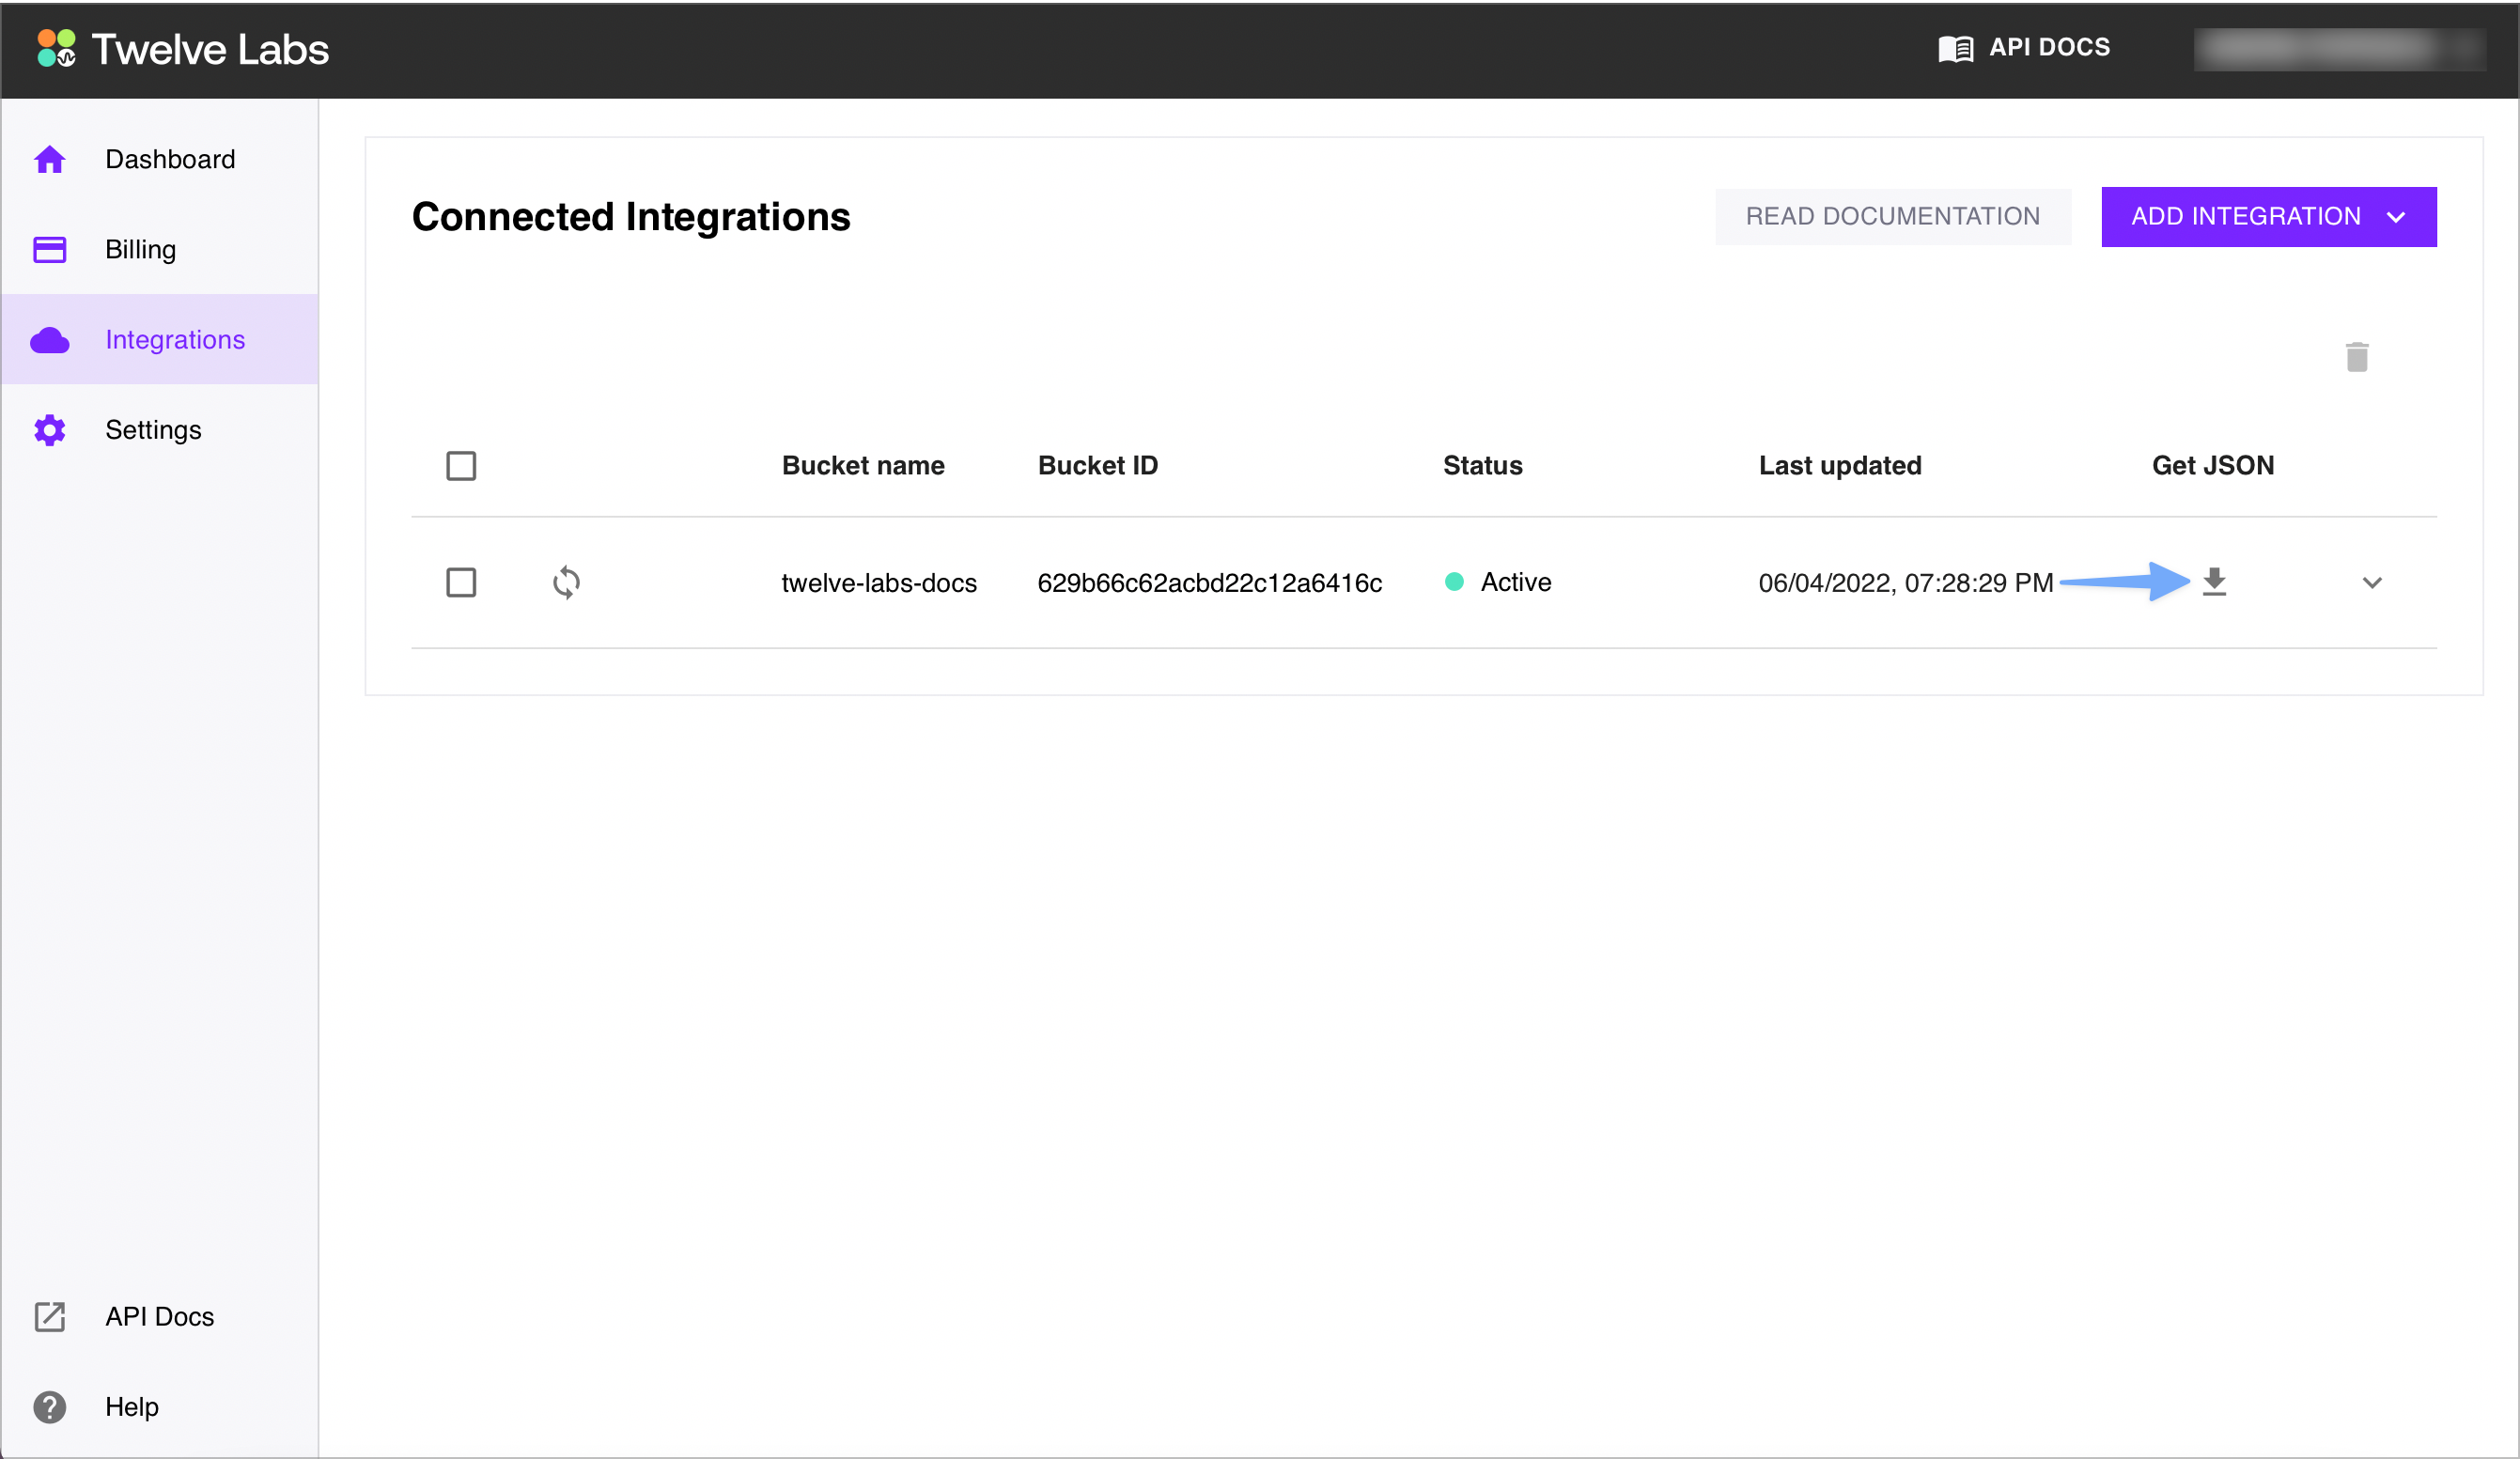
-
From the Index dropdown, choose an index to which you want to associate the videos and select the Download button. The following example screenshot specifies an index named
my-index:
-
(Optional) You can edit your JSON file in a plain-text editor. For example, you can provide your custom transcription files, as shown in the following example:
[
  {
    "index_id": "6298d673f1090f1100476d4c",
    "language": "en",
    "object": "s3://twelve-labs-docs/01.mp4",
    "transcription": "s3://twelve-labs-docs/01.srt"
  },
  {
    "index_id": "6298d673f1090f1100476d4c",
    "language": "en",
    "object": "s3://twelve-labs-docs/02.mp4",
    "transcription": "s3://twelve-labs-docs/02.srt"
  }
]
3. Transfer and index videos
This guide shows how to transfer the files from your AWS S3 bucket to Twelve Labs and index them.
Note
The API service checks for duplicate files using hashes and will not upload the same video to the same index twice.
Prerequisites
- You already downloaded the list of files in your AWS S3 bucket.
- Your videos must meet the following requirements:
- Video resolution: must be greater than or equal to 360p and less than or equal to 1080p (FHD).
- File size: must not exceed 2 GB.
- Duration: must be between 10 seconds and 2 hours (7,200s).
If you require different options, send us an email atsupport[at]twelvelabs.io.
Note
For consistent search results, Twelve Labs recommends you upload 360p videos.
Procedure
-
Declare the
/tasks/transfersendpoint:TASKS_TRANSFERS_URL = f"{API_URL}/tasks/transfers"const TASKS_TRANSFERS_URL = `${API_URL}/tasks/transfers` -
Read your JSON file. Open a stream making sure to replace the placeholders surrounded by
<>with your values:file_path = "<YOUR_FILE_PATH>" file_name = "<YOUR_FILE_NAME>" file_stream = open(file_path, "rb")const file_path = '<YOUR_FILE_PATH>' const file_stream = fs.createReadStream(file_path) -
If you're using Python, store the file to upload in an array named
file_paramand specify that you want to make amultipart/form-datarequest. If you're using Node.js, store the file to upload in a variable namedformDataof typeFormData:file_param = [ ("file", (file_name, file_stream, "multipart/form-data")), ]let formData = new FormData() formData.append('file', file_stream) -
Upload the JSON file. Call the
POSTmethod of the/tasks/transfersendpoint, store the result in a variable namedresponse, and print the status code and response:response = requests.post(TASKS_TRANSFERS_URL, headers={"x-api-key": API_KEY}, files=file_param) print (f"Status code: {response.status_code}") pprint (response.json())let config = { method: 'post', url: TASKS_TRANSFERS_URL, headers: headers, data : formData, }; resp = await axios(config) response = await resp.data console.log(`Status code: ${resp.status}`) console.log(response)
Manage integrations
Follow the steps in the sections below to view statistics, synchronize data, and remove integrations.
View statistics
You can use the dashboard to retrieve the following statistics about an S3 bucket
- The total number of items in your bucket
- The number of indexed files
- The number of files that aren't yet indexed.
You can use this information to make decisions about initiating a new indexing task.
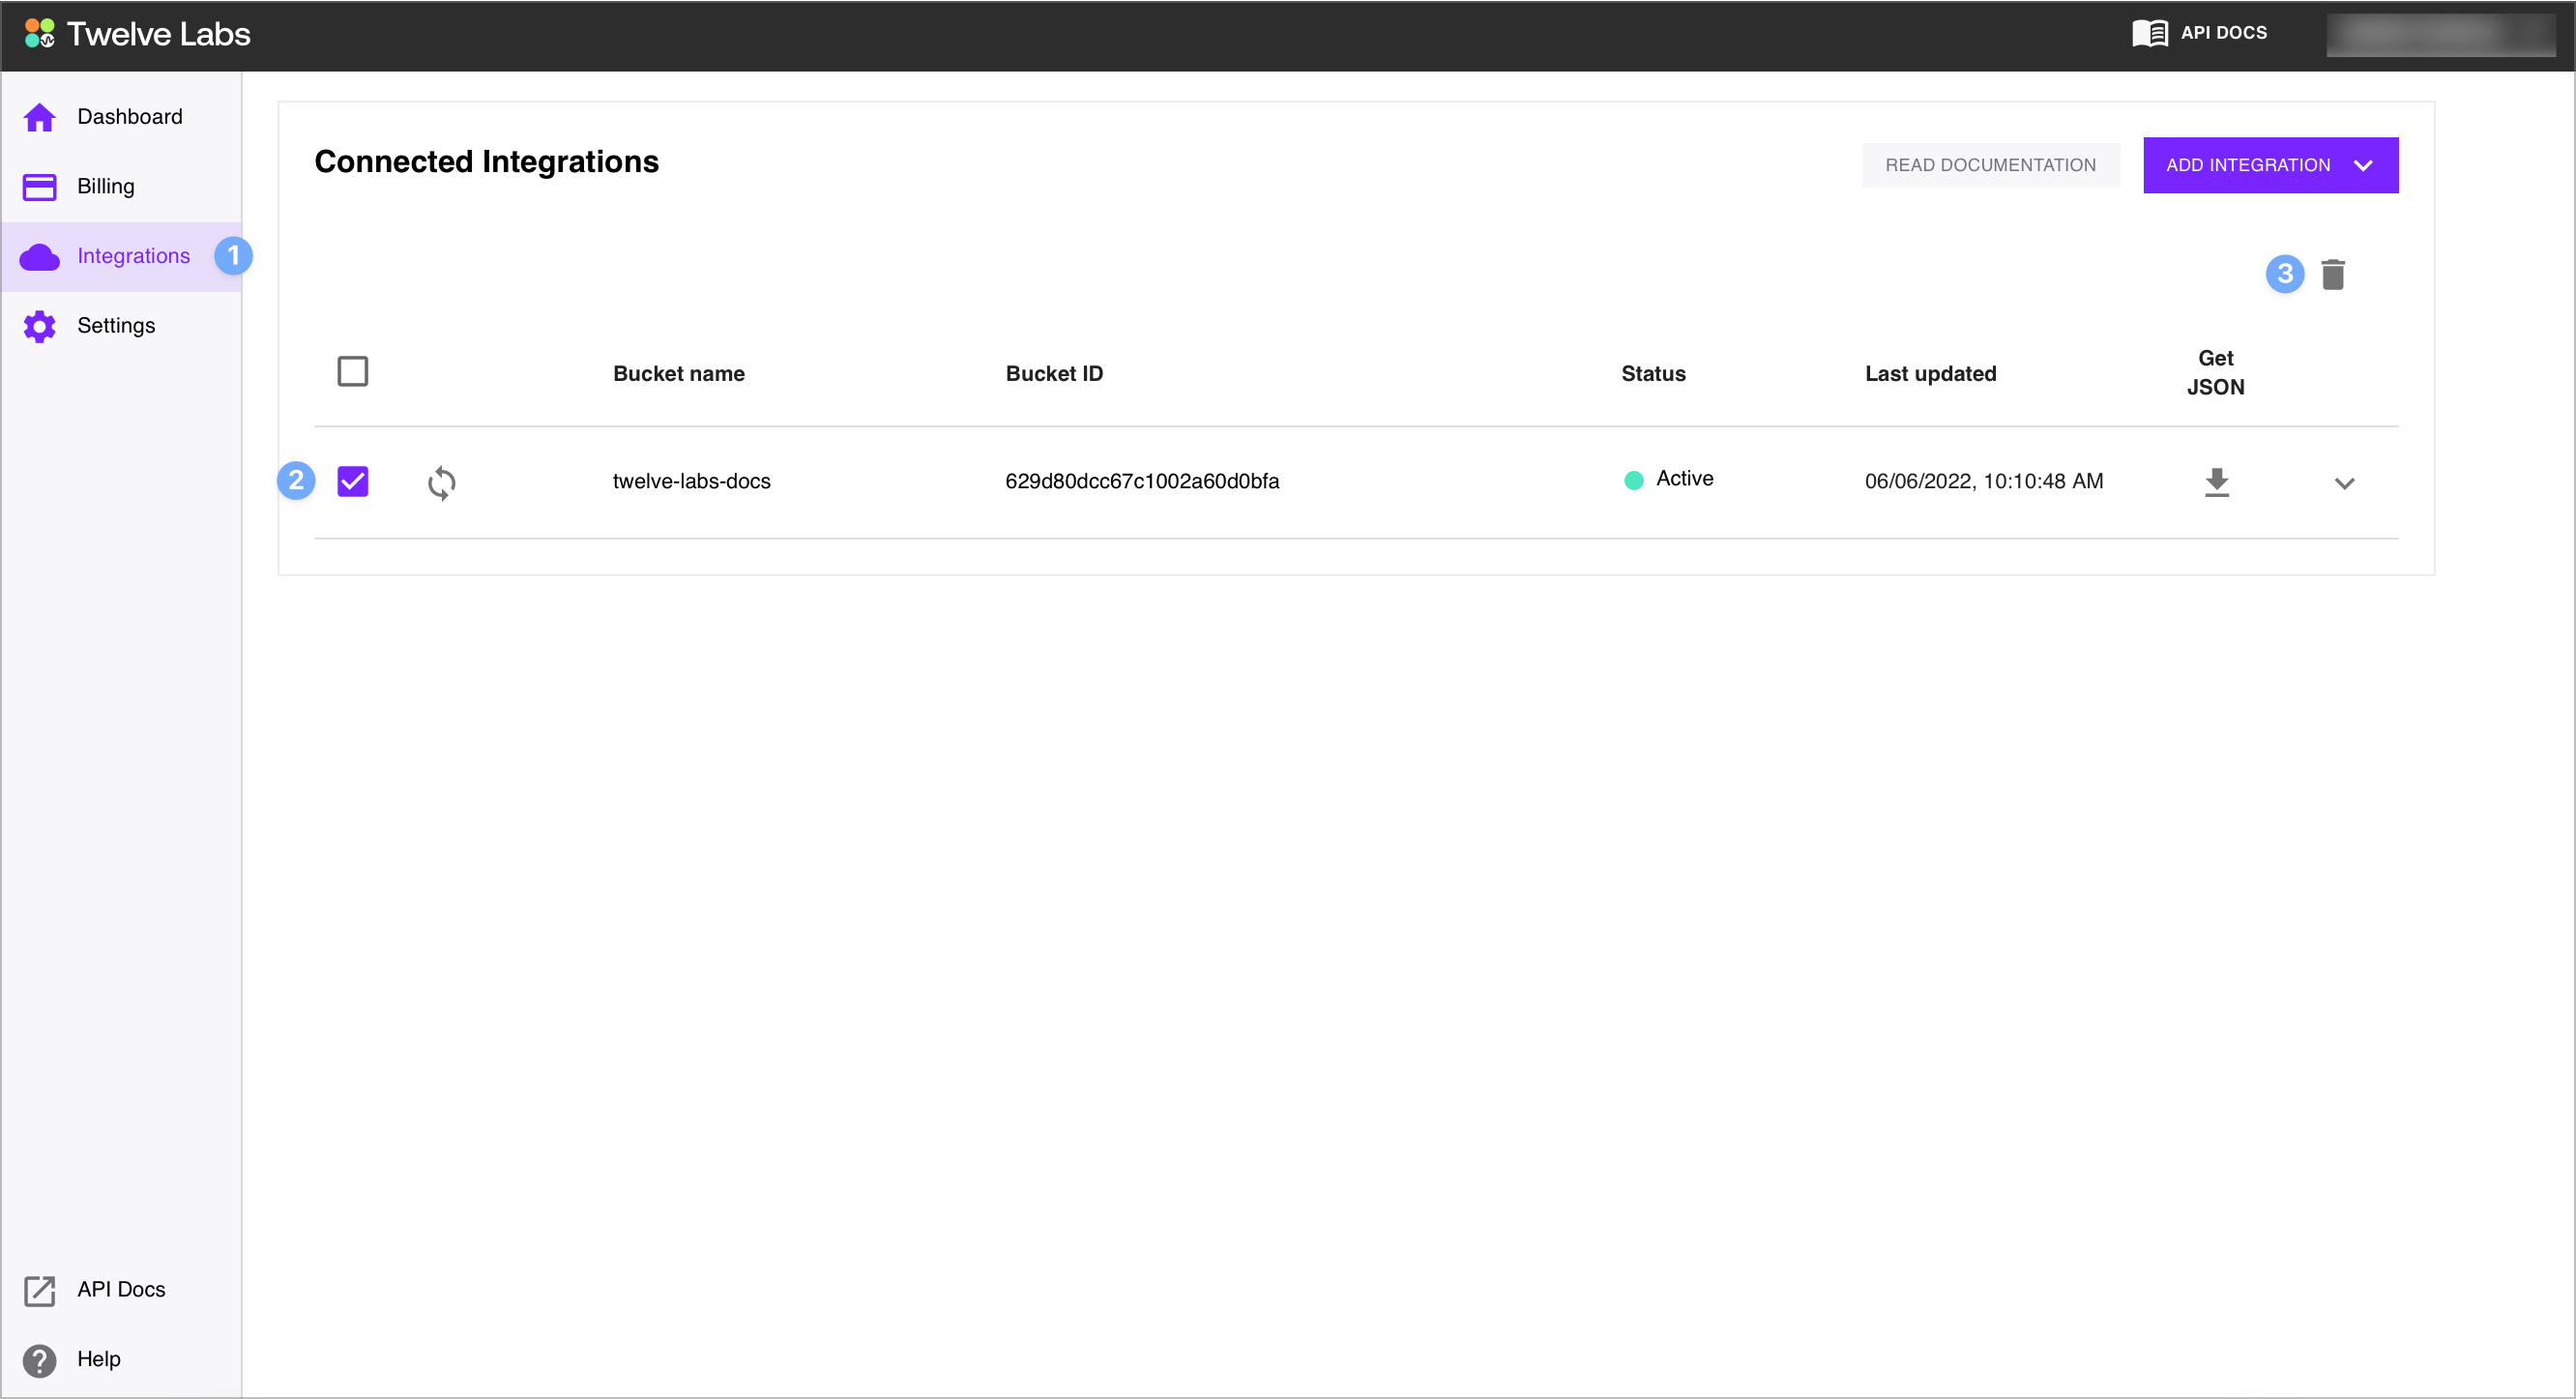
To view statistics, go to the Integrations page, choose a bucket, and select the down arrow located at the end of the row. The following example screenshot shows a bucket that contains three files:

Synchronize data
Synchronizing data refers to the process of data being propagated from your cloud storage to the API service. When adding, modifying, or removing files, the changes are not automatically propagated, and you must initiate a synchronization.
To initiate a synchronization, go to the Integrations page, choose a bucket, and select the Synchronize Data icon which is the second from the left:
![]()
Note
The API service automatically initiates a synchronization when you select the Get JSON button.
Remove an integration
When a specific integration is no longer needed, you can remove it.
To remove one or more integrations, go to the Integrations page and select the checkbox at the left of the row for all integrations you want to delete. Then, select the Remove icon:
Updated over 1 year ago