(Deprecated) Cloud-to-cloud integrations
Note
The cloud-to-cloud integrations feature will be deprecated on October 31, 2025. You can use the POST method of the /tasks endpoint to upload files instead. Refer to the Release notes page for the necessary migration steps.
Cloud-to-cloud integrations require a paid plan. If you’re on the Free plan, you can find information on upgrading your plan in the Upgrade your plan section.
Cloud-to-cloud integrations allow you to upload multiple videos in a single API call. This feature is currently supported for the us-west-2 region of AWS S3. If your data is in other regions or with other cloud providers, contact us at sales@twelvelabs.io.
Note the following about cloud-to-cloud integrations:
- The import process is asynchronous. Your videos will be uploaded and indexed after you initiate an import.
- You can perform downstream tasks on your videos only after the platform has finished uploading and indexing them.
- Only one import job can run at a time. To start a new import, wait for the current job to complete. Use the
GETmethod of the/tasks/transfers/import/{integration-id}/logsendpoint to retrieve a list of your import jobs, including their creation time, completion time, and processing status for each video file.
The steps for importing videos are as follows:
Set up an integration
Setting up an integration grants TwelveLabs access to read files in your S3 bucket. The platform assigns a unique identifier to each integration. Before you can use this feature, you must set up an integration by following the steps in this section.
Prerequisites
Ensure the following prerequisites are met:
- Your bucket must be in the
us-west-2region. - You have the following information on hand:
- Your AWS account ID. For instructions, see the Finding Your AWS Account ID section of the AWS documentation.
- The name of your bucket.
Procedure
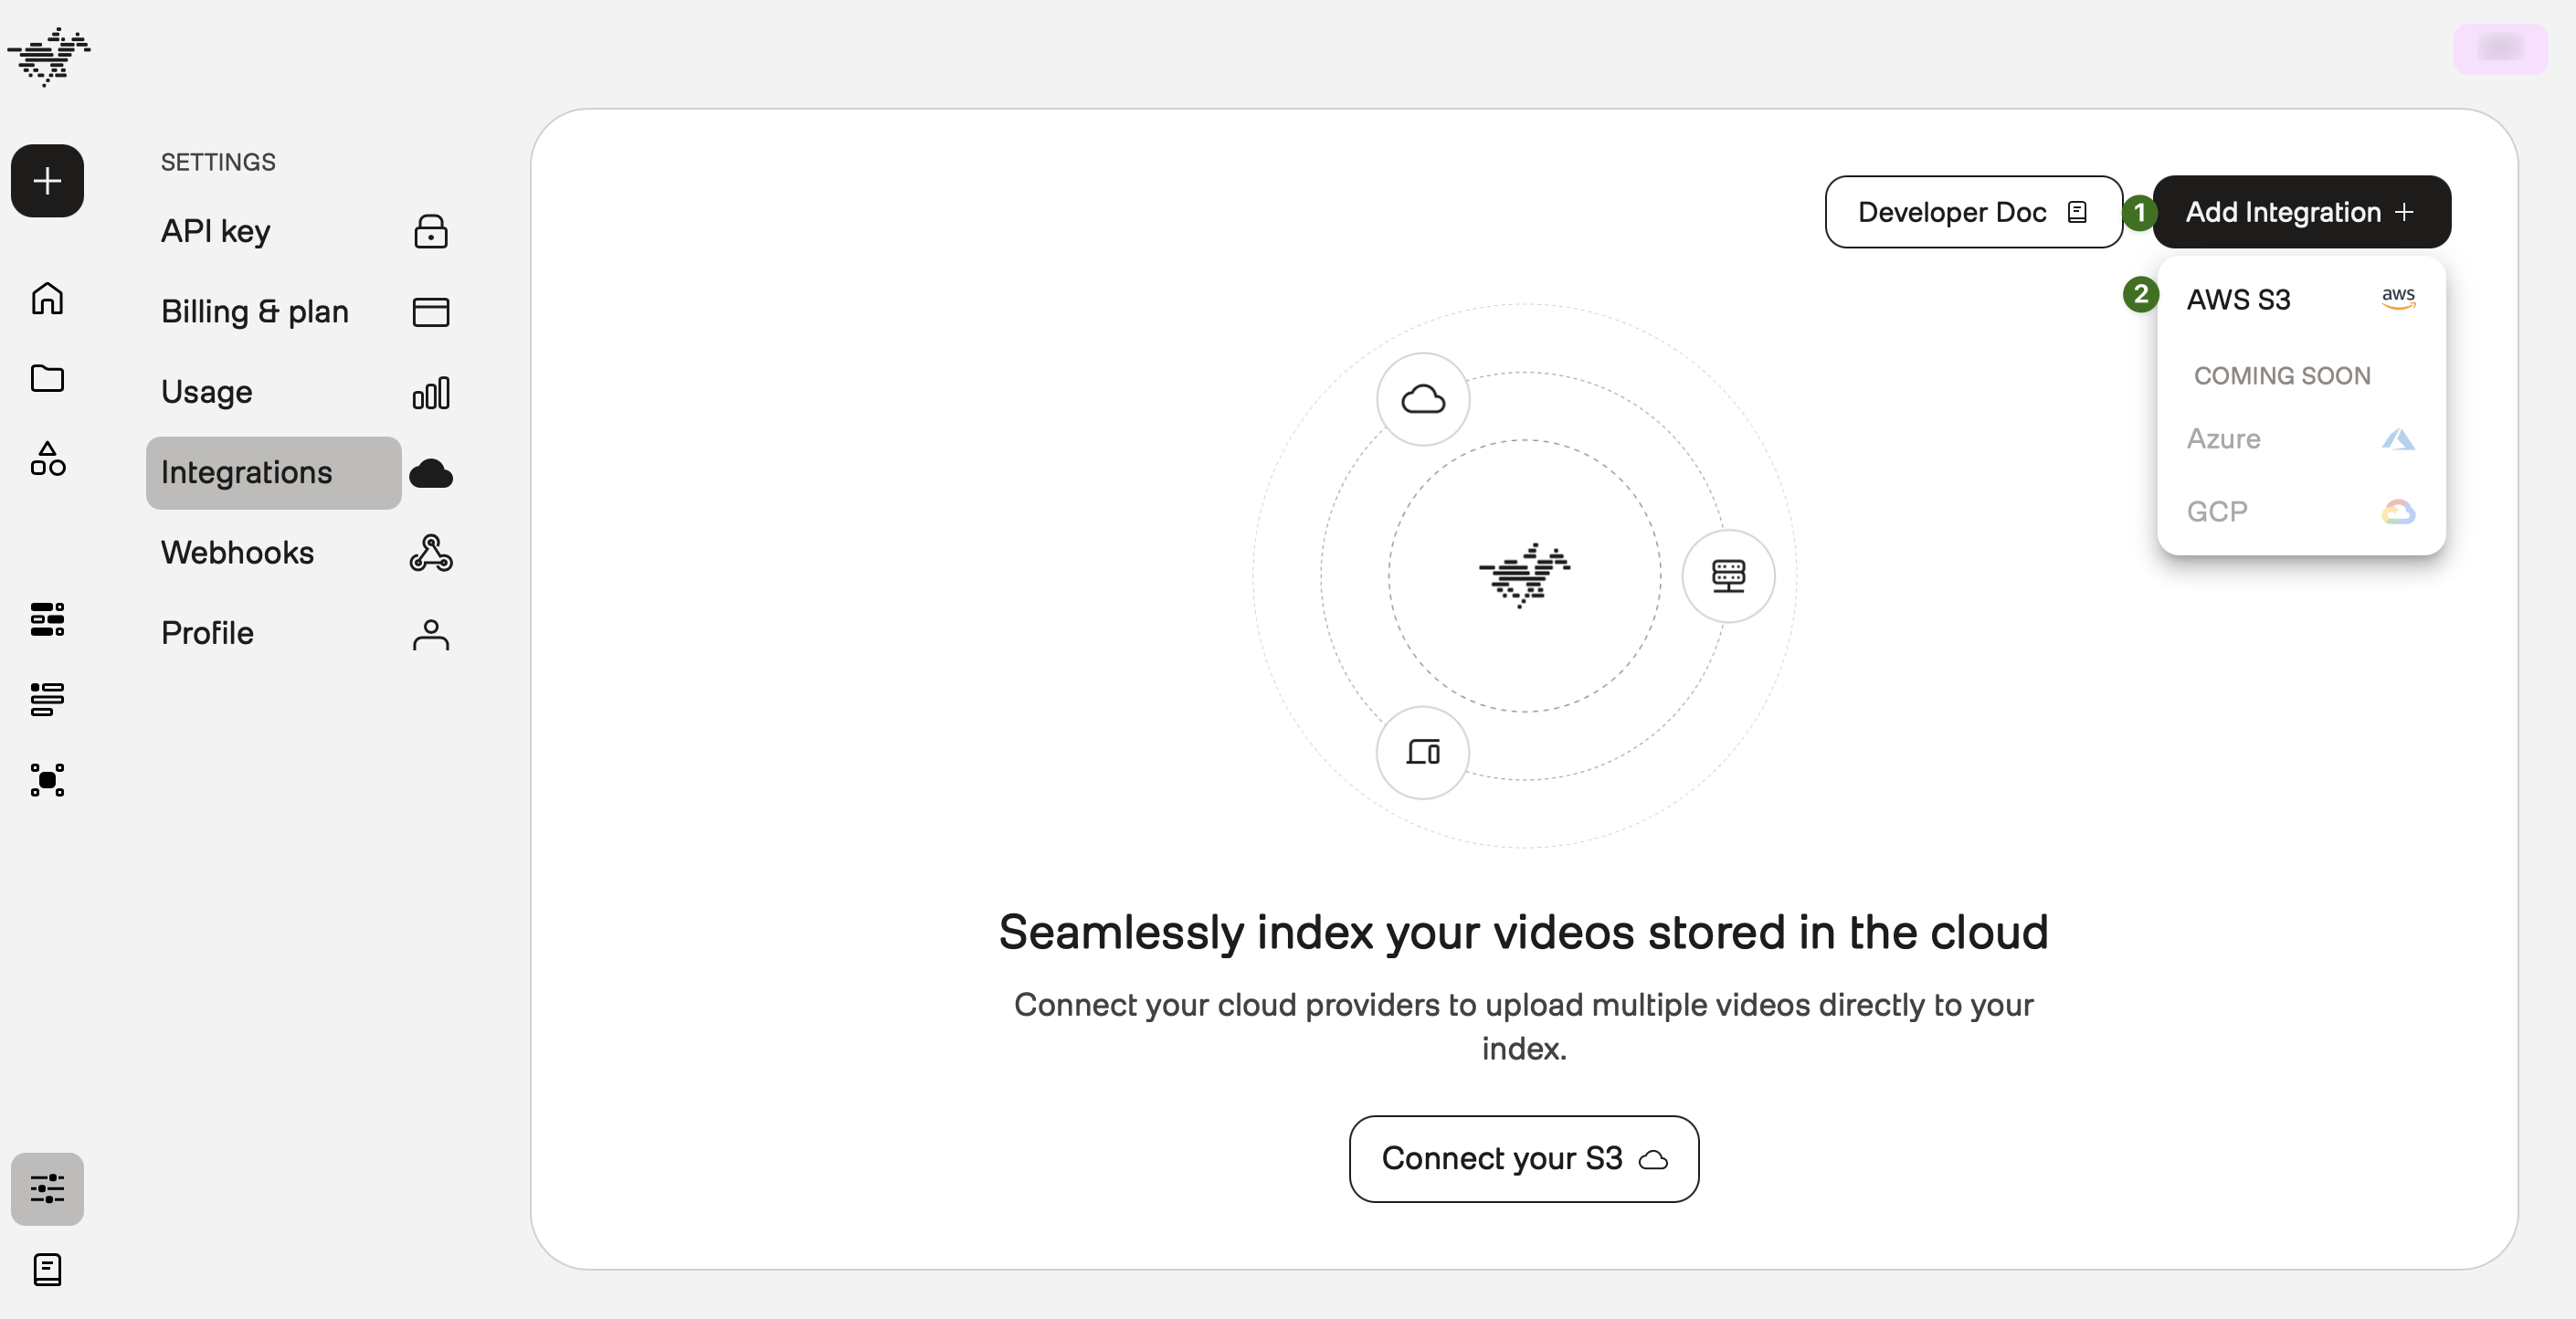
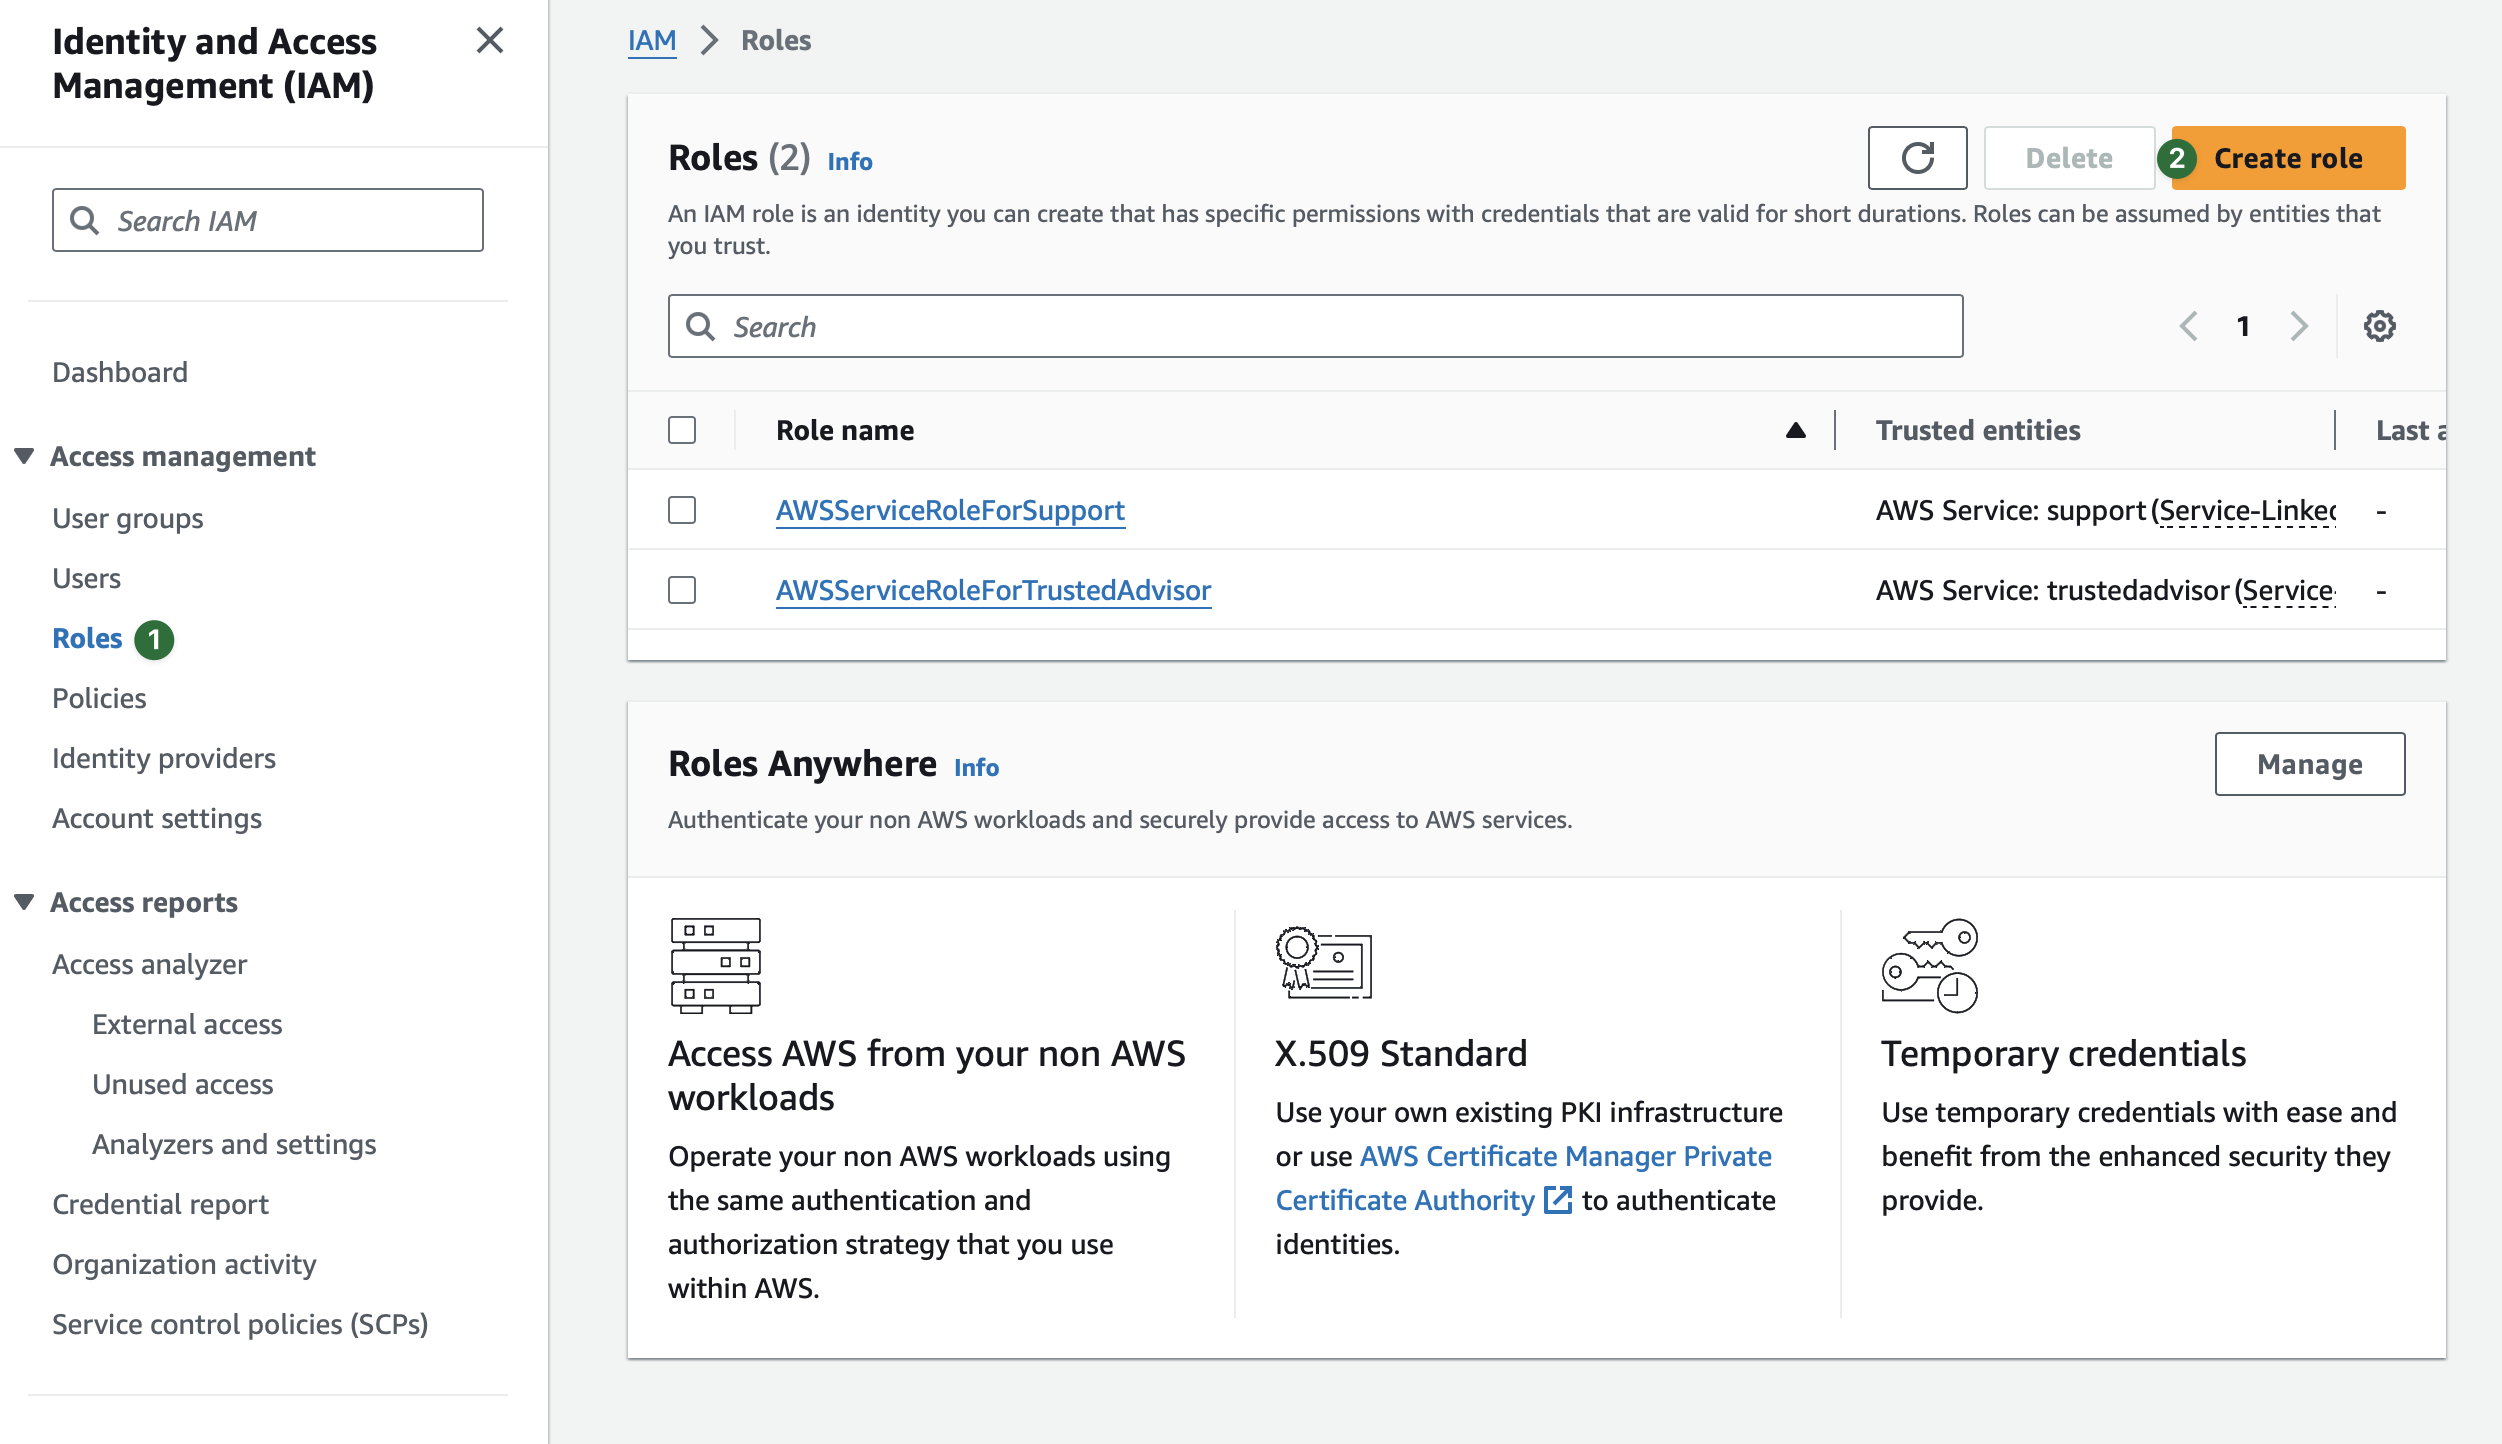
Go to the Integrations page.
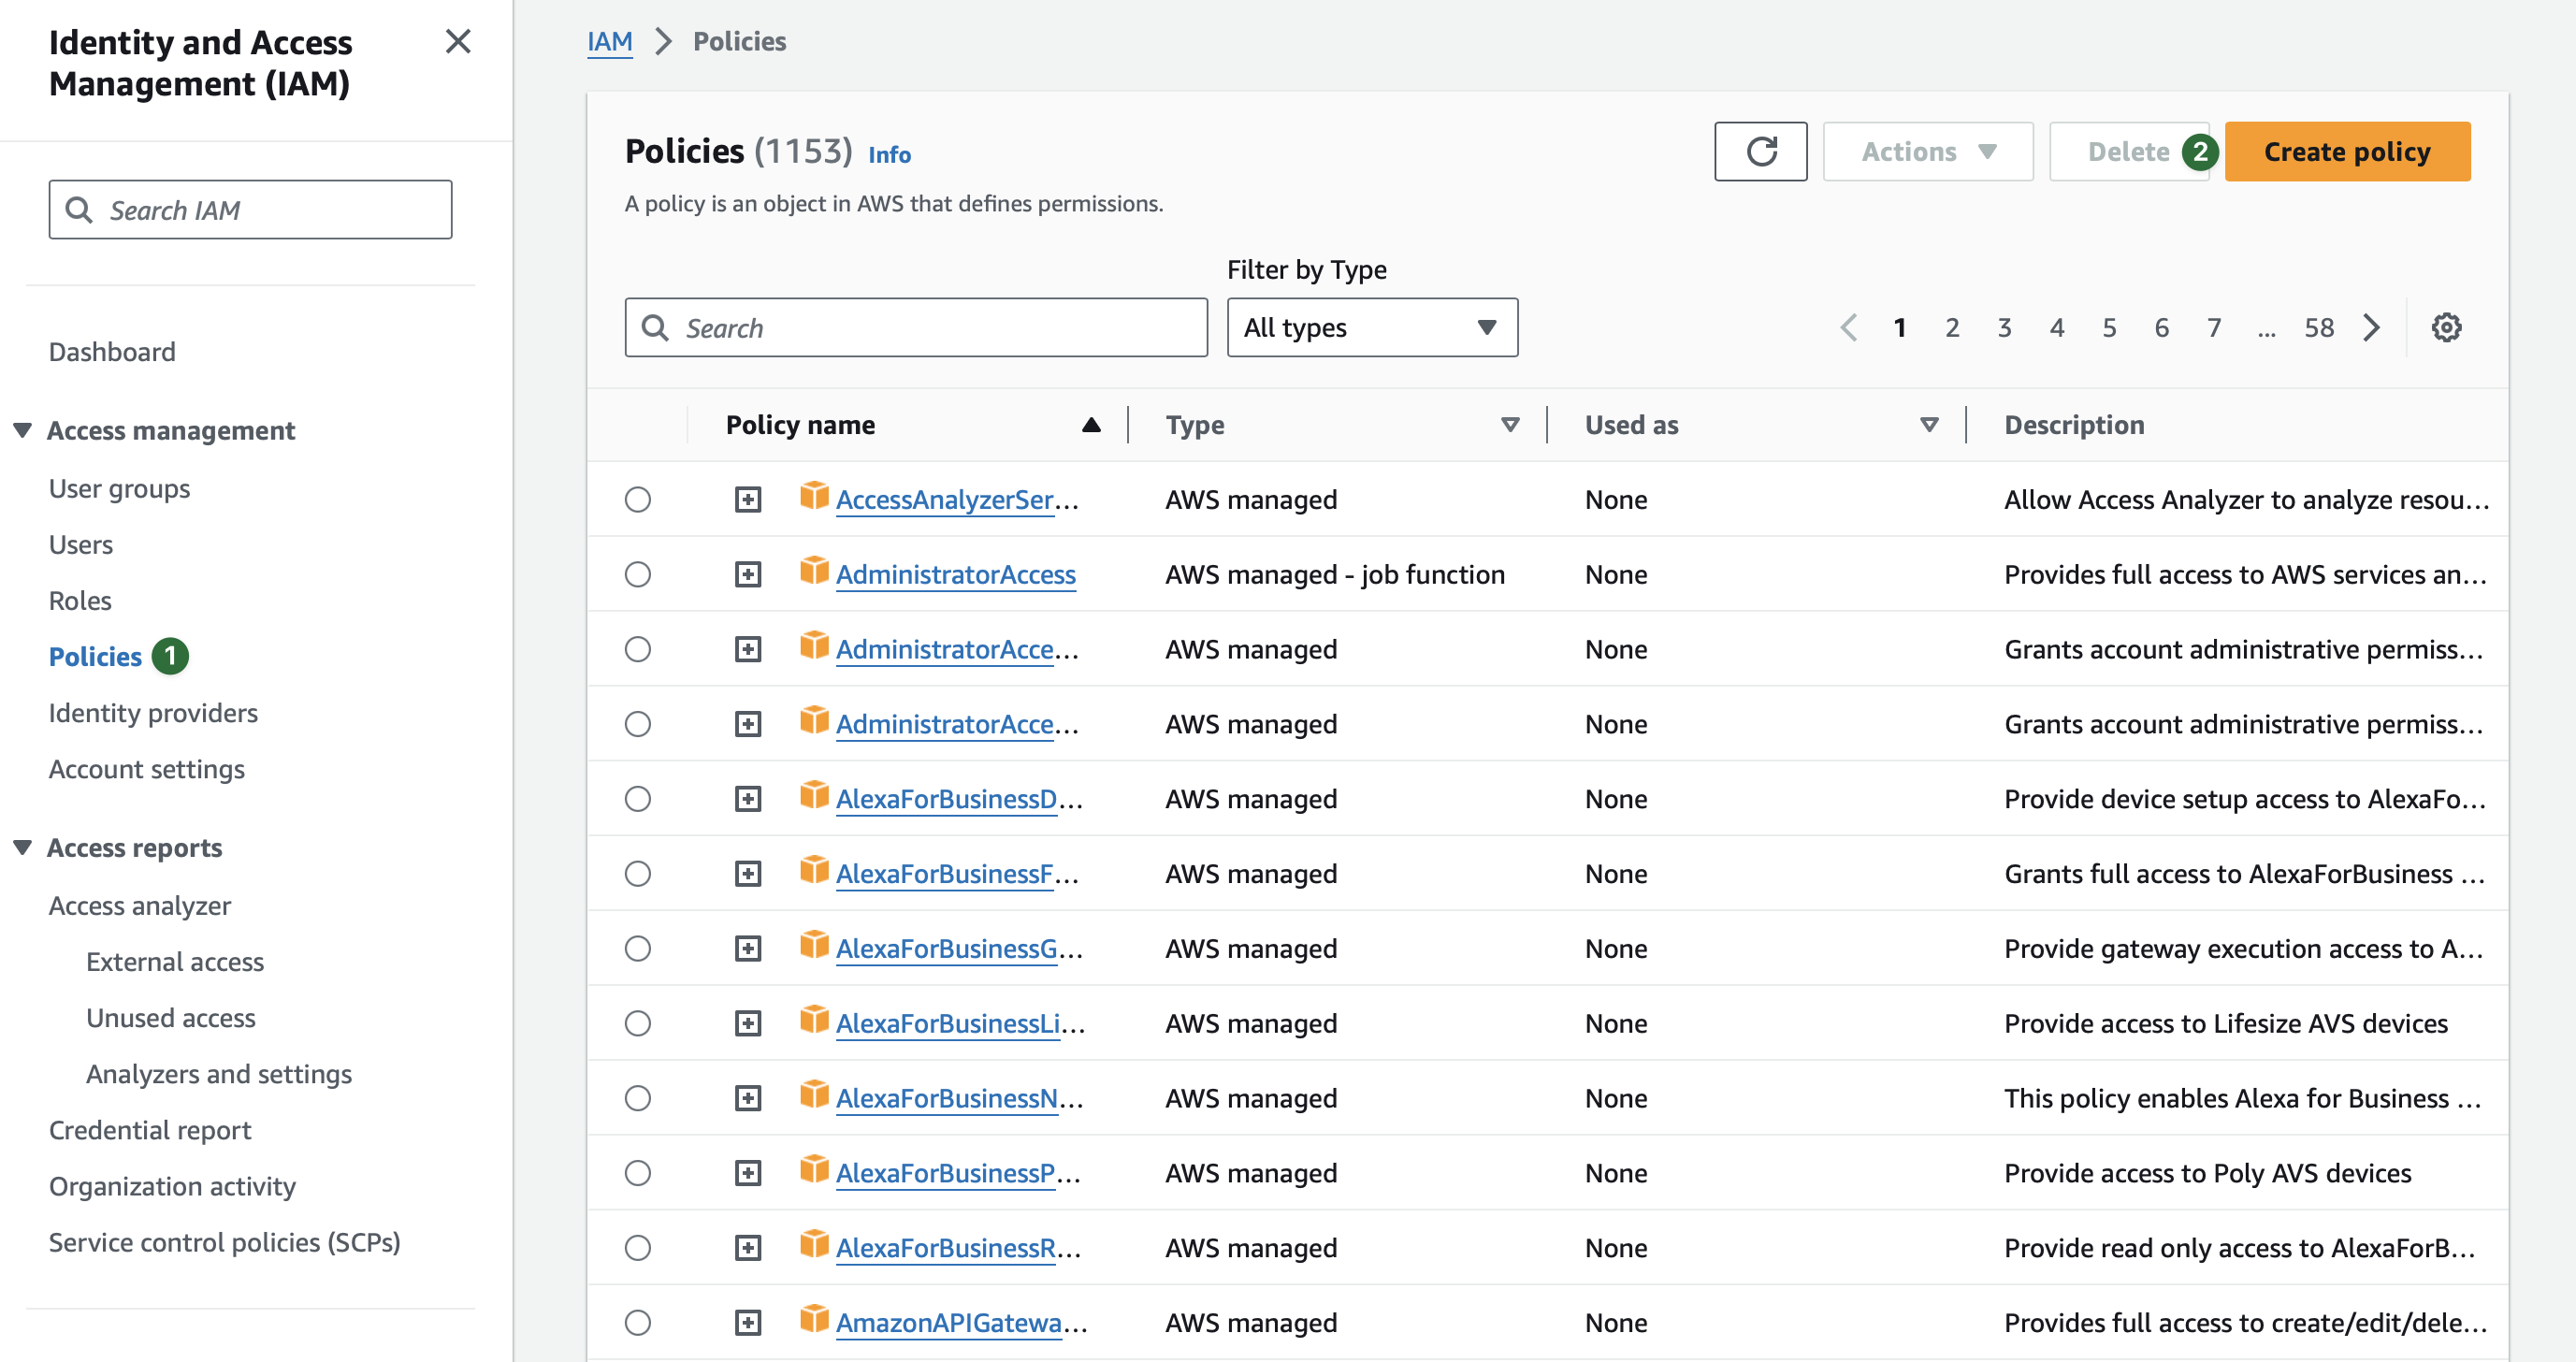
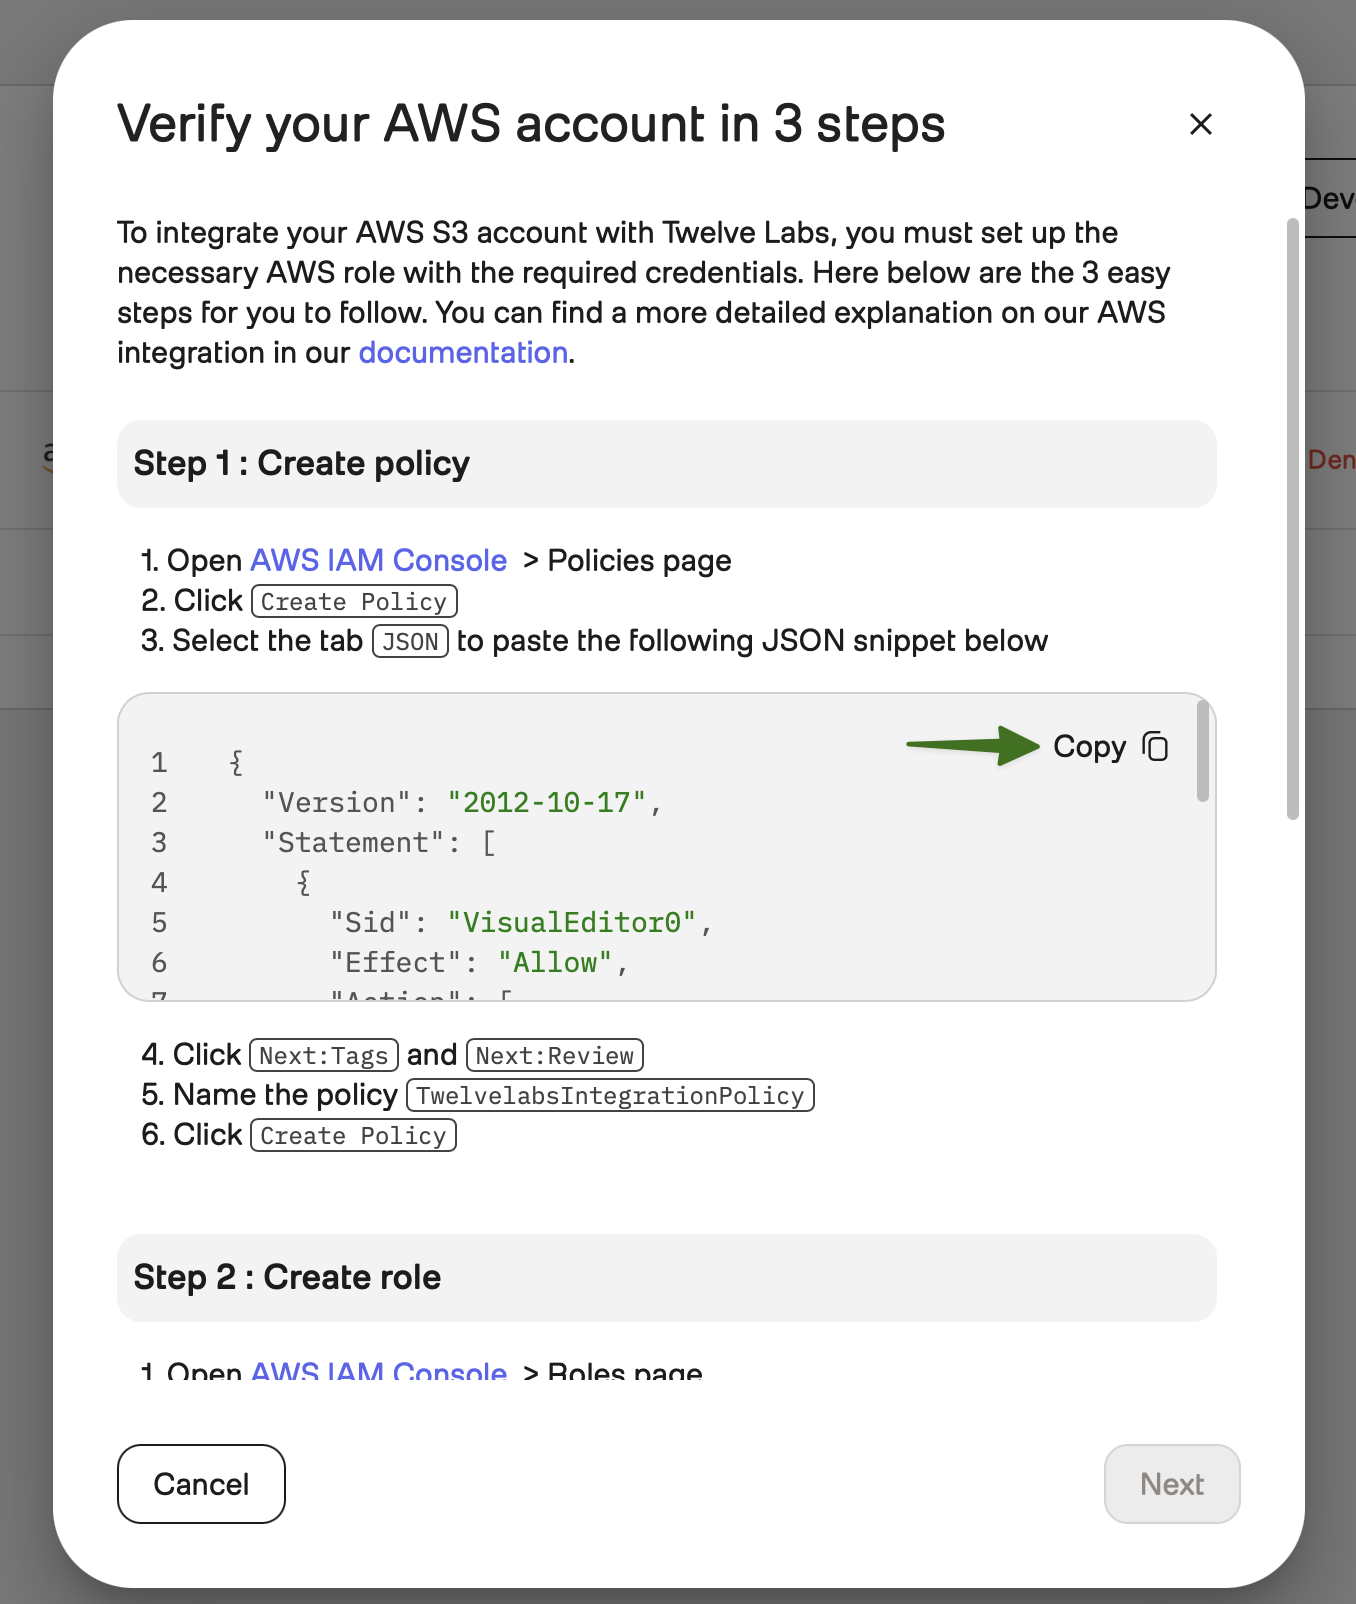
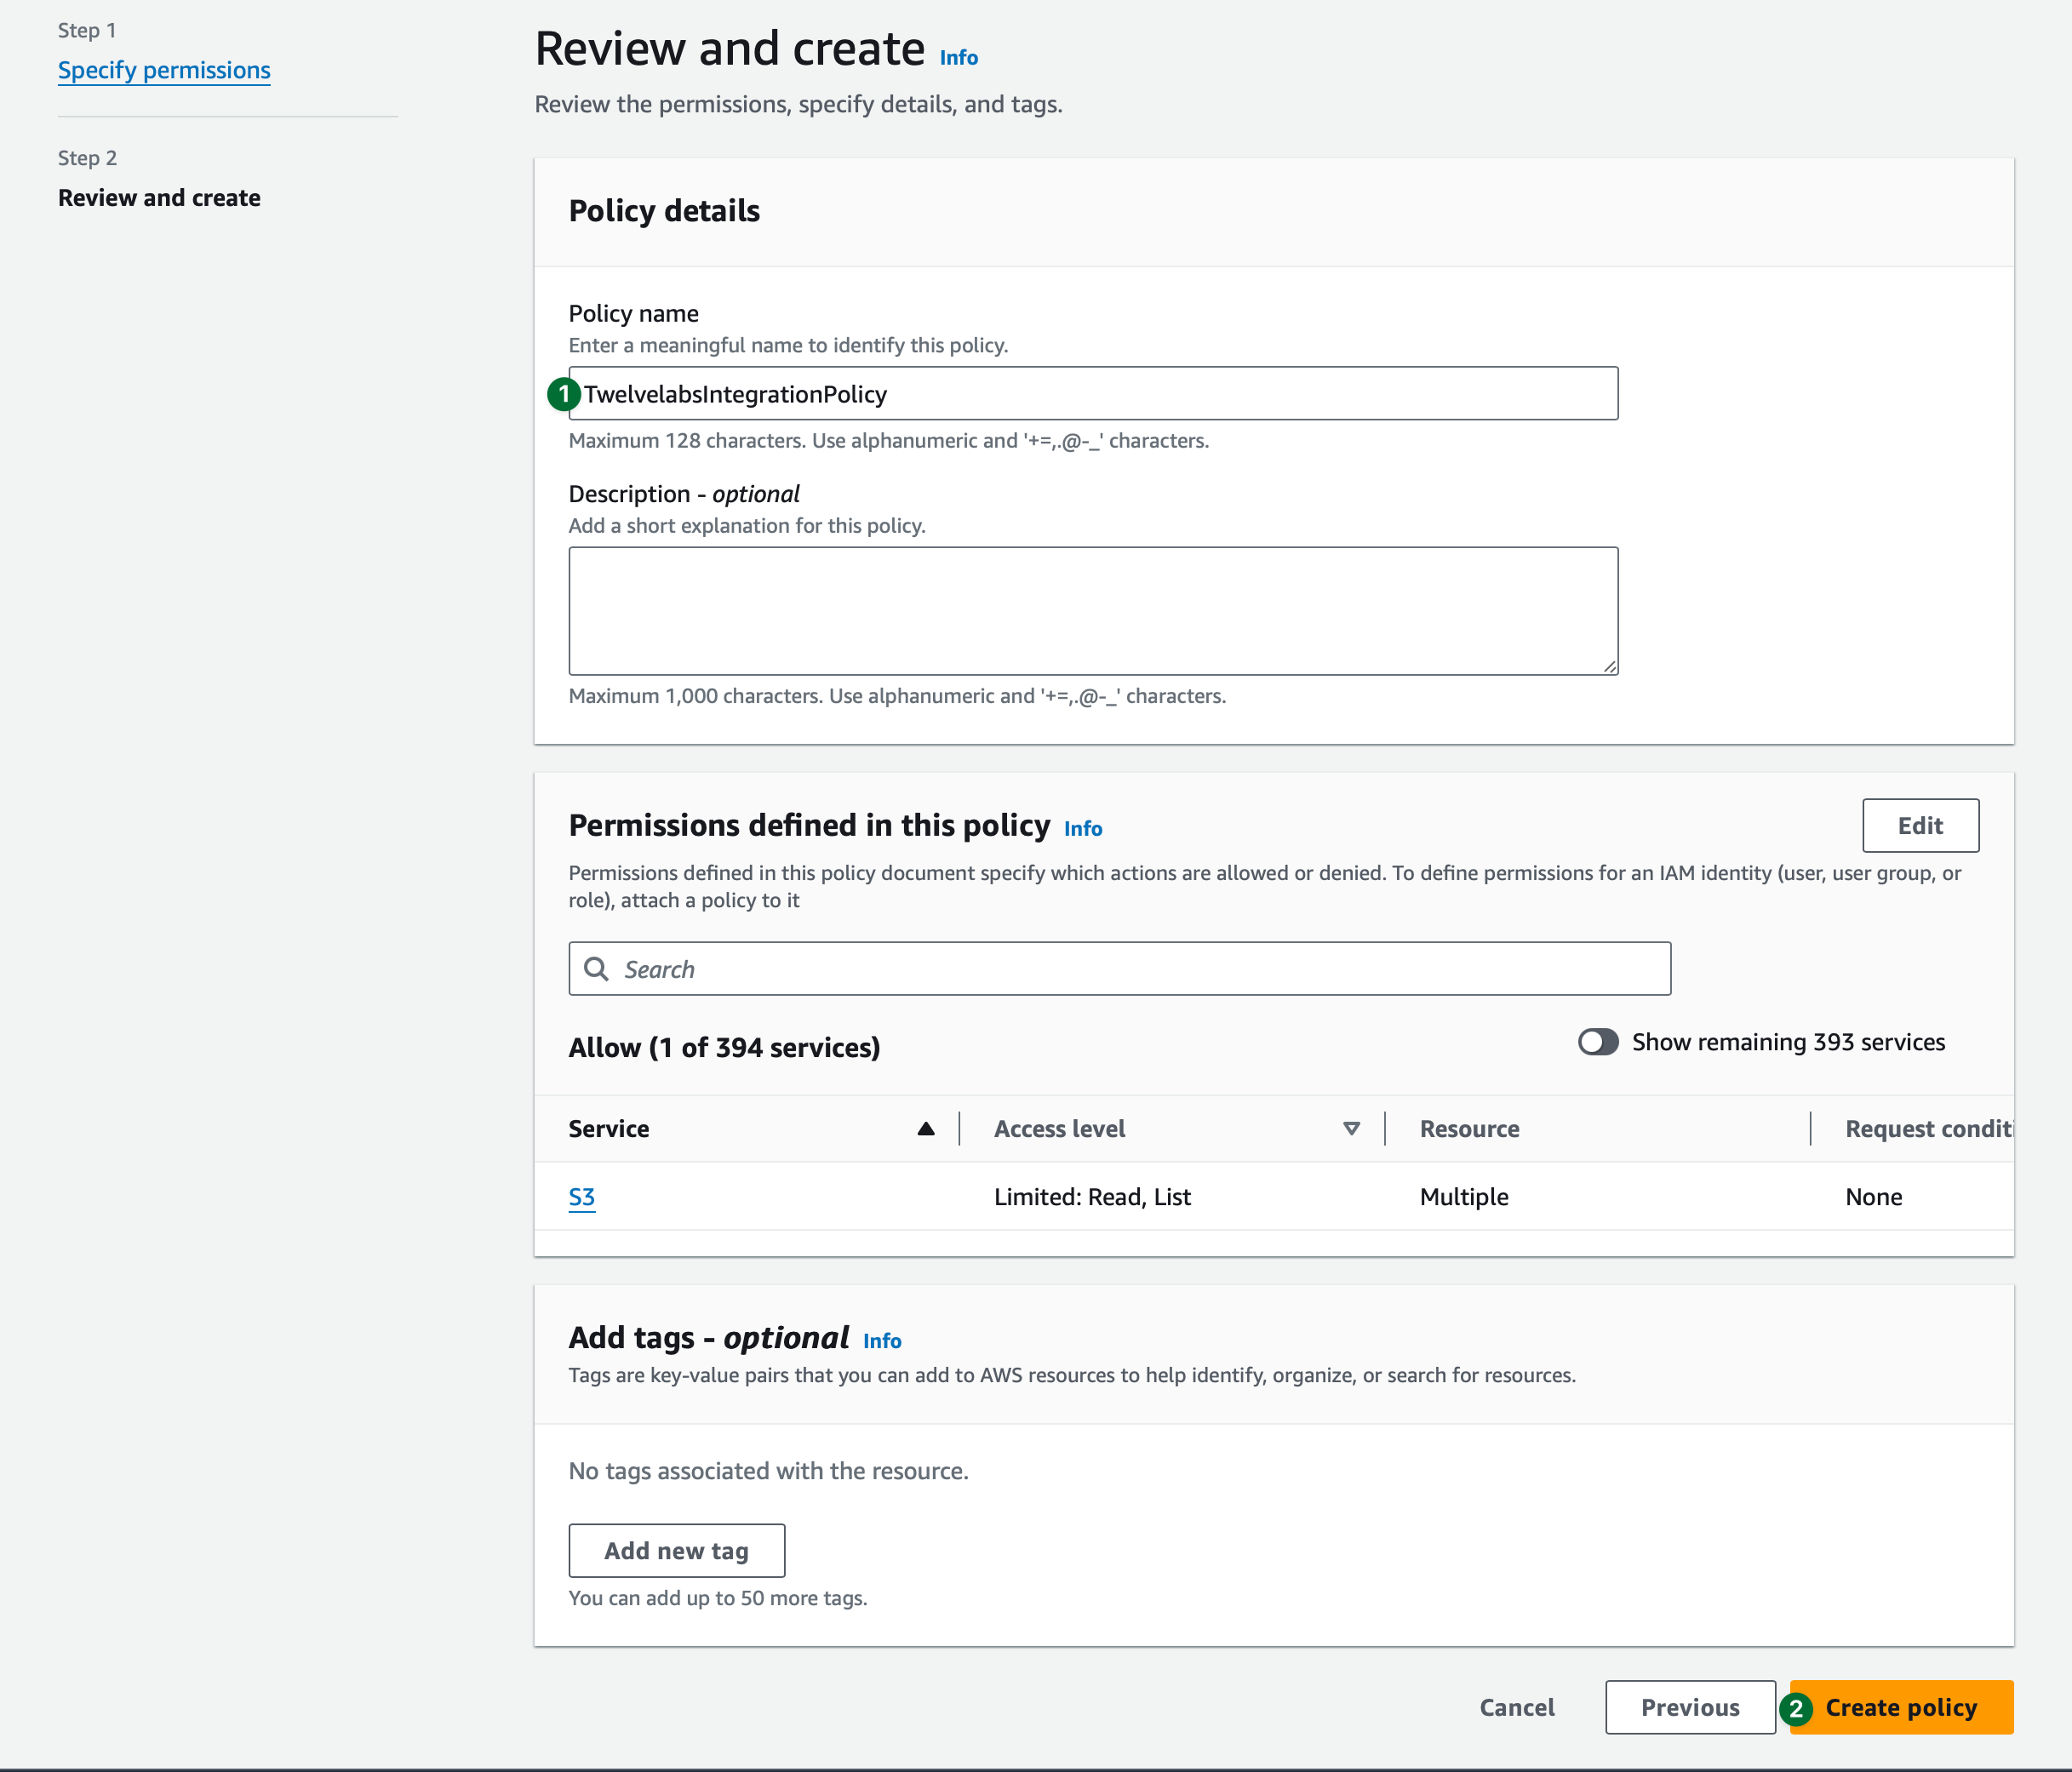
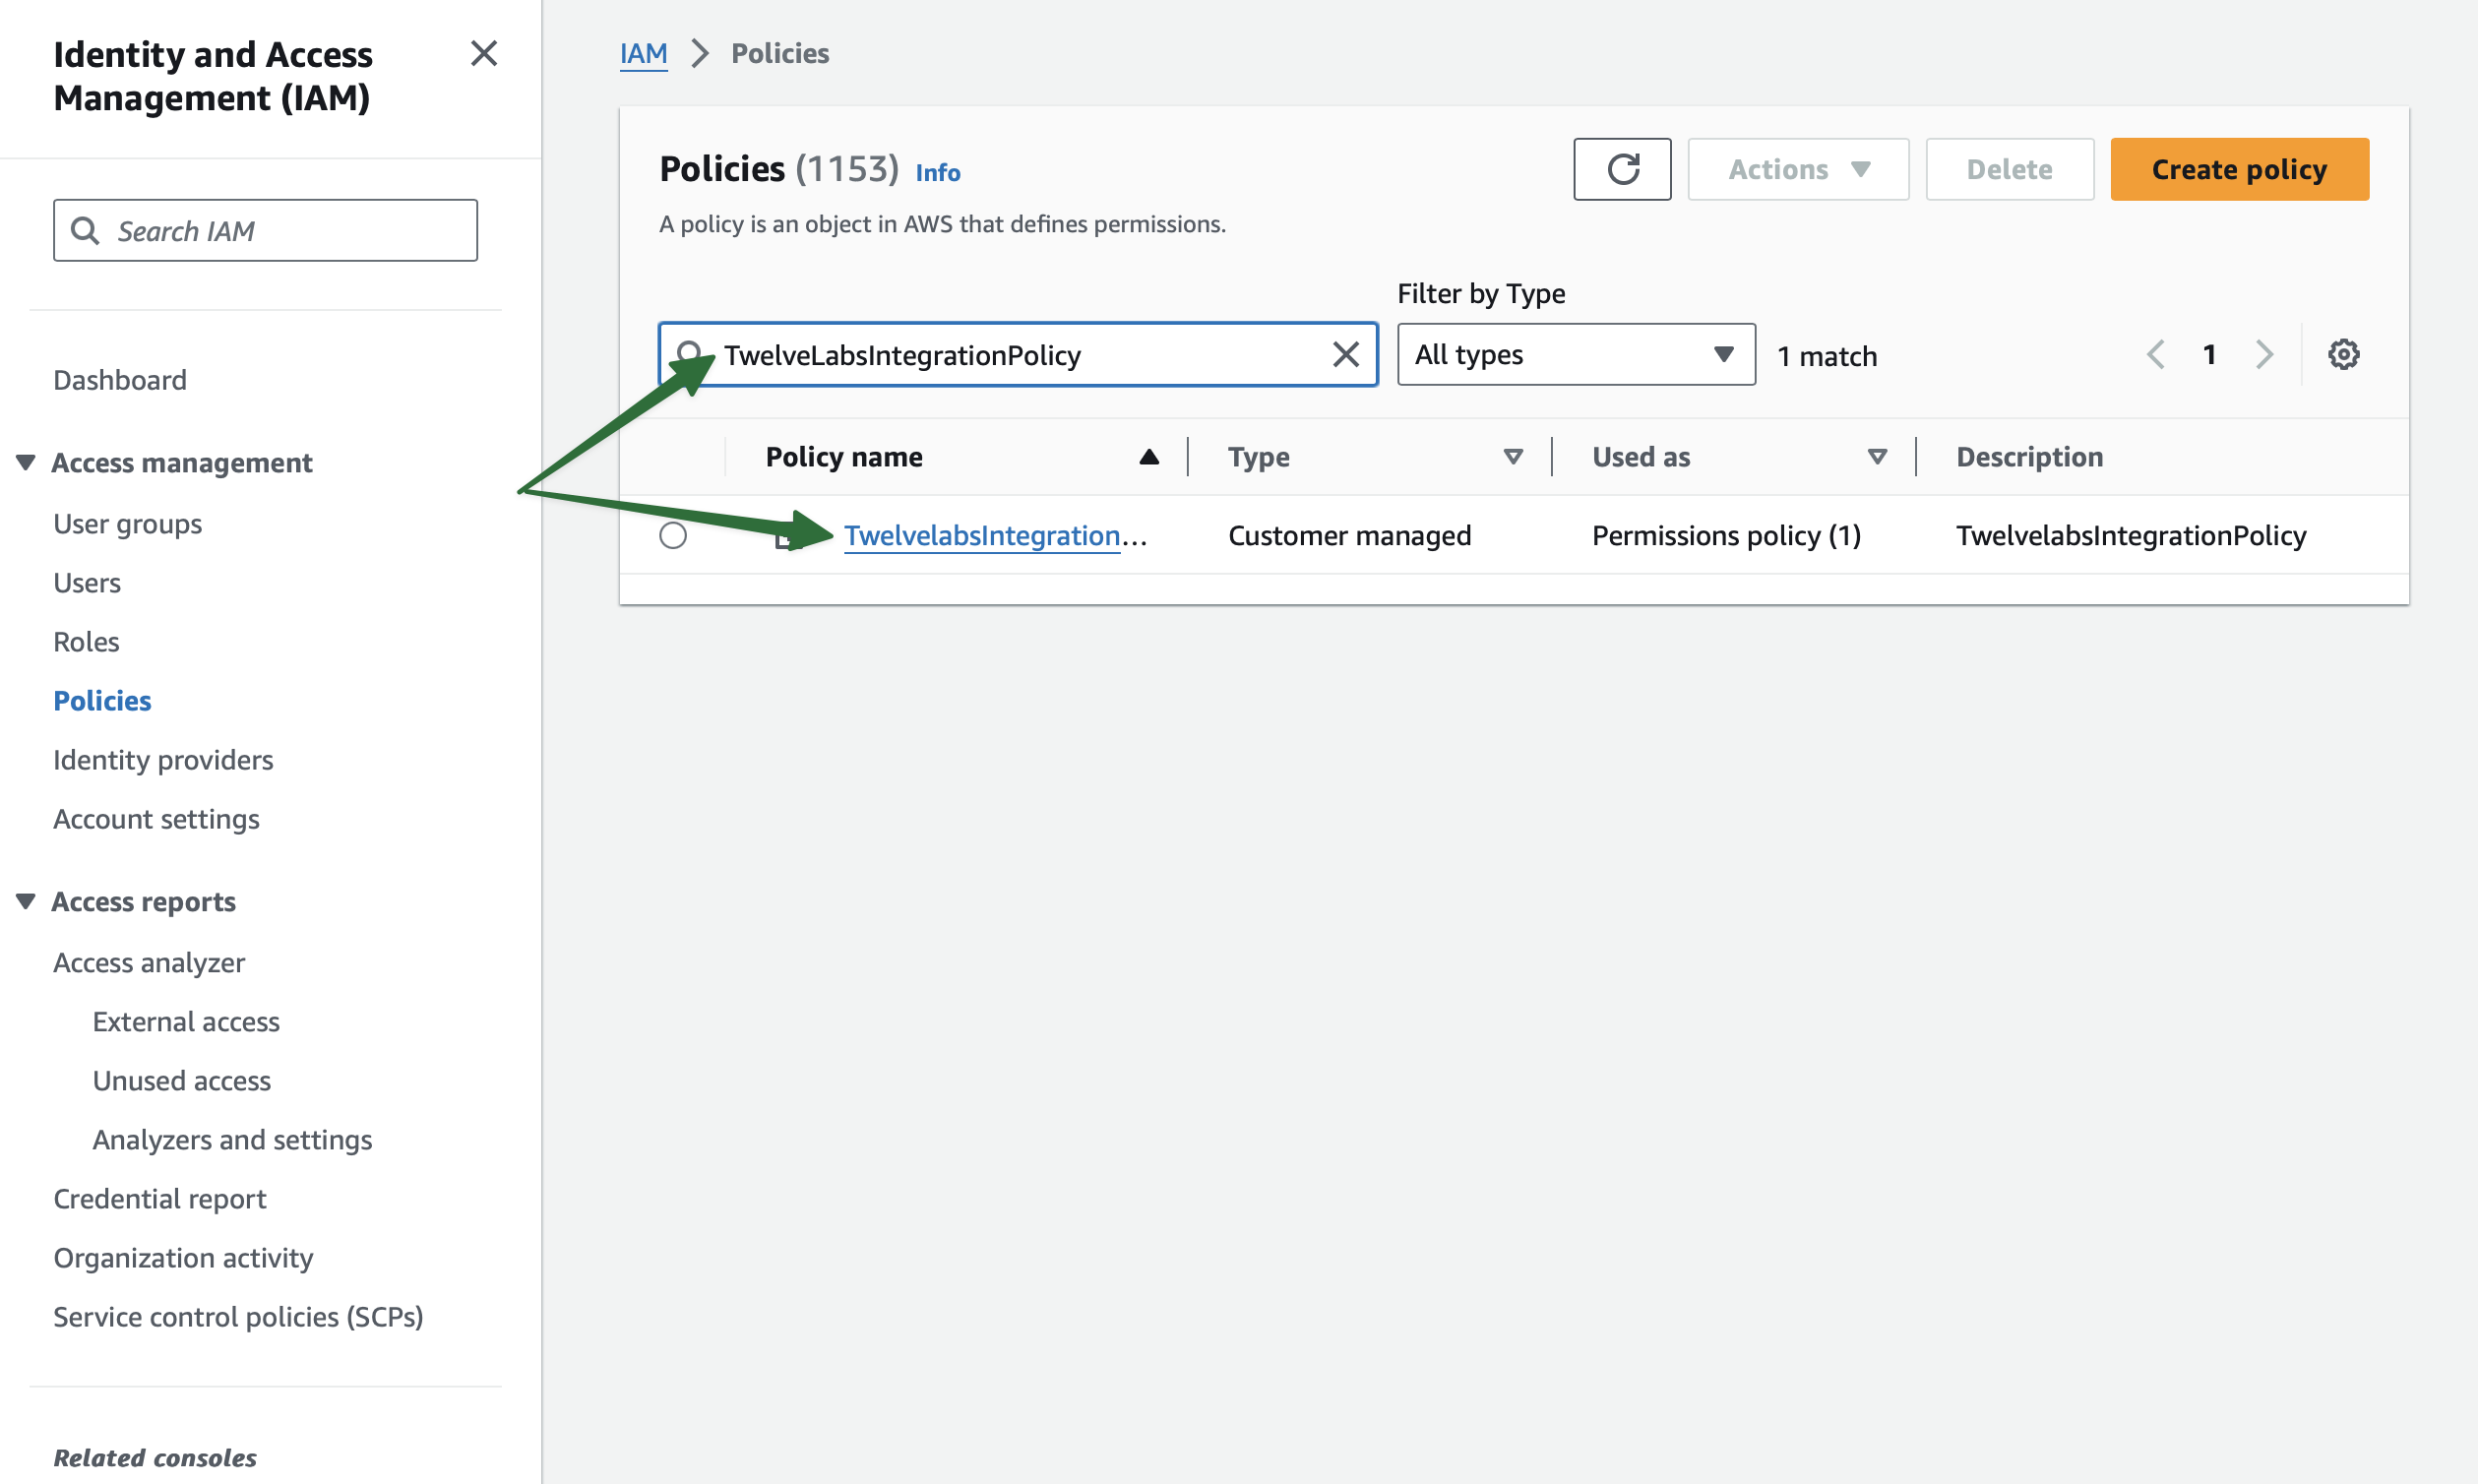
Create an AWS policy
Open the IAM Dashboard page in a new window or tab.
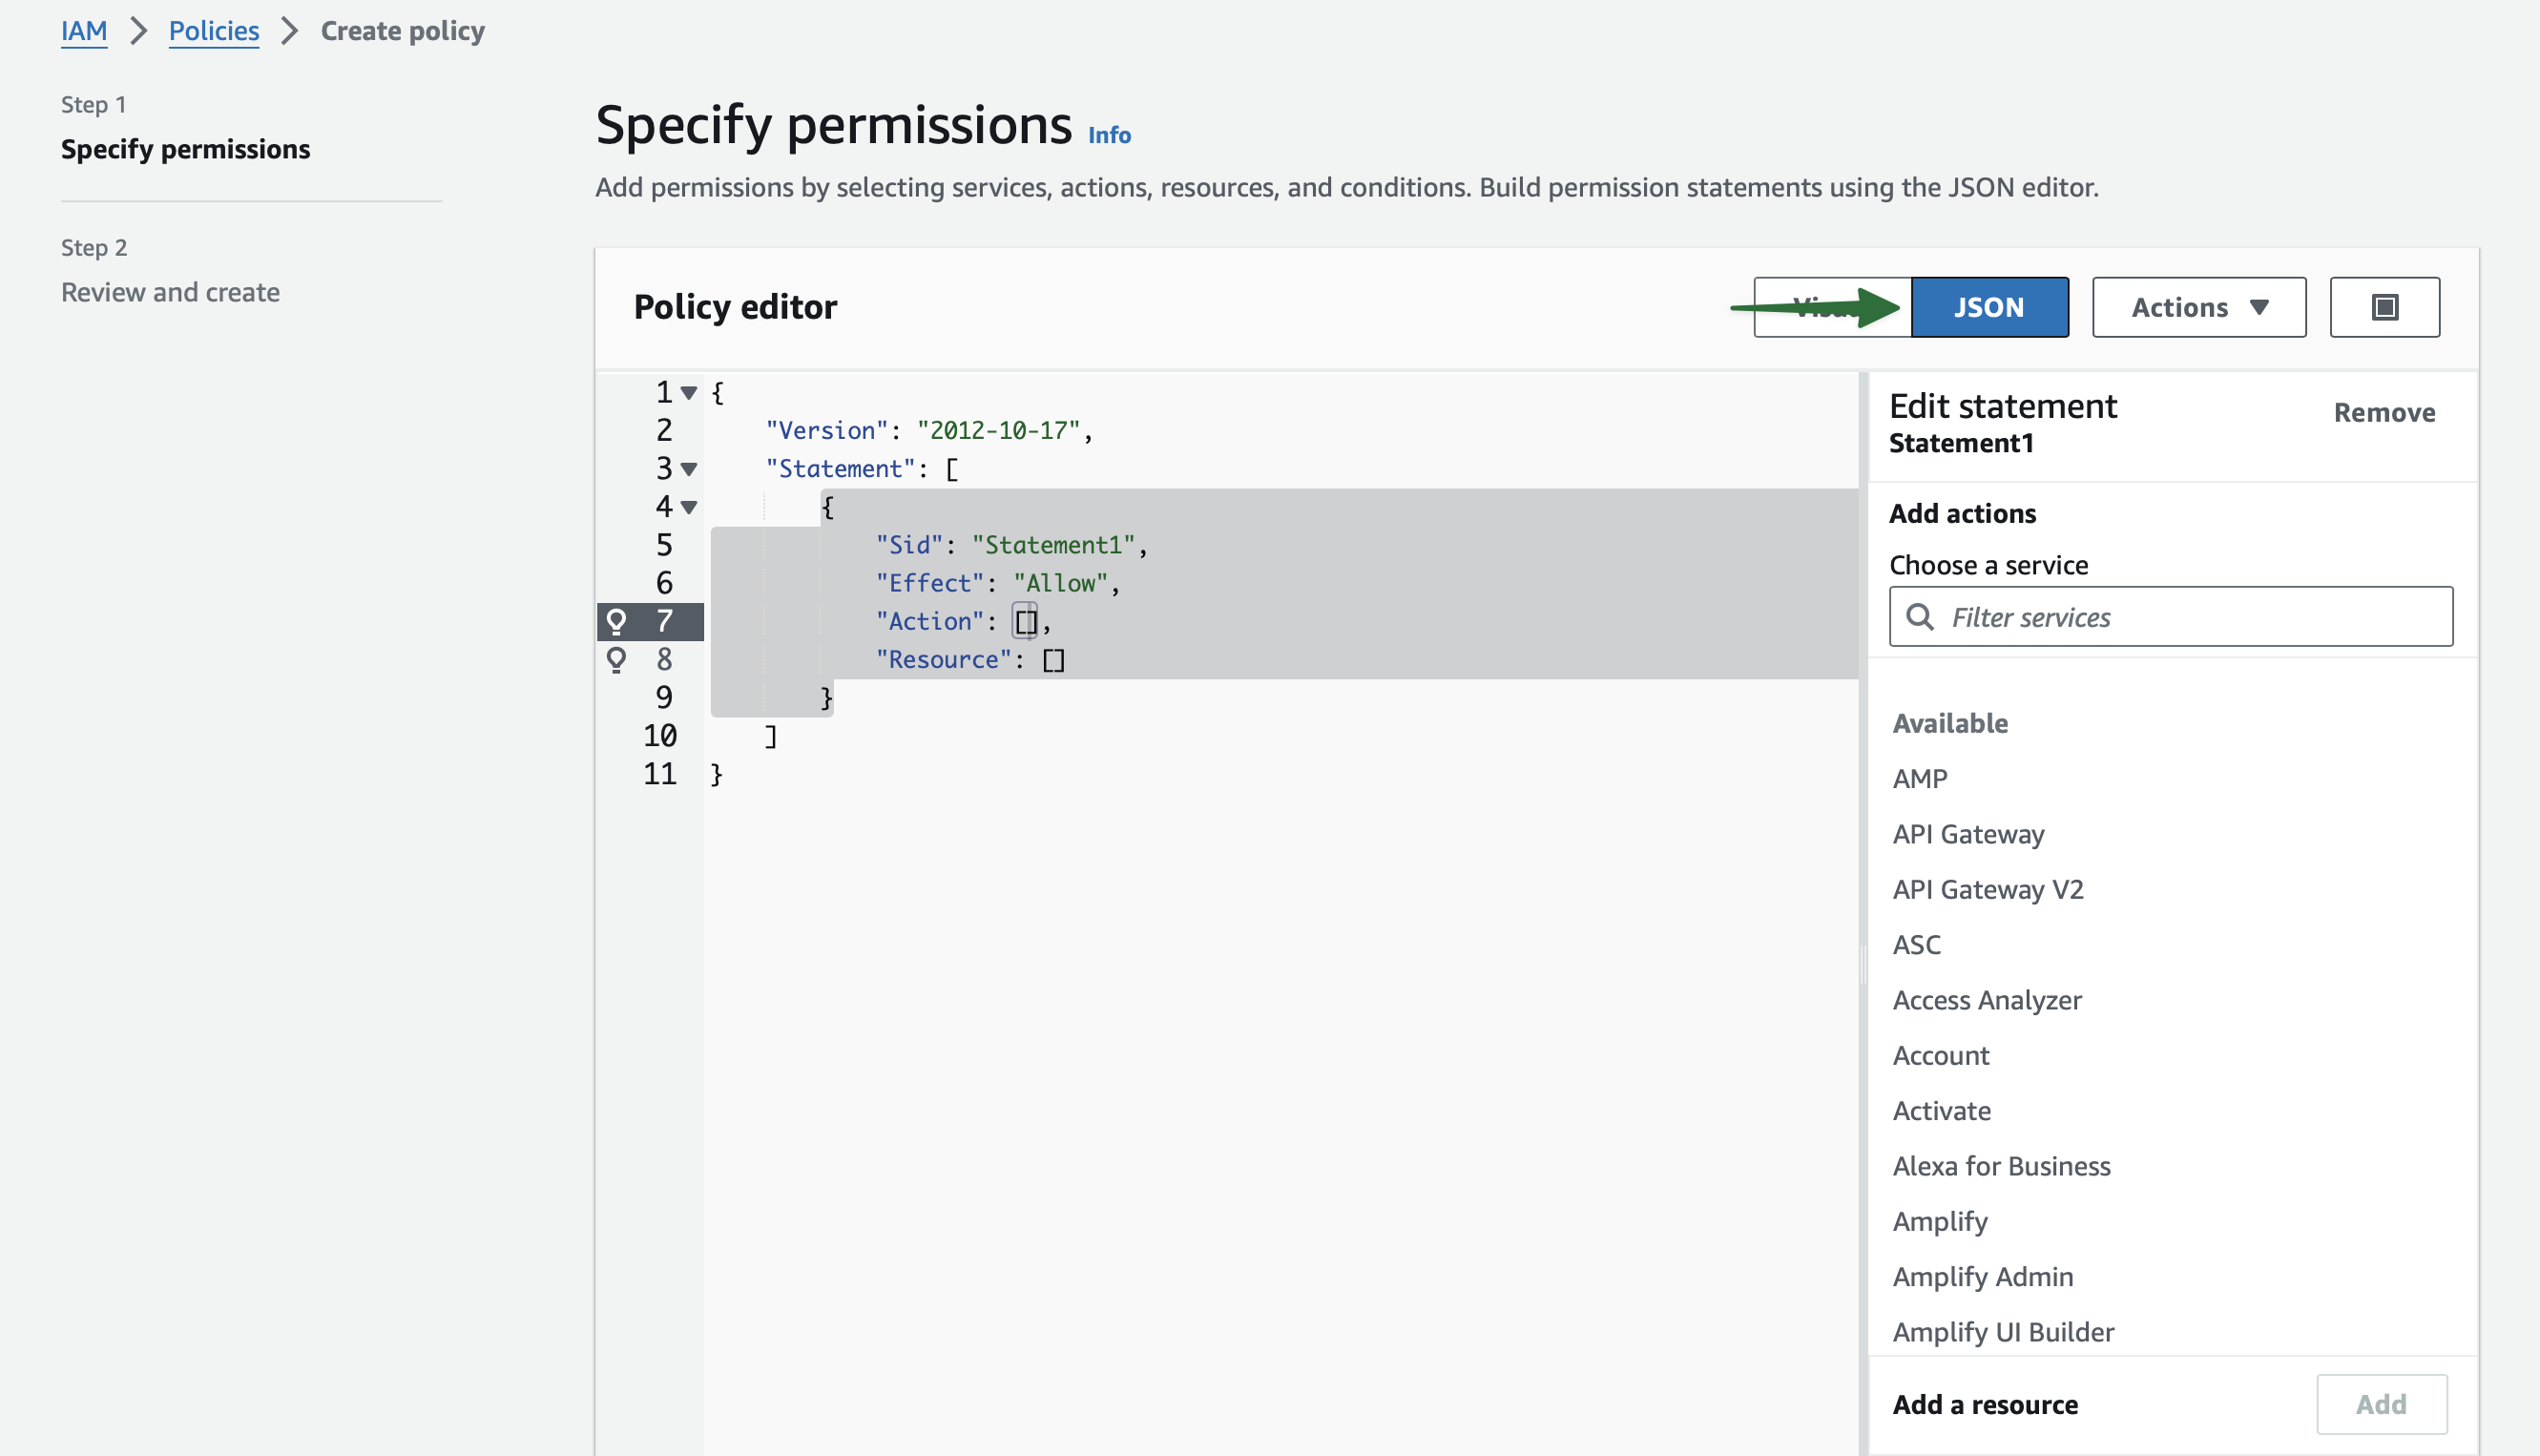
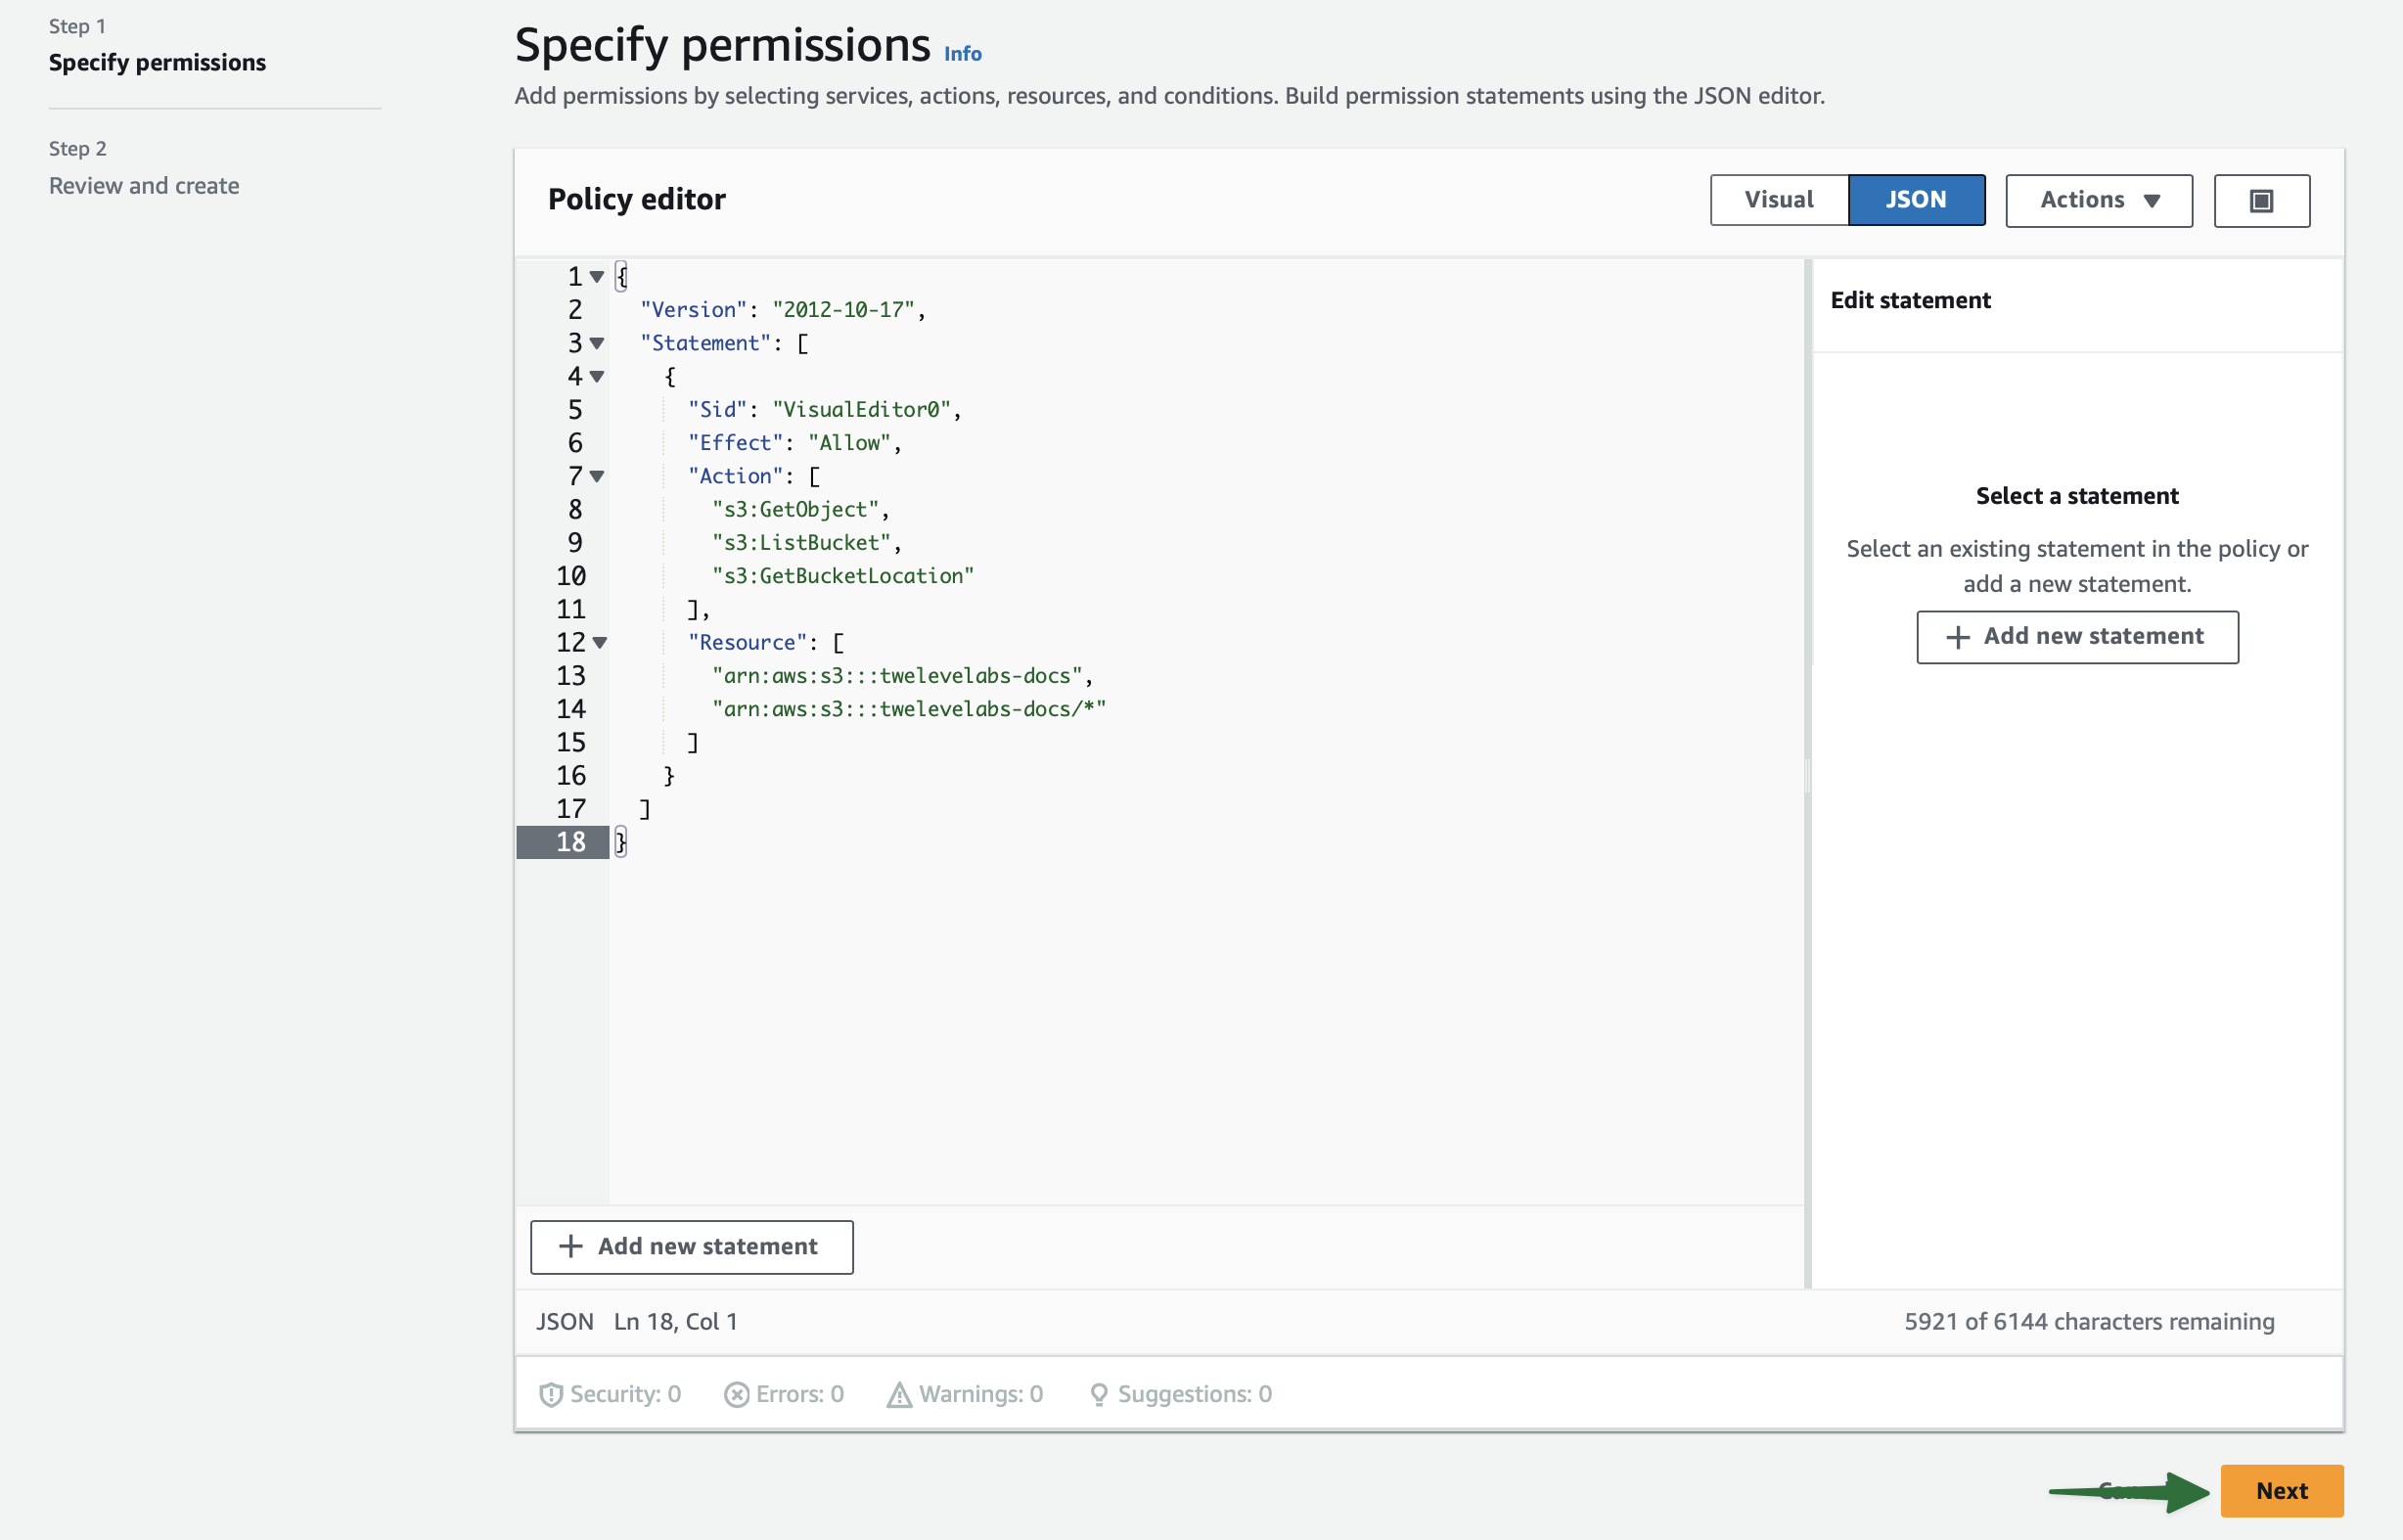
Move to the IAM Dashboard page, and replace the content of the JSON tab with the snippet you’ve copied in the previous step. Then, select the Next button:
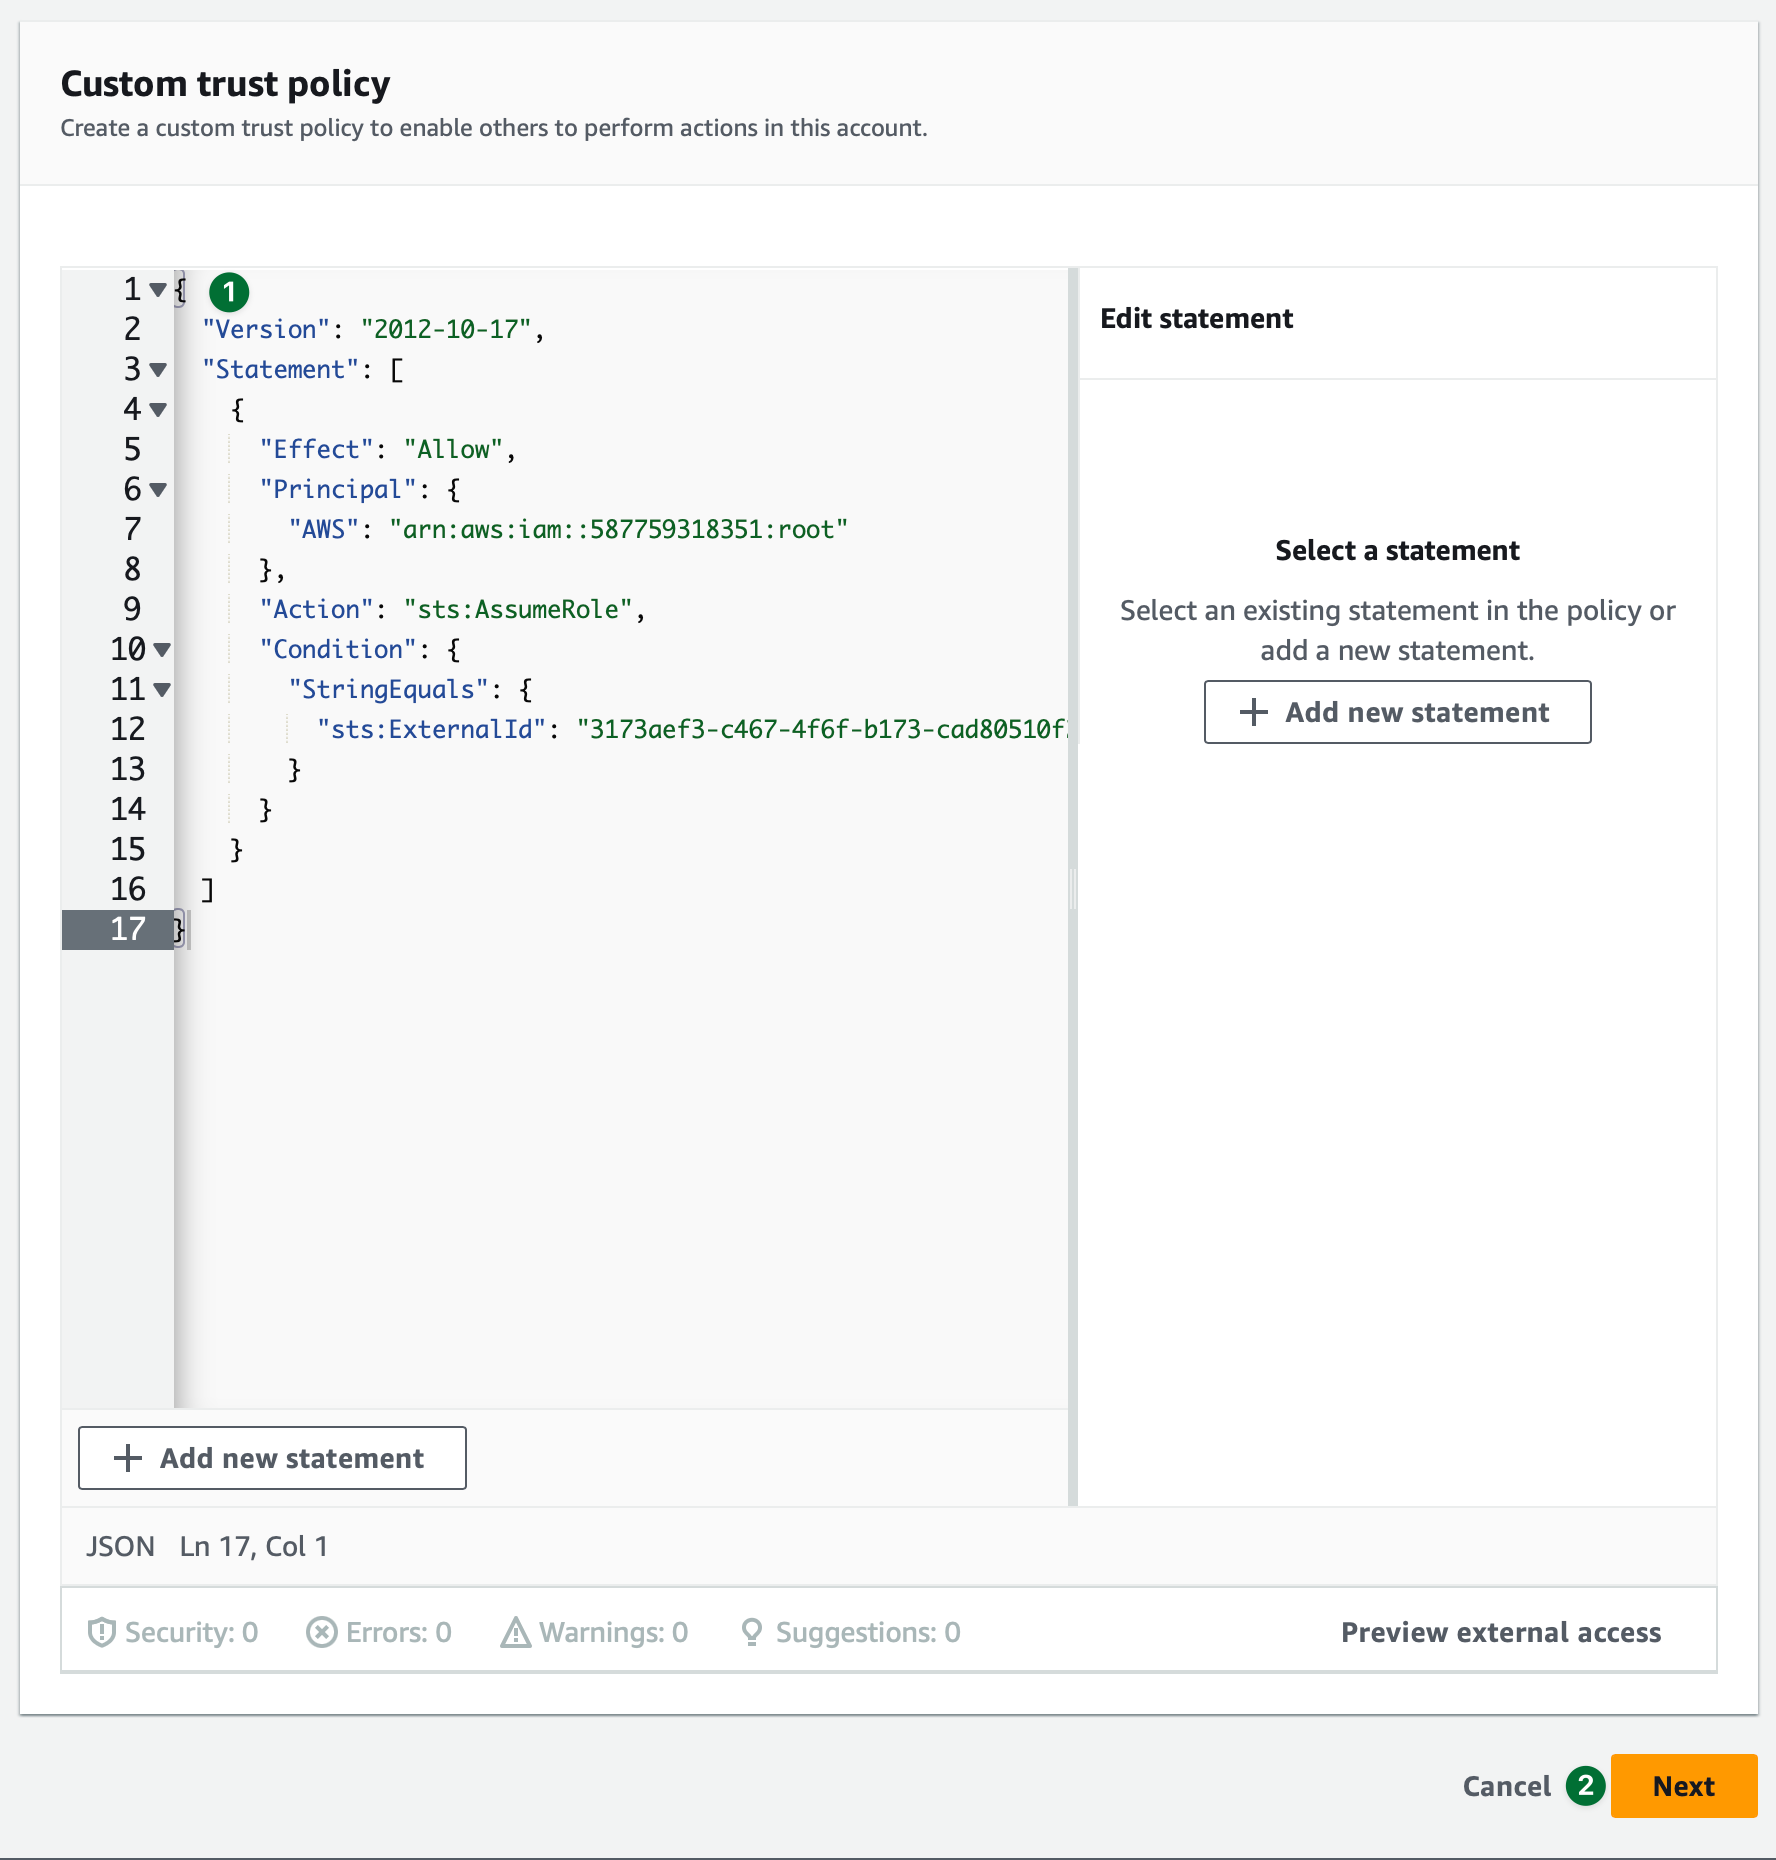
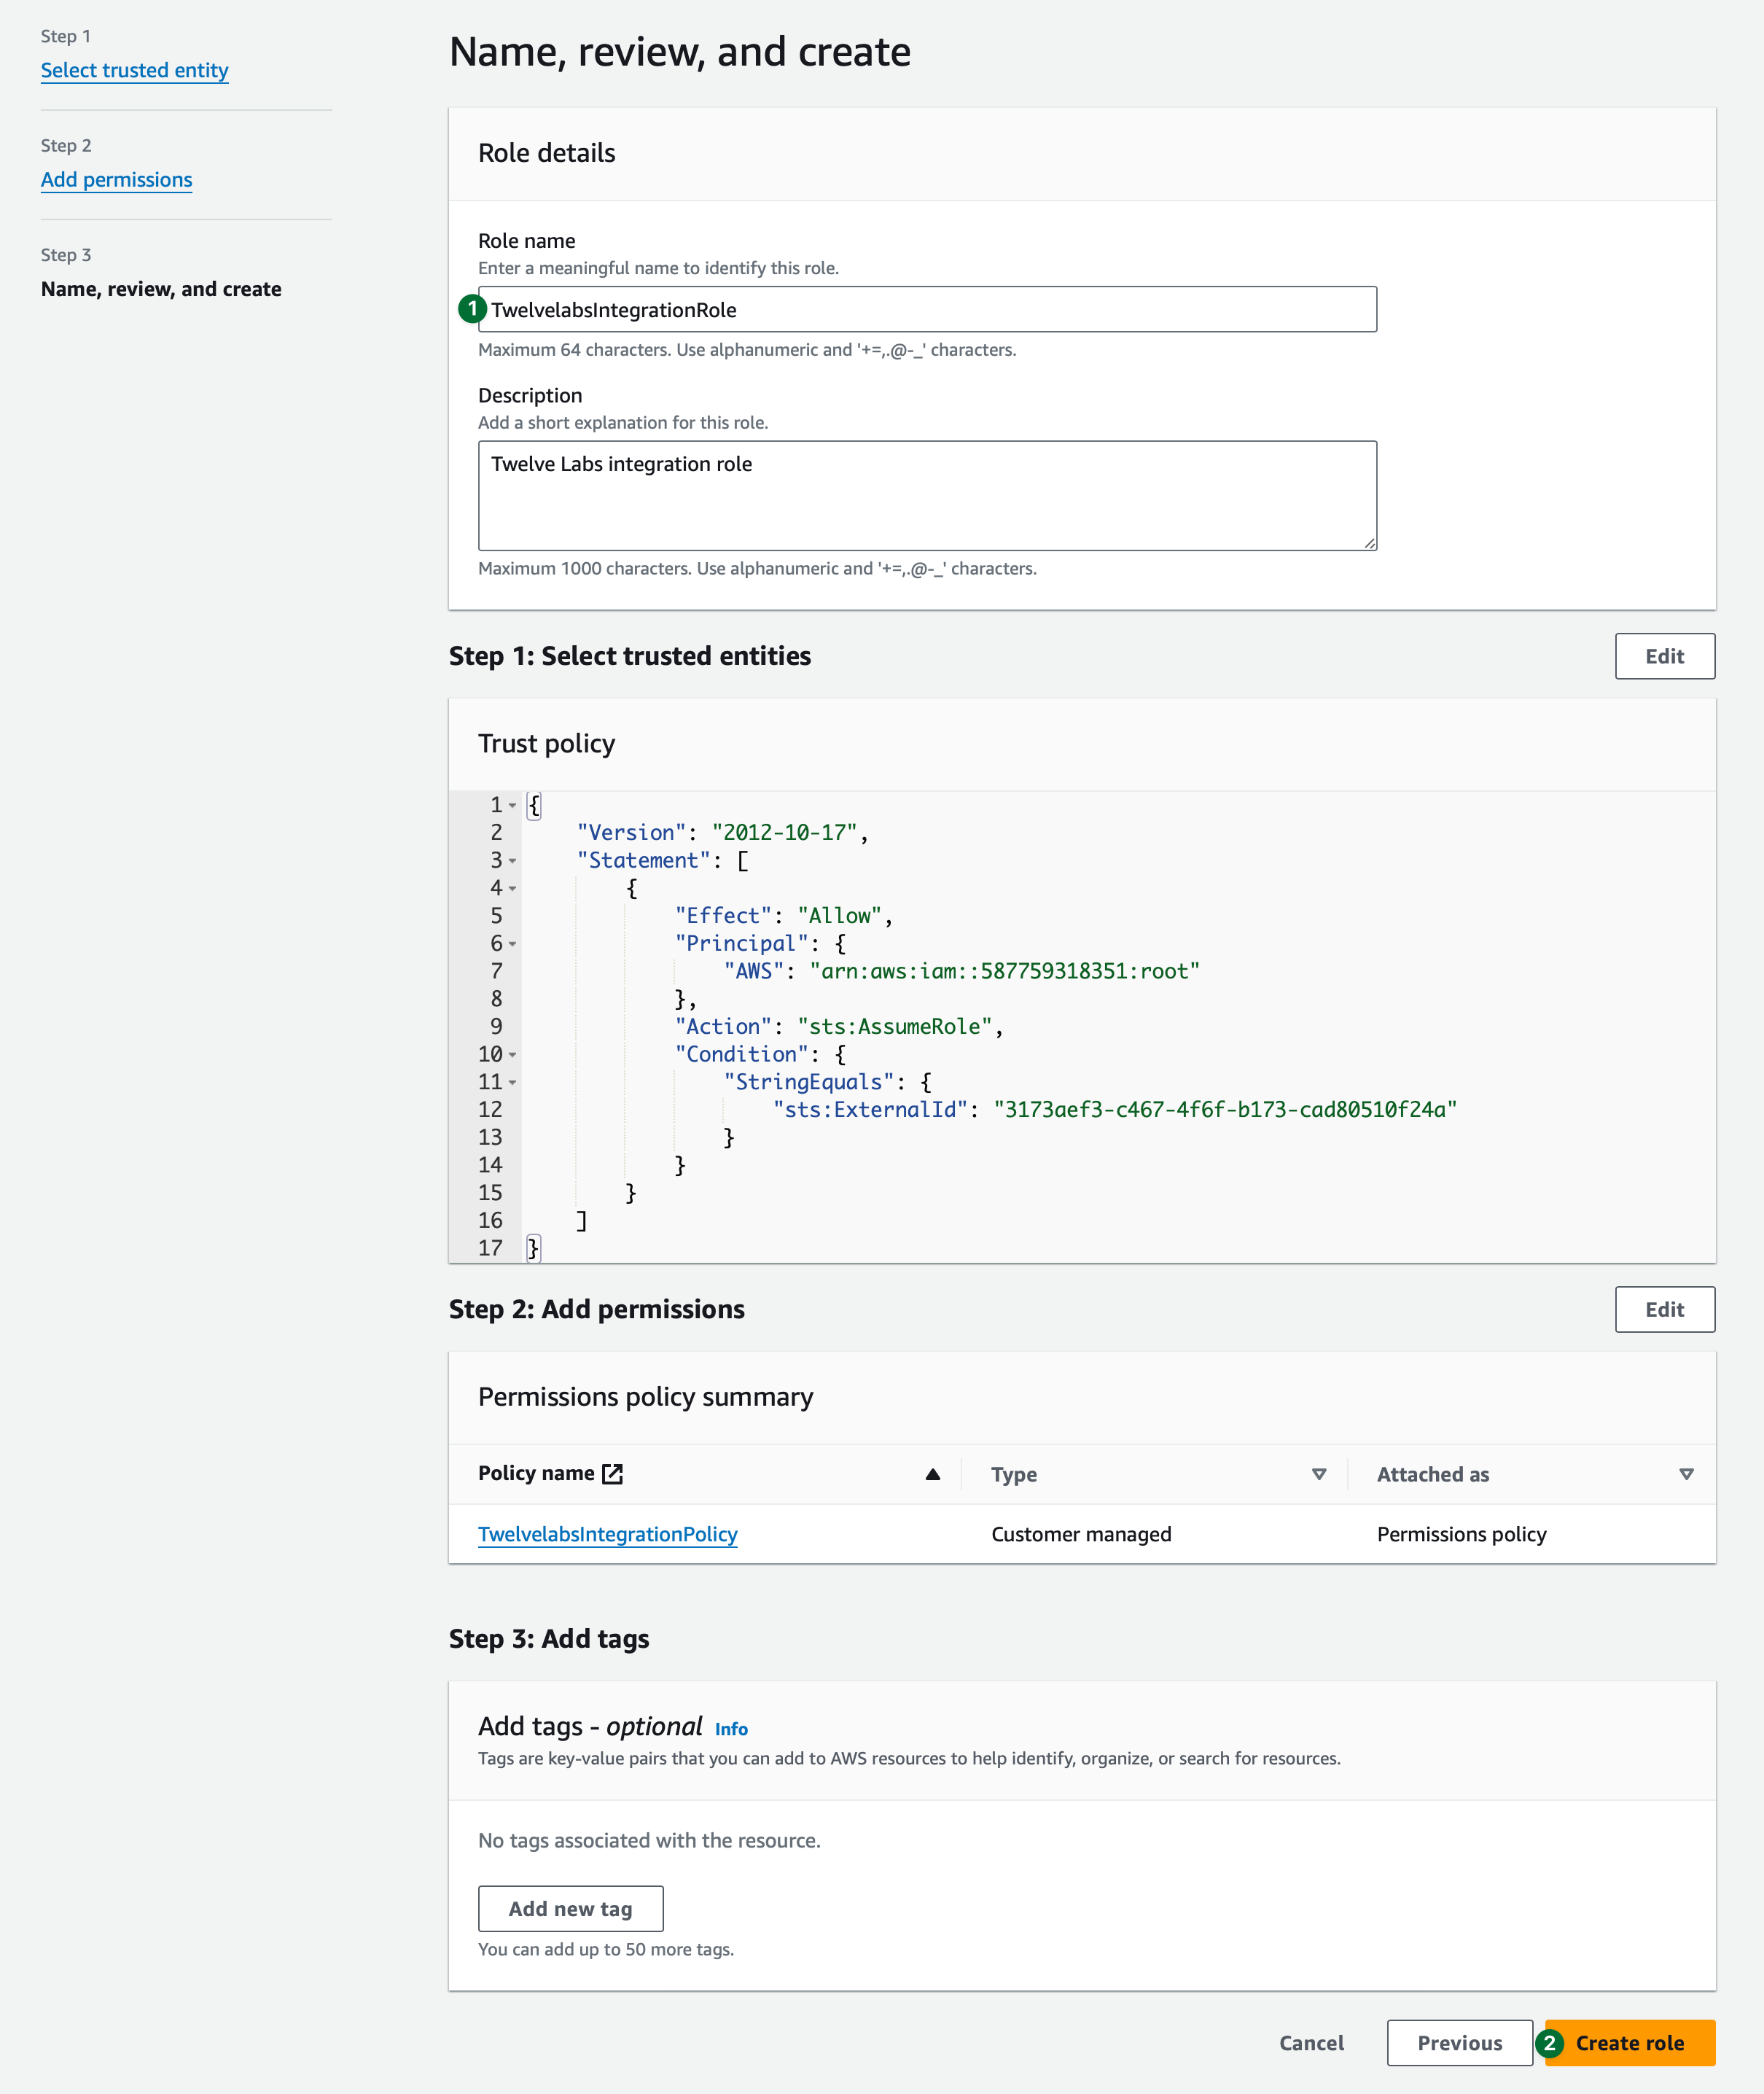
Create an AWS role
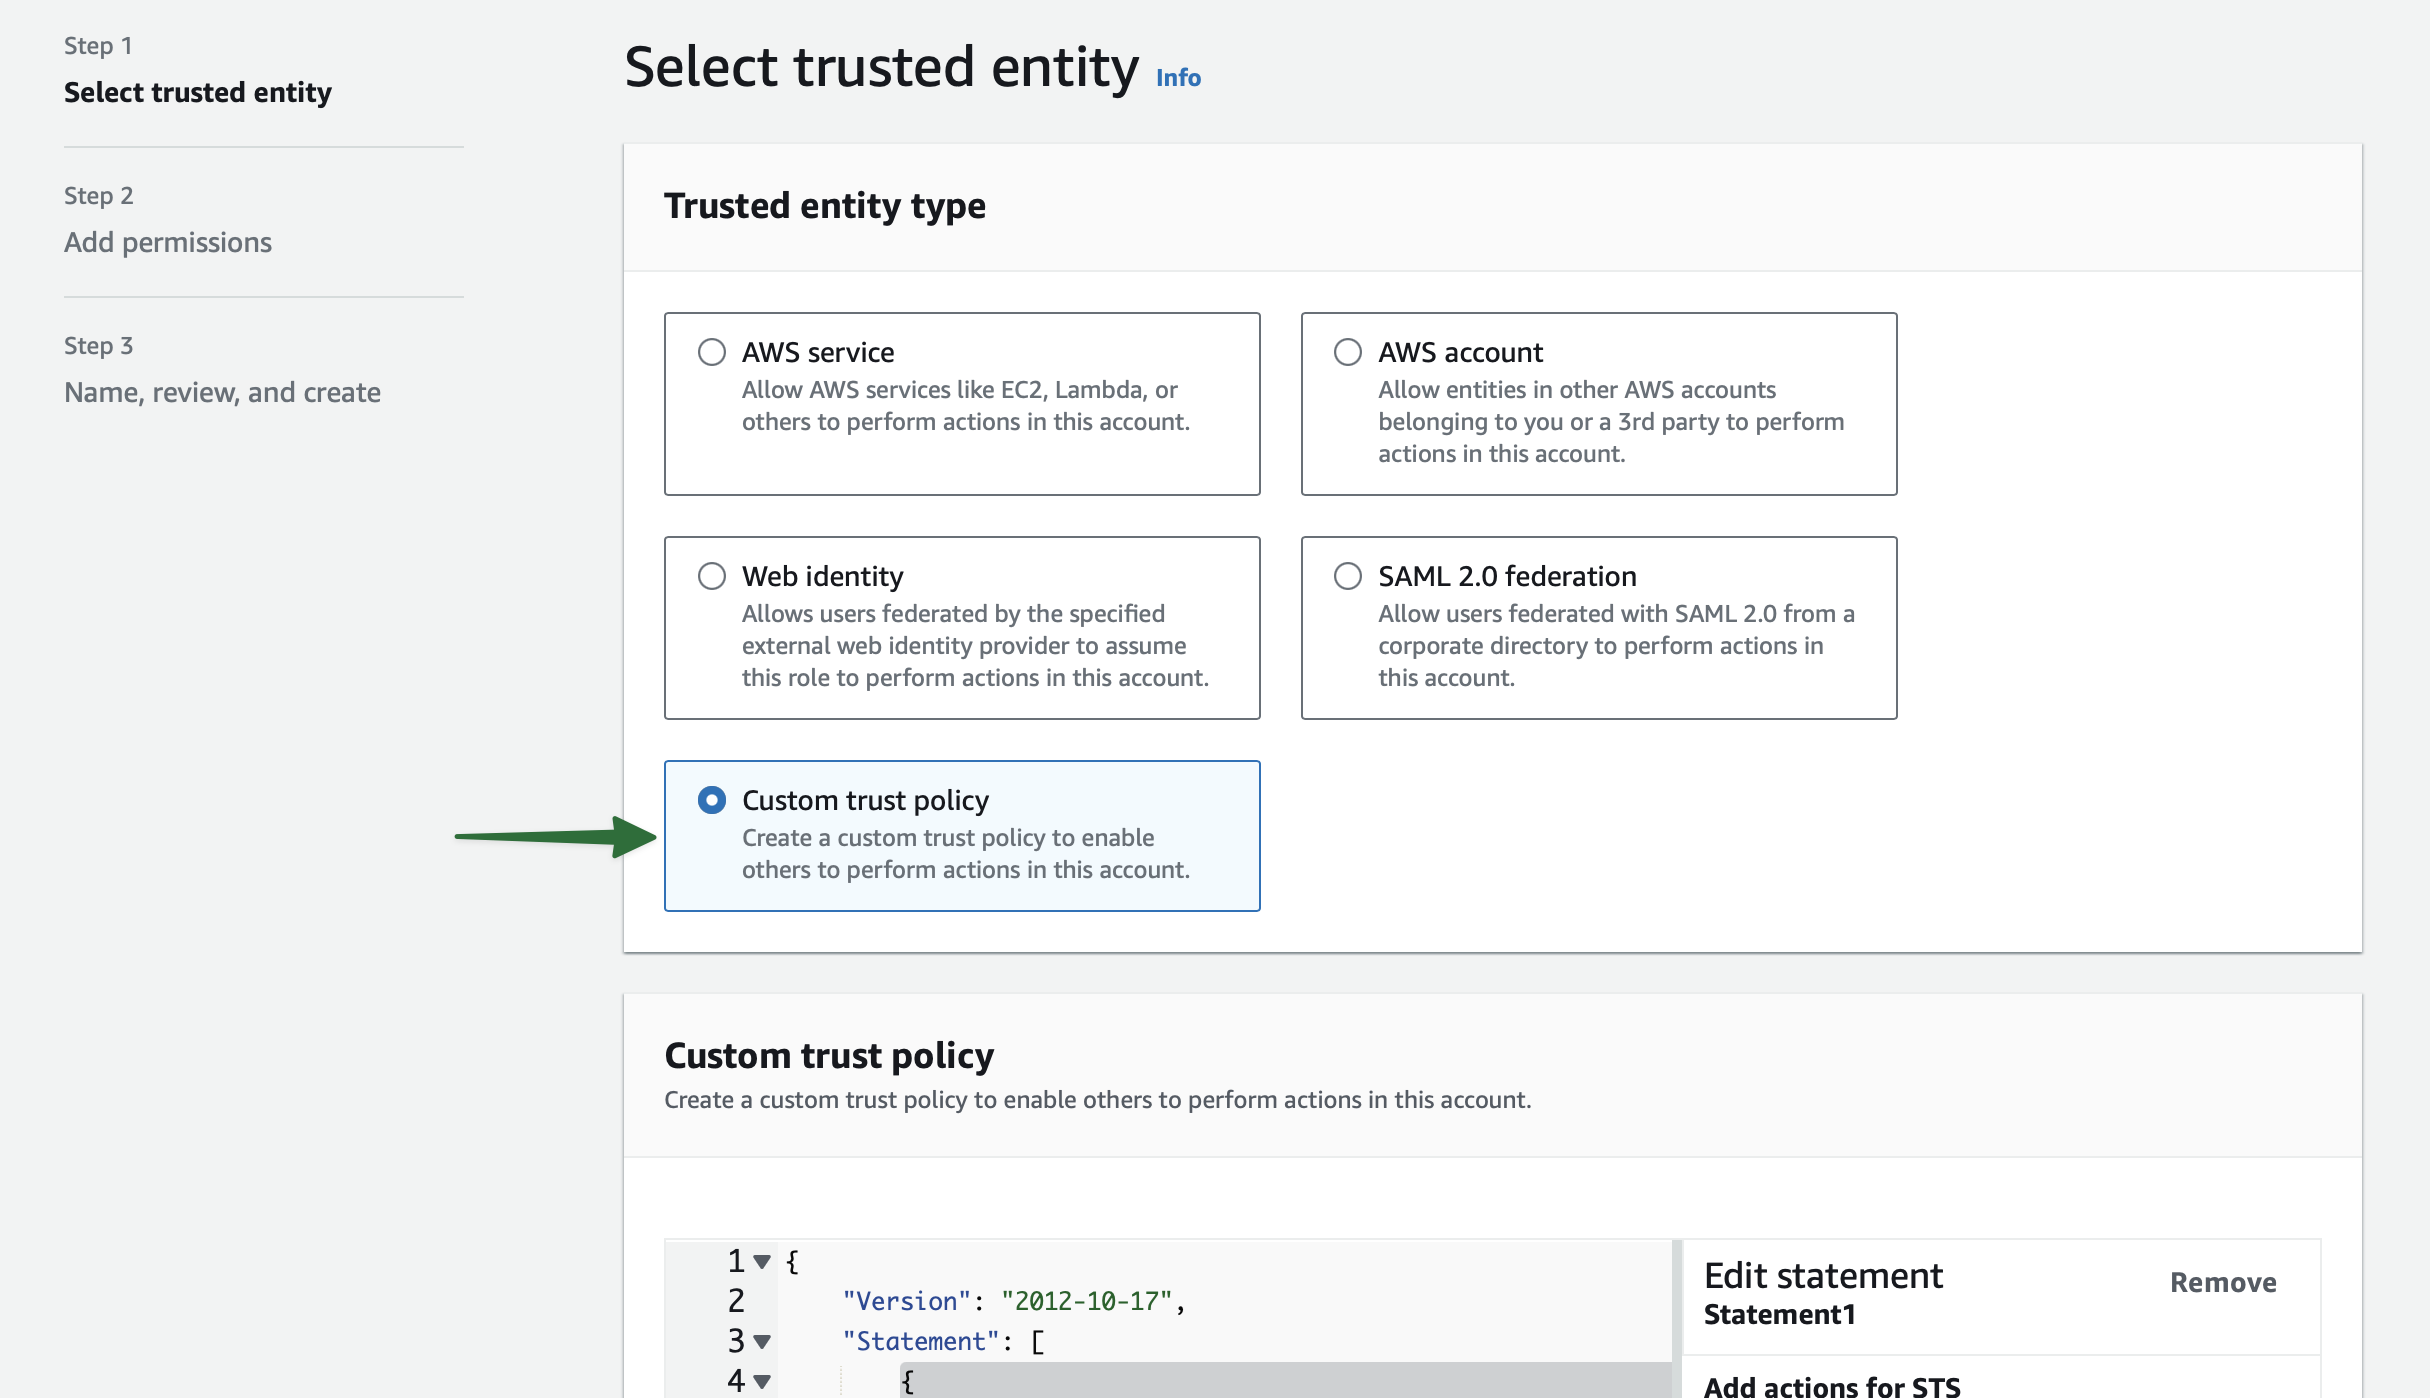
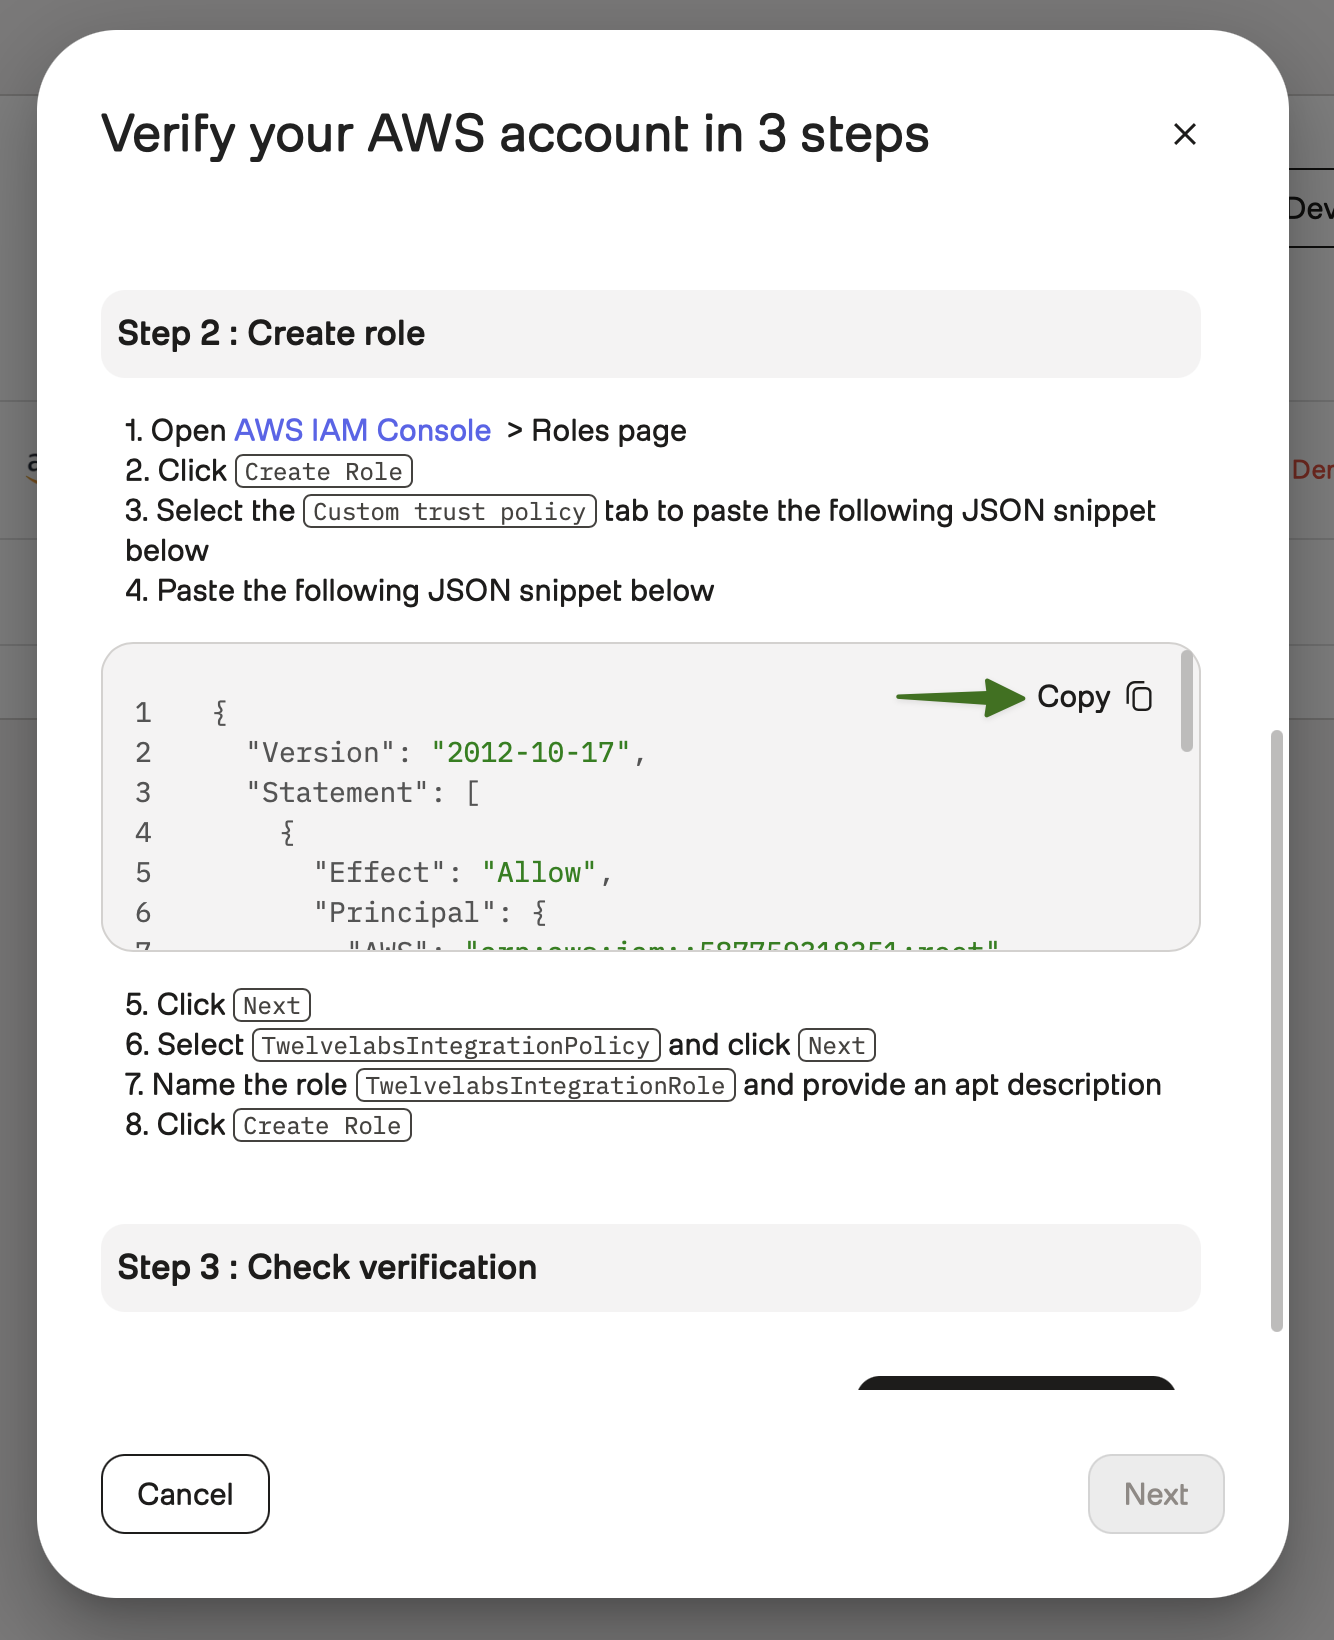
- Move to the IAM Dashboard page, and replace the content of the Custom trust policy box with the snippet you’ve copied in the previous step. Then, select the Next button:

On the Add Permissions page, select the policy you’ve created in the previous section. Then, select the Next button at the bottom-right corner of the page:

Verify your integration configuration
Move to the TwelveLabs Integrations page. Under Step 3 : Check Verification, select the Verify My Account button:
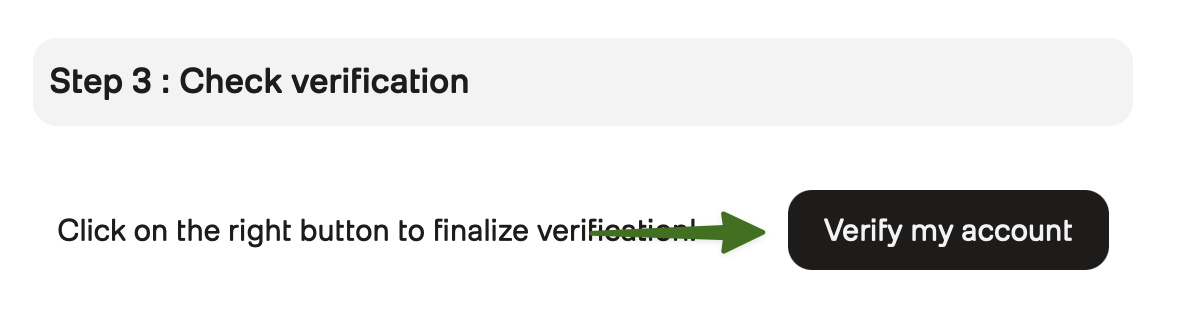
If everything went well, you should see a message saying “Verification successful!”:

On the Integrations page, make sure that the status of your new integration shows as Active. Note that each integration has a unique identifier that you must provide to import videos.
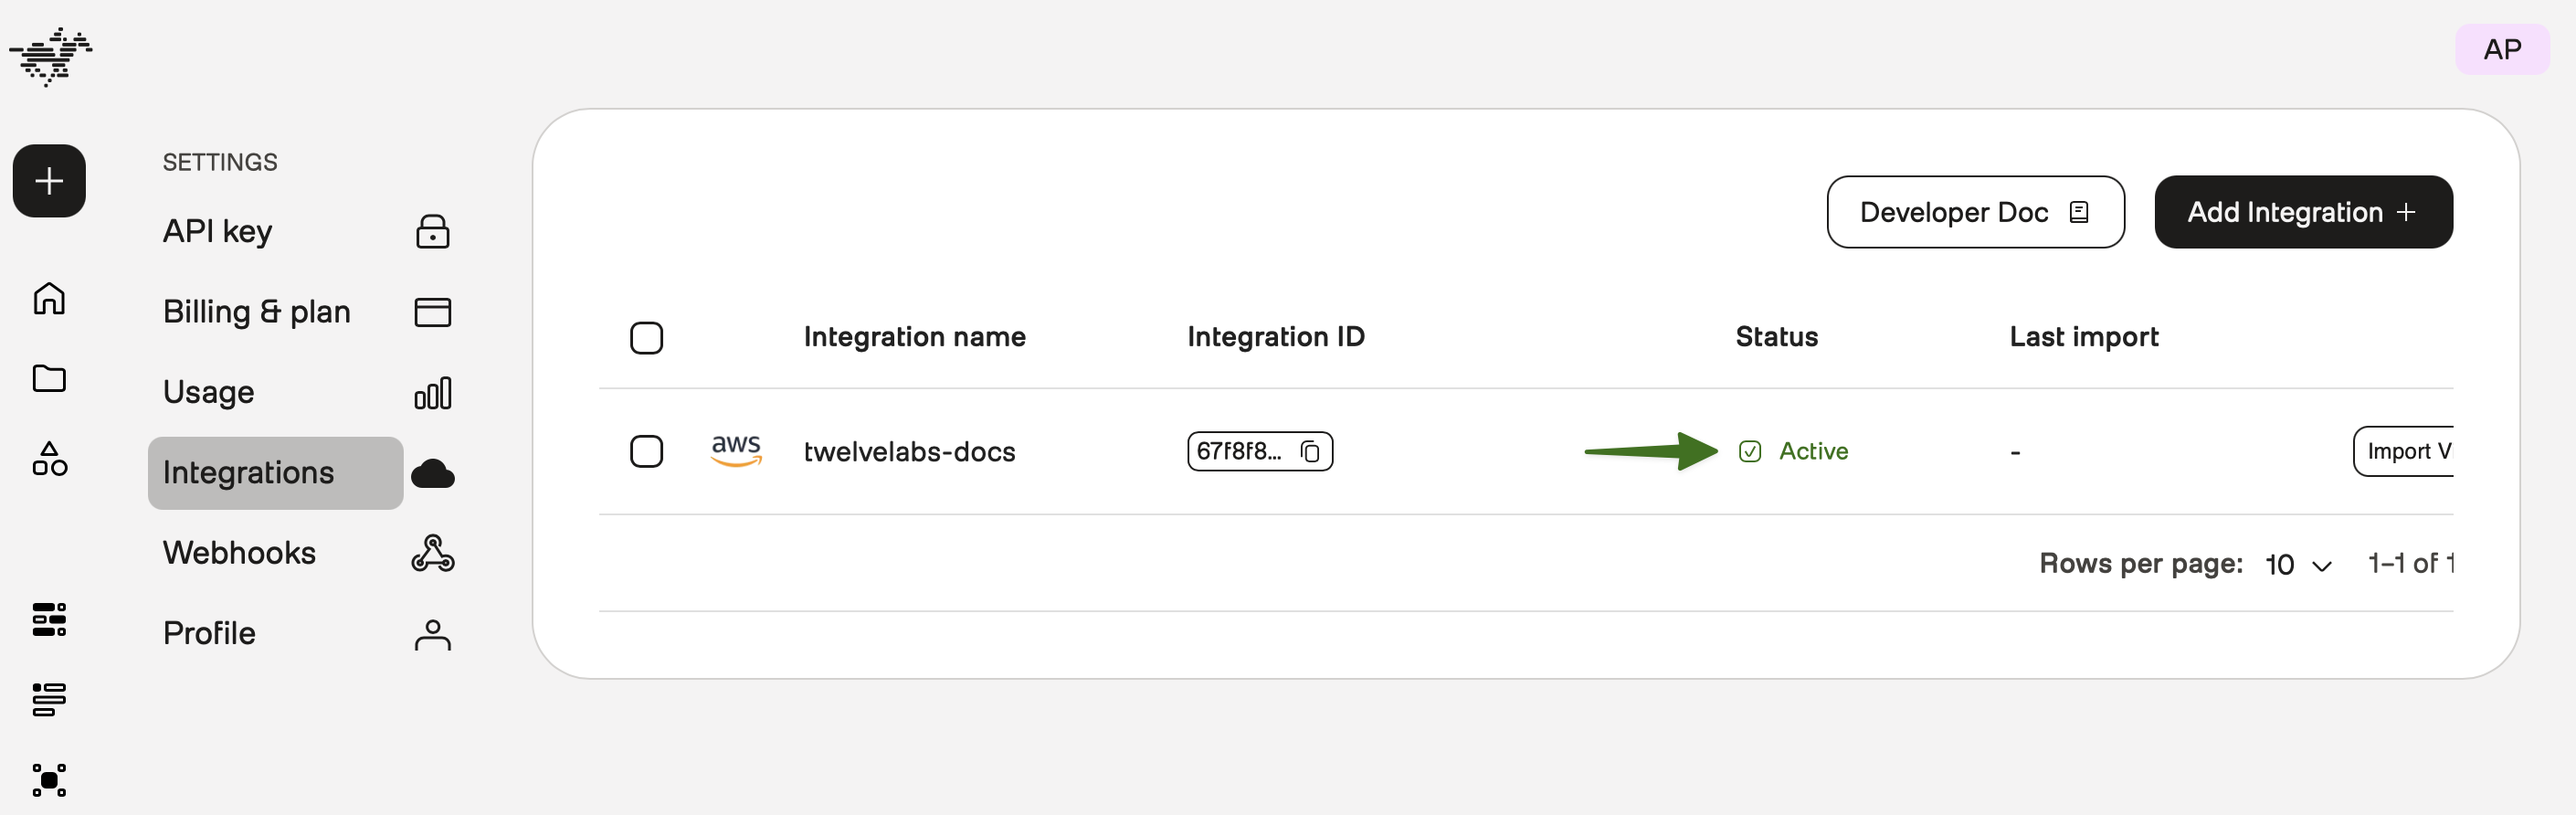
When the status of your integration shows as Active, the platform can access the videos in your S3 bucket. If the status does not show as Active, review the steps in this section, making sure all the information you entered is correct.
Import videos
You can import videos in two ways:
- Programmatically: Follow the steps in this guide.
- Using the Playground: Go to the Integrations page, choose your integration, and select the Import Videos button.
Prerequisites
Before you import videos, ensure the following prerequisites are met:
- You’ve already created and index.
- You have an AWS S3 bucket containing the videos you want to import.
- You’ve already set up an integration. If you didn’t set up an integration yet, follow the steps in the Set up an integration section.
- Retrieve the unique identifier of your integration from the Integrations page:

- Your video files must meet the format requirements based on the models enabled for your index:
- Marengo requirements.
- Pegasus requirements.
- If both models are enabled, the most restrictive limits apply.
Procedure
To initiate an import, invoke the tasks.transfers.create method, passing the unique identifier of your integration and the unique identifier of the target index as parameters:
Note the following about the response:
- It consists of two lists:
videos: Videos that will be imported.failed_files: Videos that failed to import, typically due to unmet prerequisites.
- The platform returns this information immediately after initiating the import process, before the actual upload and indexing begin. For details about each field in the request and response, see the Import videos page.
(Optional) Monitor the status of your import by invoking the get_status method, passing the unique identifier of your integration and the unique identifier of the target index as parameters:
Note the following about the response:
- It consists of lists of videos grouped by their status. For details about each status, see the Task object page.
- Each video entry includes:
video_id: The unique identifier of the video. This identifier serves a dual purpose:- It identifies the video itself.
- It identifies the associated video indexing task.
filename: The original filename of the video.created_at: The date and time when the video was added to the import process.
For details about each field in the request and response, see the Retrieve import status page.
Duplicate videos
By default, the platform checks for duplicate files using hashes within the target index and will not upload the same video to the same index twice. However, the same video can exist in multiple indexes.
Python
Node.js
To bypass duplicate checking entirely and import duplicate videos into the same index, set the value of the incremental_import parameter to False, as shown in the example code below:
Troubleshooting
To view a history of the import operations for a specific integration, invoke the tasks.transfers.get_logs method, passing the unique identifier of your integration as a parameter:
Python
Node.js
To view a history of the import operations for a specific integration, invoke the tasks.transfers.get_logs method, passing the unique identifier of your integration as a parameter:
The response consists of a chronological list of import operations for the specified integration. The list is sorted by creation date, with the oldest imports first. Each item in the list contains:
- The number of videos in each status
- Detailed error information for failed uploads, including filenames and error messages.
For details about each field in the request and response, see the Retrieve import logs page.